Good Afternoon Everybody,

What’s cool is the fact that we are planning something completely different for our fall meeting. Most of you don’t know, but Lexington, Kentucky has been chosen as the site for the Worldwide Equestrian Games. 
Instead, I suggested a worldwide web-cast near the end of September so our members still had the benefit of a Fall meeting, albeit online. Anyway, the plan is coming together. I’ve lined up three great photographers to cover weddings, family portraits, and high school seniors.
I also suggested we open up the program to all who want to spend a wonderful Sunday afternoon learning from the best of the best. As soon as we have all the details nailed down, I’ll invite all of you to check it out. It’s going to be a knock out program!
OK, time for today’s post. Here we go...
Oh No, Can This Photograph Be Saved?

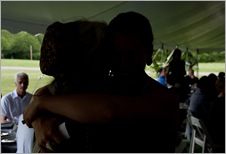
The fact that this image was on “life support” didn’t deter me from the fact that I wanted to see if I could save it because of that special moment between these two ladies. Remember, I wasn’t trying for a “perfect” result. The goal was to obtain a “saleable” result. I figured the image would be made no larger that a 4x6 or 5x7 so I had quite a bit of bottom end latitude in getting what I wanted in my finished result.
Hit the PLAY button below and see what I had to do to salvage the image. It’s kind of fun seeing if you can pull off the “impossible”.
I’ve just printed the image as a 5x7 print and as a 5x7 the print looks great. Had I pushed it to a larger size the flawed parts of the image would begin to reveal themselves, but at this size, it is a perfectly “saleable” image that captures a very special moment at the wedding.
Don’t get me wrong and try to “save the world” on all these severely underexposed images. Today’s lesson was mostly an exercise to see if we could pull it off, on the rare occasion, if we needed to. The best part is that we did! It constantly amazes me what we can accomplish in our digital world with the software tools we have available - just amazing!
_________________________________________________________
Hey gang, that’s it for me today. This week is crunch week for getting all the behind the scenes details wrapped for our “Captured By The Light 2010” tour. I’ll share a few more details with you tomorrow, but for now, I’ve got to get moving.
See everybody tomorrow for another edition of What’s Up Wednesday: Do You Want Wal-Mart Printing Your Facebook images?
See ya’ then, David

Thanks David,
ReplyDeleteGood, if not revolutionary point, you are making. What took me by surprise was your letting "uncle in the background" fade to white. - The gut reflex adjustment from most would be to recover the background greenery + persons to save as much picture information as possible. Your adjustment is clearly preferable, thanks for this.
One thing I missed: A comparison of the LR noise reduction to the "after-Nik define" NR version. Is there really still a place for the external NR programs? - Please address this some time in the future.
I know it is more manageable to work with under exposed images, but I'd like to see what you can pull off with the opposite- an over exposed image. Maybe for next week?
ReplyDeleteThat´s amazing! now I regret deleting photos that where underexposed... But I´ll remember that from now on...=)
ReplyDeleteI guess many of those things can be done in PS CS4 raw-converter too? I dont have lightroom yet, only PS and Bridge (and I´m actually not happy with the colors in Bridge, as they don´t match the colors in Photoshop.. WHY NOT?)..
Interesting tutorial. You did skip by one piece which was what your auto presets did. Maybe it was covered in another post not sure. But it would be good to hear some of the details of what you put in your preset which obviously started this photo out in a different place than the original. Thanks
ReplyDelete