Showing posts with label retouching. Show all posts

Tuesday, June 19, 2012

"Beautiful Reds"

0001 - Stylized Enhancement-

"Beautiful Reds"
© David A. Ziser

This image was made a few years ago but I brought it back because I featured it in my post-production technique on Technique Tuesday today.  I think you’ll enjoy it. 

The image was illuminated with just one light coming in from camera left.  It was a very large Westcott Softbox, probably about 6 sq.ft.  I used a reflector to fill the shadow side of the face in the original portrait but removed the fill light for added dramatic effect in Lightroom 4.

Compositionally I like how our model positioned her hand on her neck.  With how the highlights fall on her hand and her face, the gesture seems to continue the “line” traveling down her profile. 

I think what really makes this image really “sing” are the strong contrasts in the portrait.  Those strong contrasts along with the very vibrant colors make for a striking low key portrait.

Camera specs:  Canon 7D fitted with 18-200mm IS lens at 110mm, F5.6 @ 1/250 second, ISO 800.  Enjoy!  -David

Technique Tuesday: New Cool Stylized Image Enhancement Techniques With Lightroom 4

Good Afternoon Everybody,

Help WantedSoooo, does anyone what to be my assistant on a wedding this weekend?  All my regular assistants are busy with other commitments – that never happens but it sure did this weekend – YIKES!!!  If your interested in helping out, shoot me an email at david@ziser.com and I can fill you in on the details.  I photographed the bride’s Bat Mitzvah year’s ago so it will be a great experience to visit with the family and so many of their friends many of which are also my past clients.  So, if any of our wedding experienced DPT readers are interested, drop me a line.

Time for this week’s brand new Technique Tuesday – here we go…

New Cool Stylized Image Enhancement Techniques With Lightroom 4

Welcome to another Technique Tuesday.  I think I’ve got a good one for you today.  In today’s tutorial I’ll walk you through a few new retouching/enhancement tricks I learned in Lightroom 4.

I've been saying for months now that we photographers have two tremendous resources at our disposal when it comes to creating great images.  First off, we have the best digital cameras ever that let us capture the image like never before.

But more than that, we have the best software available too.  Today's iterations of Photoshop CS6 and Lightroom 4 are the best ever and are necessary upgrades to make.  Today it's not just about the hardware we use on the job, it's the software too that helps us finish that job the best we are able.  The combination of both gives us an unbelievable amount of versatility in creating our finished images.

Even though I got a great image in the camera, as you'll see in this tutorial, the brand new Lightroom 4 allowed me to push the image to an even more wonderfully stylized result that the hardware could not so easily do by itself.  But more that that, Lightroom 4 saves me a few more steps over to Photoshop in getting my result and makes my post-production duties even that much easier and quicker.

Why not hit the PLAY button to see what I'm talking about.  Enjoy! –David

_________________________________________________________________

Hey gang, that’s it for me today.  It’s back to the book before I call it a day today.  Have a great rest of the day and evening and I’ll see you soon.

Adios,  -David

Tuesday, March 13, 2012

Technique Tuesday: Lightroom 4 Breaths New Life Into DOA Images!

Good Afternoon Everybody,

Horse CountryToday we head back from the beautiful horse country of Lexington, KY and land  in CINCY this afternoon.  Once we arrive, it's back to work for me as I still have one more program to wrap up for Photoshop World coming up in just two weeks.  I just can't believe it's right around the corner already.  My other two programs; Lightroom 4 for Wedding and Portrait Photographers and 12 Ways To Make Your Lighting Exciting are just about completed and look really good. I'm really excited and looking forward to be presenting these new programs in Washington, D.C. in a few weeks.

Canon 5D Mark III - 2Also, around the corner is another wedding this weekend and then a quick run up to Sandusky, OH to check out their PhotoBlast Convention.  The real reason I'm going up is to catch up with my good friend and Canon Rep, Mary Mannix.  She's told me she has the new Canon 5D Mark III with her and I could have a peak - I'm getting excited already.  (This sounds expensive to me..LaDawn)

OH, more 5DM3 news,  my other good buddy and Canon Rep. Michael Sheras may be attending my sold out (sorry) Pre-Con Shootout at Photoshop World. Guess what? He may be bringing his 5DM3 along for me to shoot during my pre-con class. I'm really stoked about that.  Mike told me no promises, but if he has the camera, I'll get to shoot with it.  I guess we'll have to wait and see ;~)

Lightroom 4 Breaths New Life Into DOA Images!

I've got a brand new Technique Tuesday for you today.  As you know Adobe released Lightroom 4 just last week and I was thrilled.  We've been using the BETA since it's first day of release - yes, even in our regular production workflow.  What can I say…. besides it's an AMAZING piece of software!  Anyway, always trying to push cameras and software to it's limits, I thought today I would plan to do that in today's post.

Here's the plan - I've selected two horribly under exposed images and two horribly over exposed images, let's call them my Lazarus images. I'm going to see if I can save them in Lightroom 4.  Remember, I'm NOT trying to make a "silk purse" out of a "sow's ear" - OK, yes I am. All joking aside. I'm not trying to make a visual masterpiece out of these 4 images.  I'm only trying to get them to a sell-able condition, for example, in the bride's wedding album.

But that's what's so amazing about this version of Lightroom. Lightroom's has this new found ability to really wring the last amount of quality out of any image.  Sure, start with a good image and Lightroom 4 will take it to a brand new level.  Take a "crummy" image and Lightroom will work it's magic to get you a passable, sell-able image.  And, that's a good thing it you got the shot but severely missed the exposure.  Why not hit the PLAY button below to see what I'm talking about.  I really think you'll enjoy what you see ;~)

________________________________________________________

Hey gang, that's it for me today.  We are packing the bags and heading north in just a short while.  I hope you enjoyed the post today and I'll see you soon.


Have a great rest of the day,  David

Wednesday, February 15, 2012

Good Deal Wednesday! Pssst…, Be Sure To Read The Last Post Entry

Good Evening Everyone,

You guested it – it’s still super busy around here.  I thought I had a little breathing room in today’s schedule, but my afternoon filled up pretty quickly then a friend came by and we had a nice visit, and then the day was behind me.  I still wanted to get today’s post up for you so me and my 4 typing fingers (up from three) are still at the keyboard punching out the post ;~)

DAZNOTE: First off, a few folks are wondering when Technique Tuesday will return.  Our regular Technique Tuesdays should return next week – already working on one.  But remember, I’ll be at WPPI all week too so I’ll want to keep you abreast of all the Las Vegas happenings too. 

Hey gang, for today’s post I need to keep it short so let me tell you about two specials being offered to all the PhotoPro Expo attendees.  I checked with Perfectly Clear and Metal Mural to see if it would be OK to mention them here and they graciously agreed to make these specials available to our DPT readers too. So here we go.

Perfectly Clear: 12 Corrections, 1 Click and One Steal Of A Deal!

Perfectly ClearI talked with Brad Malcolm, president of Athentech Imaging, makers of the wonderfully efficient Perfectly Clear software after PhotoPro Expo 2012 and Brad offered to extend the show discounts for two more weeks and make them available to our DPT readers.

Here is the deal$$$

$50 off Perfectly Clear plugin for Photoshop or Lightroom  (reg. price $199).  Please use code: 65FEAEA0

$75 off Perfectly Clear Plug-in bundle for both Photoshop or Lightroom (reg. price $249)

Please use Code: 8877305A

Perfectly Clear  B-A

Be sure to check out Perfectly Clear's online videos[link] and watch how easy it is to get great results on 100's of images in only minutes. Perfectly Clear is a great workflow solution and a must-have for today's digital photographer.

Best Wall Display Ever! Metal Murals 40% Off!

I first met our friends at Metal Mural about three years ago and was blown away by their brand new impressive metal collage wall decor. There was simply nothing on the market that compared to what they were showing - and I loved it!Metal Mural

Anyway, since they were a late entry to our PhotoPro Expo trade show they wanted to be sure everybody had an opportunity to check out their products and have graciously offered to extend their show specials deadline and also make the offer to our DPT readers too. 

Metal Mural offers one of the most unusual and beautiful ways to display your images - on metal! The look is beautiful, contemporary and rich looking.  Check out their special landing page for all PhotoPro Expo 2012 attendees RIGHT HERE, order up a few samples and save yourself 40%!  Their offer expires on February 19, just a few days from today so don't delay!

Want To See What You Missed: Experience All The PhotoPro Expo 2012 Excitement!

How you ask?  Just become a PhotoPro Expo VIP Member [link]. It's only $49 to join, yes only $49!  Then you have complete access to the entire set of PhotoPro Expo 2012 programming!

PhotoPro Network

That's right, we recorded all the programs at this year's PhotoPro Expo 2012.  We're still in the process of editing them and making them available on-line but when they're ready to go, you'll be the first to know. I wasn’t going to mention this for a few weeks so consider this a “soft” announcement for something very special.

What an outstanding opportunity to re-invigorate yourself with over 30 hours of some of the finest programming on the planet!

Hey, that's not all - we already have 35 hours of content on-line right now for your viewing and educational enjoyment!  As a member you are eligible to enter Print Competition and have a chance to win awards, cash and many other prizes. Just a couple top reasons to join PhotoPro Network!

And, there are available other member benefits as well. Check them out RIGHT HERE and join today! It will be the best business decision you made this year!

________________________________________________________

Hey gang, I’ve got to go.  It’s nearly 7:00 p.m. and it’s been a long day.  Back at you tomorrow with a brand new Business Day Thursday. 

See ya’ then, David

Friday, October 07, 2011

Friday Wrap Up: Webcast A Big Hit; Captured By The Light Only A Week Away; Awesome Retouching Tools!

Good Morning Everybody,

I just want to kick off today's post with a great big THANK YOU to Suzette Allen for her fabulous webcast yesterday.  I don't think I have ever seen so many great comments come across the wire while we were on the air - the attendees just loved it!

Suzette’s Webcast A Hit!

Suzette StoreI think the secret to the success of Suzette’s program was her down to earth approach to teaching - no fluff, just solid, rapid fire tips you can use everyday in your Photoshop workflow.  I know, I know - everyone wants to know if it will be re-broadcast.  I'm planning to work on that over the weekend.  In the mean time, check out Suzette’s additional training materials right here.  Things are going to be super busy for me next week with my Master Class kicking off on Monday, but I'll do my best to find some time to get Suzette’s webcast and next week’s post up on line.

I'm keeping it short and sweet today because LaDawn and I leave our friends, the Smith's, today and head to Toledo, OH for a family wedding this afternoon.  We head back to Cincy tomorrow and prep for my class on Monday.  I’m happy to say we have another full class with photographers coming in from all around the country once again.  I'm really looking forward to a great week.  I'll keep you updated as we progress thru the week.

Captured By The Light California 2012

I can't believe it!  We kicked off Captured By The Light California 2012 tour just last Thursday and we have quite a number of folks registered still with nearly 2 weeks to go before we hit the west coast. 

CBTL2012Once again, we’re giving away $600 worth of goodies to everyone walking through the door including a complete recording of the program with additional tutorials!  And YES, we’re giving away $1000’s worth of door prizes each night!  You’re going to love it!

We're trying something different this year with how we're getting the word out so if these three cities do as well as we hope, you just may get your wish and see us out next year at a city near you.

Retouching Salvation!

Perfect Photo 6A quick note - you've heard me talk about OnOne's new Perfect Photo Suite 6, the next big tool to workflow success in my opinion, since we've sat in on two webcasts highlighting the latest features of the program. I have to tell you, I'm really stoked to see the the final release. 

I thought I would have a Beta release to be testing by now, but no luck for this lonely PC user.  I just spoke with OnOne the other day though and it looks like I may get a real peek shortly.  If you want a preview of some of those great new features, OnOne is posting a one a day video highlighting those features right here.  I really encourage you to check them out -WAY cool stuff.

________________________________________________________

Hey gang, that's it for me today.  I'm going to try to get my 5 mile workout in today - OK, 3 mile workout ;~). and then it's off to Toledo and catching up with family and friends at tonight’s  wedding.

Everybody have a great weekend and I'll see you bright and early on Monday.  Keep your lenses polished, your CMOS sensors clean, and your pixels smilin',

See ya' next week everybody,  David

Tuesday, September 20, 2011

Technique Tuesday: Design Lines–1 & Testing Some Brand New Software

Good Afternoon Everyone,

Sorry for the late post today. I've really been behind the eight ball these last couple of days and have found it difficult finding time to post the blog. Let me give you a quick update of what's going on around here.

The biggest “time gobbler” has been installation of three new computers at the studio – and what a pain in the neck that can be sometimes. My computer is pretty much up and running, and I got our second computer installed earlier today. I’ve just got one more to go but, it will probably take about another day of work to get it on-line.

I will say that these computers are far faster than the almost 5 year old models we’re replacing. I think everybody's going to be thrilled with the new speedy hardware.

Testing New Software – Perfectly Clear

Perfectly Clear boxesOn a different front, I've also invested quite a bit of time exploring a brand-new piece of software for Lightroom 3 and Photoshop CS5. The name of the software is Perfectly Clear by Athentech Imaging. I met the CEO of the company, Brad Malcolm about three years ago when we got chatting at one of the trade shows.

I've been following Perfectly Clear’s development over these last couple of years and what I saw most recently really impressed me. Brad and I had the opportunity to hook up again at Photoshop World in Vegas just a few weeks ago and I'm now in the process of testing Perfectly Clear in depth to see just how it might improve our workflow.

At first glance, it looks like it's going to be a lifesaver and happily a timesaver for us, too. What Perfectly Clear does is  analyzes each of your digital images pixel by pixel and then does it’s best to adjust color balance, contrast, black levels, white levels, and about every nuance of your image. 

As you know, we photograph about 3500 images in the course of an event but our big hang-up is fine tuning the images for posting to the Internet for our clients to view. That part of the process can take hours – too many hours!  After my first brief test with Perfectly Clear at Photoshop World I was surprised how many times the software got it right.

Perfectly Clear training videosWere currently exploring some different workflow options with the software. You can go online and watch all Perfectly Clear’s tutorials right here. The one tutorial that interests me the most was the batch processing post, it's the last one listed on the video page. After a few preliminary tests yesterday, I was very positively surprised with the results that I obtained. I want to do a little tweaking of the program adjustments and give it a try one more time.  BTW, Perfectly Clear works in Photoshop and Lightroom and across both the PC and MAC platforms.

The game plan, and this is constantly updating as we improve each process, right now is to load all of the images into Lightroom. Once done, I want Perfectly Clear to work its magic on each and every one of those images saving the processed images to a different folder.   Next we’ll import those images into Lightroom as well. Since I'm not changing names of the images, the perfectly clear adjusted JPEGs should sit right next to the raw file in the Lightroom catalog. The next step is to just breeze through the catalog and select the best image. In my first tests I was selecting the Perfectly Clear image 95% of the time.

Remember, were just trying to get these images looking good for proofing for the client, not perfect for final output. Don’t get me wrong – most of the Perfectly Clear adjusted images looked just fine. Granted, some images are going to need additional post processing, but that should be no problem in our typical normal Lightroom workflow. Anyway, running new software through all the tests is a time-consuming process. I hope to have the completed and finalized results of my testing ready to post next week – stay tuned.  The testing coupled with getting three machines up and running explains my lack of time needed for blogging.

Design Lines 1 – See Where The Lines Are Leading Then Place The Subject Accordingly

I had planned to post part three of the banner project that I've been discussing in the last two Technique Tuesday's. Sorry no time……  Don't worry though, I promise they have it completed in fairly short order.

In lieu of posting a brand-new Technique Tuesday today, I thought I would revisit a episode I did a couple of years ago. The topic is one of my favorites, composition and lighting, so I think you’ll really enjoy it.

Here is the back story on today's video. LaDawn and I were on vacation a couple of years ago staying at a beautiful new Hilton Hotel right on the waterfront in San Diego. It turns out that the hotel offered some great backgrounds for portrait photography. In this tutorial I'll walk you through how I spotted the leading lines, how I determined where the viewers eye was being led, and how I positioned my subject within a composition.

A nice plus for this tutorial is a fact I am using the most ultraportable lighting set up that I can be using – a wirelessly triggered shoe mount flash. In spite of my equipment minimalism in this tutorial, I still think we pulled off some very cool portraits. They are well lit and well composed,. Why not hit the PLAY button below and enjoy the show. Hope you enjoy it.

 
__________________________________________________________
Hey gang, that's it for me today. Thanks for hanging in here with me on this very busy week. I hope to see everybody again tomorrow and, I hope to have the post up a little earlier than today.

Have a great rest of the day and I'll see everyone tomorrow.

-David

Tuesday, August 23, 2011

Technique Tuesday: Feeling A Bit Gray Today? – Making Underexposed Look Good

Good Afternoon Everybody,

New Day Today is a brand new day for me.  LaDawn returned from her travels from the Nashville Fitness Spa late over the weekend and is in the process of “shaming me” into getting into better shape. She lost 8 pounds and about 10 1/2 inches during her week’s stay. Me, I probably put on a few inches and pounds while she was gone:~)

Anyway, the Ziser’s are on a new health kick.  Less calories, less fats, better carbs, exercise (ugh), and WHAT! – no adult beverages for a while. Ohhh… I hope I’s still alive for Photoshop World in two weeks ;~)

OK, enough of my moaning ad groaning – let’s get on with today’s Technique Tuesday.

Feeling A Bit Gray Today? – Making Underexposed Look Good

After my post a few weeks ago entitled, “Whoops, I Should Have Caught That” [link], I showed an image in which the shadow of one wedding party member fell directly on another and really underexposed the shadowed person.  A question was raised in comments about how to fix underexposed skin tones.

Now the fancy of the matter is that we have covered underexposed images previously five times and many of those images involved saving the skin tones in one way or another.  Just look at the screen grabs for those tutorials below – obviously many of the images were a near death experience.  The tutorials show how I saved them.  When I say “saved them", I talking about a salvage job that makes them at least a saleable image.

The first was entitled, Burn and Dodge Cha-Cha” way back in the early days of Digital ProTalk. Before I get into today’s tutorial, I’ll list the others right here with and intros and their links – you can click on the image too.  Enjoy these instant replays AND don’t miss today’s post following these links:

1. Burn and Dodge Cha-Cha: [link]

Burn and Dodge Cha-Cha This Photoshop Tutorial shows 3 ways to Burn and Dodge in Photoshop. Each method is discussed as to it's best application in your work flow. There are three BONUS tips along the way too.

Underexposure 12. Under Exposure - Part 1: [link]

But what do we do if that image is badly underexposed and it really needs to be in the wedding album? Can we save it? What are the noise issues involved? If there is a tremendous amount of noise, what can we do to ameliorate it?

3. Saving The (Underexposed) Image – Part 2: [link]

Underexposed 2 Different exposure problems call for different strategies in solving the problem. I have the same image saved in JPEG and RAW format. Each file demands a different strategy to obtaining the best result.

4. Resurrecting an Image From The Dead: [link]

Ressurecting An ImageToday we have my last tutorial on underexposure - it's a practically invisible image that we will resurrect from the dead pulling out all the stops - or rather adding a bunch more stops to the exposure.

5. Can This Photograph Be Saved? [link]

Can This Be Saved The fact that this image was on “life support” didn’t deter me from the fact that I wanted to see if I could save it because of that special moment between these two ladies. Remember,  I wasn’t trying for a “perfect” result.  The goal was to obtain a “saleable” result.

And now for today’s post:

Feeling A Bit Gray Today? – Making Underexposed  Look Good

In this tutorial I’m going to show you yet another strategy to save the skin tones of an image.  Let’s revisit the image I references in my post .

We can use any number of ways to save this image – in fact, many of the ways in the previous listing of tutorials could have worked effectively.  Today I’m showing you one more solution – it’s one of my favorite Photoshop plug-ins – drum roll, please  - I-Correct Portrait.

This has been one of our “go-to” color balance/skin tone one-click plug-in for many years.  That’s right, one-click – that’s why I like it so much, it’s just flat out easy to use.  In this tutorial I’ll show you how it can be applied to the image you see right here. A little lightening and brightening, adjust the contrast, touch up the skin tones, and you are good to go.  Just hit the PLAY button and Enjoy!

____________________________________________________

Hey gang, that’s it for me today.  I think it’s taken longer to find all the past links than to create today’s video.  Anyway, now you have them all in one place – better bookmaker this page for further reference ;~)

Time for me to get back to my real job…

See ya’ tomorrow for another episode of “You Got To Come Back With The Shot!”.

Later,  David

Tuesday, May 17, 2011

Technique Tuesday: You Won’t Believe Your Eyes!

Good Morning Everybody,

Just a couple of quick notes before we get on with today’s Technique Tuesday.  First I’m planning a FREE Webcast for the not to distant future on Social Media Marketing focusing on how to use Twitter to enhance your business presence.  If you have any suggestions for upcoming topics, please let me know in the comments section after this post.

SnappAlso don’t miss SNAPP tomorrow evening – it’s LIVE Photoshop User TV.  It looks like fun.  Here is the link to REGISTER!  I missed the last episode but I definitely plan to sit in on this one – hope to see you there.

On with today’s post…

You Won’t Believe Your Eyes!

Content Aware FillI remember seeing a demo or two about Content Aware Fill in CS5 months ago.  The demos simply blew your mind and I couldn’t wait to try out that razzle-dazzle feature myself. When I first tried CAF, I got mixed results – how come when I tried it, it didn’t work quite as effectively as the demo I had watched?

You know, it’s like anything, CAF takes a little practice and a little getting used to.  It’s not made to work it’s magic on EVERYTHING, but it does work magic in many situations.  That’s what this tutorial is about – using Content Aware Fill for the Wedding/Portrait photographer and showing when it works and when it doesn’t.

I’ve done three posts at DPT over the past few weeks [link1] &[link2] & [link3] where CAF figured prominently in my finished results.  In this tutorial, I’ll revisit the images in those two posts.  I’ll show you a tip and trick or two that helps you get the best out of Content Aware Fill.

Why not hit the PLAY button below and enjoy the show.

_________________________________________________________

Hey gang, that’s it for me today.  I’m trying to put the finishing touches on my newsletter which is scheduled to go out tomorrow.  You can sign up for it over in the right side bar if you have changed your email address or have yet to receive the newsletter.

Also, I’ll be back tomorrow for another episode of the one that got away. 

Hope to see you then,  David

Tuesday, March 22, 2011

Technique Tuesday: Another Blast From The Past; FREE Web-cast Announced; & Denis Reggie Interview

Good Morning Everybody,

Sweet DriveI’ve got lots of good news for you guys and gals today – let’s get right to it.  We had one sweet drive to Atlanta yesterday in my brand new car - it felt like we riding on a cushion of air for the entire trip.  To be honest, the ride was exhilarating, not tiring as most road trips can be.  We left right at 10:30 a.m. and landed in Atlanta at Denis’s home at 4:30 p.m. – 450 miles, 2 stops, 6 1/2 hours, pretty good time.

It was good to catch up with Denis last evening - we enjoyed a few choice bottles of wine and a wonderful dinner, then turned in fairly early.  Today Denis and I are scheduled to meet a consultant who just happens to be an expert on Camtasia and on-line content.  What I’m implying  is that we are cooking up a few things for down the road at DPT.  As usual, I’ll keep you posted.

Interview With Denis Reggie A “Go”

Denis ReggieAs a surprise for our DPT readers, Denis has agreed to do a 30 minute video interview with me today.  That should be cool.  It should be cool to get a peek behind the scenes of one of the finest wedding photographers in the world.

The plan is to film later today and I’ll plan to have it on-line tomorrow, all the pixels willing.

Technique Tuesday: Another Blast From The Past!

Today is normally Technique Tuesday and normally I’ve got a new video for you.  With the long drive and full schedule today, I’m going to Plan B.  I’m re-posting a really popular tutorial from a few years ago entitled, “Porcelain Doll.”  This video has been rated one of the Top 10 videos of 2008 so if you missed it or simply need a quick review, you can catch it a second time today.

Here is the back story:  I saw this tutorial over at Stock.Xchng, printed it out, and tried to duplicate the result. It took me a few tries until I finally got it. Some of the steps are not super intuitive which is why I thought I would do a video of it.

I really like the effect and see some applications for that really theatrical retouched effect. The folks over at Imagenomic have a great Photoshop plug-in that does what looks like the same thing. We actually use it at my studio and it does a great job, but if you want to save some dollars this tutorial will do the trick. Give it a peek and see what you think.

_________________________________________________________

Hey gang, that’s  it for me today.  We’ve got lot’s on the front burner  and I’ve got to get moving.  Hey, don’t forget to check out the FREE Web-cast coming up April 7, 2011 at 3:00 p.m. DST right here at DigitalProTalk.com.  It’s entitled, “FUSION – Now More Than Ever!”  Here is the link to REGISTER right here. I’ve posted more details below, so please check it out – it’s going to be important time spent.

On that note, I’m out of here – see everybody tomorrow,  David

Tuesday, March 15, 2011

Technique Tuesday: Oh, The Lightroom Auto Mask Feature – I Love You, I Hate You!

Good Afternoon Everybody,

Mercedes s550 Well, it looks like the “crashed car” drama is finally coming to a close.  Yesterday, I made the final decision on my replacement vehicle. I decided against the very fast and more nimble Mercedes CLS 500 – it probably would have gotten me a ticket or two in the long run and decided on a low mileage late model S 550.

It was pricier than I wanted to pay even after the showroom haggle, but wow, it has all the “bells and whistles” and what a gorgeous ride! It should be one sweet trip to Photoshop World next week ;~)

Oh, The Lightroom Auto Mask Feature – I Love You, I Hate You!

Auto MaskBut you didn’t tune in to hear about my car, you’re looking for a  brand new Technique Tuesday.  Well folks, here it is. I hope you enjoy it. 

Oh, by the way, I used my new nifty little battery operated Fotodiox battery powered LED light I blogged about right here. The video light was used for the intro and exit video segments.  I thought it worked out really well.

Lightroom’s Auto Mask feature has always been a bit problematic for me.  Maybe it’s because I’m a heavy handed retoucher and I want Flow and Density cranked up to 100% when using Auto Mask.  But by doing that, you will definitely see some artifacts at the edges.

By using the Auto Mask a little more judiciously or less aggressively, you really can obtain a good result. In this Lightroom Tutorial I’ll walk you through two images and show you the “ins and outs” of the Auto Mask feature in Lightroom. Using it correctly can and certainly will enhance your post-production efficiency.

Anyway, hit the PLAY button below and enjoy the show.

________________________________________________________

Hey gang, that’s it for me today.  I’ve got to clean out the bank account and go pick up a car ;~)  Have a great rest of the day and I just might see you tomorrow for a Photoshop Marathon Love Fest.

See ya’ then,  David

Tuesday, March 01, 2011

I Just Feel So Vibrant Today: A Few Photoshop Tips and Tricks

Good Morning Everybody,

I arrived at Tampa, FL yesterday, got settled into my hotel and checked in with NAPP World Headquarters.  We begin working on the special project today.  I'm sworn to secrecy for the next few weeks but I promise to fill you in as soon as I can.

Ford ExplorerMy car situation that I reported on yesterday is slowing working itself out. We landed back in Cincy safe and sound on Saturday and headed directly to Enterprise. My insurance was kind enough to upgrade me to a premium rental and I soon found myself driving off in a fully equipped Ford Explorer.  Not quite as nimble as my other car but still a nice ride.

With all the latest, greatest, electronics, wi-fi, and Bluetooth gadgets, I was in geek heaven the entire weekend.  I had everything crankin' in that car including my iPhone and iPad - LaDawn was only slightly amused by all the electronic gadgetry.  Heck, it made me almost forget about what happened to my car over the weekend ;~)

Hey gang, time to get on with today's post.  Here we go...

I Just Feel So Vibrant Today: A Few Photoshop Tips and Tricks

I have to say, one of my favorite sliders in Lightroom is the Vibrancy slider.  I just love what it does to an image when used properly.  Wouldn't it be cool if you could apply Vibrancy to an image selectively?  Lightroom doesn't allow you to apply that specialized technique yet, but you do have that functionality in Photoshop.

Also, wouldn't it be cool if you could open an image in Photoshop and still have all the functionality of ACR right at your fingertips too?  Well, hit the PLAY button below and watch how easy it is to pull it off.  Enjoy!

_______________________________________________________

Hey gang, that's it for me today.  I'm out the door and heading over to see the Photoshop gang.  I'll catch you tomorrow for a short post or too.

Hope to see you then,  David

Monday, November 01, 2010

Quick Hit Monday: Joe’s New Book; Webcast Still On the Air; What A Deal On Ink-Jet Printers; Retouching, Shortcuts, Postcards, and More

Good Morning Everybody,

LR Grid It was a great Bat Mitzvah celebration over the weekend. We began at 7:30a.m. and worked till 11:30p.m. that evening. Thankfully we had a break in the middle of the day to catch our breath. I downloaded the cards when we returned, renamed them importing them into Lightroom and hit the sack late.

Four hours later the alarm went off - we had a 9:15 a.m. flight to L.A. and I still needed to pack. I wanted to bring the images with me on the trip so I could work on the order and share a few more with my DPT readers this week. They were still imputing into Lightroom at 6:15a.m.

Finally I got the job done, packed up the 650 gig Toshiba pocket drive and we headed to the airport. We were fortunate to get kicked up to the BIG seats for our four hour flight and I was able to catch a few zzzzzzzzzzz's on the trip out.

Like I said - busy weekend, and now a busy week as we wrap up our Captured By The Light 2010 tour. We are looking to visit with over 700 excited photographers this week so I hope you can make it to one of this week's programs - it will be a kick! That said, let's get right to this week's Quick Hit Monday. Here we go...

Rocket Speed Digital Design Being Extended

Digital Design Webcast  Horo Logo2 Last week I posted my Rocket Speed Digital Design webcast [link] and mentioned that I would keep it up till Sunday midnight and still honor the special $99 bundle pricing on LumaPix. Because we only have 3 CBTL tour cities left, I thought I would keep it up till the end of this week.

That should give everyone ample time to catch the webcast if you missed it and take advantage of these NOT-TO-BE-MISSED specials. If you have any questions about the specials, please give the studio a call at 859.341.5900.

Joe McNally's New Book, The Life Years, Just Released!

Joe's book3 I caught this over at Joe's Blog [link] over the weekend. Joe told me he had a new book coming out near the end of the year but didn't give away any of the details. His new book looks like a knock out hit.

Yes, I'm old enough to be a Life Magazine fan and was pretty disappointed when it folded. This book reprises Joe's years at Life when he was the named the first staff photographer for the magazine. He coincidently was also the last staff photographer for Life. That would give him the distinction of being the only staff photographer for the magazine.

Not only do the images look exciting, but what captured my attention was the fact that this is a "nuts and bolts" read, complete with F-stops and shutter speeds - right up my alley. Here is the link to his post right here. I can't wait to pick up my copy! I am wondering how Joe retrieved the EXIF data from the film though ;~)

How About One Gigantic Deal On Canon Inkjet Printers!!!

iPF8300 Folks, I have to admit, I thought I would NEVER see the price of Canon's iPF 8300 wide carriage inkjet printers hit a rock bottom price of only $2299 after rebate at LexJet. I mean,  this is a steal of a deal if you want this printer. You ain’t going to find it at a better printer price anywhere in the world!!!

Yes, they are offering the iPF6300 at a great deal too at $1899 after rebate, but for the $400 difference, I'd pick up the iPF8300. Oh, and did I say, that includes a complete set of 330 ml ink cartridges too!

We have been using the iPF8100, the model prior to this model and we have been luvin' it. It's fast, is stingy with ink, and gives gorgeous results on all types of mediums. Deals like this are unheard of - check it out right here if you are even remotely interested. You'll have to call one of the LexJet friendly representatives to get all the details.

And Now For A Little Fun…

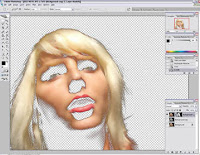
Rapid Fire Beauty Retouching

AJ Wood Friend of this blog, A.J.Wood has a nifty little tutorial posted at his blog right here. It's a 3 minute tutorial showing his rapid retouching techniques in Lightroom and Photoshop.

A.J. is a certified adobe Expert. His blog has a lot of good content which is fun to check out. Once again, here is the link.

Jeff Revel's Keyboarding Shortcuts For Lightroom

PhotoWalkPro I've always enjoyed visiting Jeff's site, PhotoWalkPro.com [link]. It's enjoyable to read, informative, and an easy read. Recently, he did a post on workflow, you know the part of the profession we all enjoy the most.

Like all of us, Jeff is always looking for the most efficient way to get the job completed. His post gives some good ideas on how to do just that in his post right here. If you want to get your Lightroom and Photoshop chores done more quickly, it's worth the read.

Oh, while you are at Jeff's place check out his other tutorials too - always informative and easy to follow.

Now Every Picture On Your IPhone, iPad, etc. Is A Postcard

OK, I caught this post at the Imaging Insider [link] and think it is one clever app. Here is the deal: with this app from Simply Postcards [link] you can send any photo stored on your iPhone or iPad as a postcard to anyone you want - friends, family, potential clients, vendor buddies, current clients, whomever for only $1-$2. That's your photo printed as a postcard, stamped and mailed!

Simply Postcards Many of you may be wondering, "Who cares, I'll just email the image." Sure, that seems like the easy way, but getting a hard copy is just so much more retro cool. All kidding aside, I see it as a perfect way to impress your clients or even your potential clients.

I've mentioned here what a fan I am of the iPad and the many ways we use it for marketing in my business. This app let's us take it to the next level. Here's how:  we routinely bring the iPad along to an event, upload about 50-60 images to the iPad and then present a viewing sampling of the images during dinner for the bride and groom, families, and guests. Everybody loves it.

OK, how about now we select our favorite image of the event and send it as a post card to the bride and groom. Sure, they are on their honeymoon, but don't you think it would be cool for them to find a postcard from their wedding day in their mail box when they return. I think it is one more way to sizzle that client experience. And, folks that's what it takes to keep them coming back.

Head over to their site right here. Simple Postcards has some great ideas listed. Oh, did I forget to mention that it's a FREE app too - yep, FREE. Jump on it! I’ve installed it and can’t wait to give it a try.

________________________________________________________

Hey gang, that's it for me today. My throat has been a bit "froggy" these last couple of days with all the speaking presentations, Master Class, and Bat Mitzvahs. Now with only three more programs to go I hoping my voice holds out. Who knows, LaDawn may have to do the last one in Sacramento on Thursday ;~)

Oh, just a quick note to those making Facebook friends requests. I was all caught up a few weeks ago, but now I'm way behind by about 750 or so. I'll try to get caught up in the next few weeks. The bigger problem is that I'm approaching the Facebook limit of 5000 friends so I may be foxing to plan B and setting up a fan page. Hey, I'm still trying, ( in my spare time) to figure all this social media thing out too - I'll keep you posted.

Don't forget to check back tomorrow for a brand new Technique Tuesday: Posing Mistakes – Easy Fixes, Making Your Clients Look Good. Hope to see you then.

Adios, David

Tuesday, September 07, 2010

Technique Tuesday: Our CBTL Tour Kicks Off Today; and Pixel Bending With Lightroom 3.2

Good Morning Everybody,

Today is the big day and I can't wait! We left Las Vegas, NV on Saturday and headed to Palm Springs, CA to spend the weekend. What an amazing drive it was through the Mohave National Reserve!

Joshua TreeIMG_6145-Edit We spent Sunday exploring Joshua Tree National Park - another breathtaking experience (considering it was 108 degrees-whew!). Joshua Tree was just beautiful in spite of the heat. You could almost see the dinosaurs walking this ancient primordial landscape.

CBTL BH3 Today we are in Phoenix for the kick off of our "Captured By The Light 2010" tour [link] and are really looking forward to it. We loved our stop in Phoenix last year and are looking forward to seeing over 200 friendly photographer faces again this year. I hope you stop by tonight.

Pixel Bending With Lightroom 3.2

I've got a quick and easy Lightroom tutorial today. It covers one of the new features in Lightroom 3 - Lens Correction. This is probably a feature most of us don't use very often, but it sure does come in handy when you need it. And, it saves you one more trip to Photoshop. Let me walk you through a few images to show you when to use it, how to use it, and some fun you can have with it. Hit the PLAY button below and enjoy the show!

__________________________________________________________

Hey gang, that's it for me today. I'm going to give the show one more walk through before tonight. We head to Dallas tomorrow to a crowd of over 300 strong and then off to Houston on Thursday. If we miss you tonight, I hope we can catch up down the road.

One more time, here is all the info for the CBTL 2010 tour right here.  Remember to use Promo Code DPTCBL2010 to save yourself $20 off the registration. I still can't believe we are giving away over $350 worth of goodies to each person attending AND $18,000 worth of door prizes this week!

Hey, you all look like winners to me, so come on down and enjoy an entertaining and information packed evening.

I hope to see you at a location near you,

-David

Tuesday, August 10, 2010

Technique Tuesday: Oh No, Can This Photograph Be Saved?

Good Afternoon Everybody,

KPPA2 I spent a good deal of yesterday in a meeting with my state Kentucky Professional Photography Association board. We are in the process of planning our Fall meeting and next year’s state convention.

What’s cool is the fact that we are planning something completely different for our fall meeting.  Most of you don’t know, but Lexington, Kentucky has been chosen as the site for the Worldwide Equestrian GamesEquestrian Games Think of it as the Olympics for horses.  It is a super big deal and all the hotels within a 100 mile radius of Lexington expect to be filled to capacity for about 3 weeks. That fact has been “cramping” our arrangements for our normal Fall meeting.

Instead, I suggested a worldwide web-cast near the end of September so our members still had the benefit of a Fall meeting, albeit online. Anyway, the plan is coming together.  I’ve lined up three great photographers to cover weddings, family portraits, and high school seniors. 

I also suggested we open up the program to all who want to spend a wonderful Sunday afternoon learning from the best of the best. As soon as we have all the details nailed down, I’ll invite all of you to check it out. It’s going to be a knock out program!
OK, time for today’s post.  Here we go...

Oh No, Can This Photograph Be Saved?

Can It Be Saved-2924-NV_Galinski W10 Have you ever found yourself in a position where you are reviewing your images from an event and one of the images looked totally unsave-able? Still, what you see in that image is a special warm moment between a mother and her daughter in that severely underexposed image. 

The fact that this image was on “life support” didn’t deter me from the fact that I wanted to see if I could save it because of that special moment between these two ladies. Remember,  I wasn’t trying for a “perfect” result.  The goal was to obtain a “saleable” result.  I figured the image would be made no larger that a 4x6 or 5x7 so I had quite a bit of bottom end latitude in getting what I wanted in my finished result.

Hit the PLAY button below and see what I had to do to salvage the image.  It’s kind of fun seeing if you can pull off the “impossible”.

I’ve just printed the image as a 5x7 print and as a 5x7 the print looks great. Had I pushed it to a larger size the flawed parts of the image would begin to reveal themselves, but at this size, it is a perfectly “saleable” image that captures a very special moment at the wedding.

Don’t get me wrong and try to “save the world” on all these severely underexposed images.  Today’s lesson was mostly an exercise to see if we could pull it off, on the rare occasion, if we needed to. The best part is that we did! It constantly amazes me what we can accomplish in our digital world with the software tools we have available - just amazing!
_________________________________________________________
Hey gang, that’s it for me today.  This week is crunch week for getting all the behind the scenes details wrapped for our “Captured By The Light 2010” tour. I’ll share a few more details with you tomorrow, but for now, I’ve got to get moving.

See everybody tomorrow for another edition of What’s Up Wednesday: Do You Want Wal-Mart Printing Your Facebook images?

See ya’ then,  David

Tuesday, August 03, 2010

Technique Tuesday: Go Away Green! Shooting Mixed Lighting With Florescent Light? Get The Color Perfect In Lightroom 3

Good Morning Everybody,

Flower Dance Ahhhh…, another beautiful day in paradise around here, my program for Friday Photo School is about ready to go, and the whole world is coming up roses or tulips.  There, that should put everybody in a good mood where ever you are ;~)

That said, let’s get right to today’s Technique Tuesday.  Here we go…

Go Away Green! Shooting Mixed Lighting With Florescent Light? Get The Color Perfect In Lightroom 3

Do you ever have trouble getting those ugly greens out of the background and skin tones when shooting in mixed lighting conditions that include florescent fixtures? It really can be challenging now and then. This past weekend while working on a job in Lightroom 3, I was constantly challenged with that exact situation. After trying a few ideas I hadn't tried before and then, Bingo!, I had found a terrific solution to the problem.

Here is the deal. florescent green is not really green, it's closer to yellow, at least to Lightroom. In the past, I would just hit the color channels and desaturate the yellow channel. As long as there were no other predominate yellows in the scene, it worked pretty well.

Over the weekend, facing the same challenge, but this time with that nasty florescent greenish color in the shadow areas of the skin tones, the yellow "desaturate" option just wasn't working as well as I wanted. About half way through the job I looked at those color sliders again and decided to use the hue sliders instead. To make a long story short, watch the lesson below to see how easily I made my problem go away for good and give me great skin tones to boot - very cool.

_________________________________________________________

That's it for today's Technique Tuesday gang. I've got to get back to my real job so have a great day  and I'll see you tomorrow for a very provocative post – “Lightroom Production In "Slow-mo Mode".

See ya' then, David

Friday, July 23, 2010

Fast Break Friday: Secret’s Out, Wedding Pricing, Photo Walk; Great Book Review; and More

Good Morning Everybody,

Non Stop LR - Fotolia_643515_Subscription_XL Yesterday was one of those non-stop days and it was one of those days where you only get about half the work done that you needed to get completed.  You know what that means, I’m already behind the “8 ball” today - yikes!

That’s why today is Fast Break Friday.  Let me update you on a few things.

Scott Kelby’s Worldwide Photo Walk Tomorrow!

PhotoWalk_Leader_300X250WebAd_0510 Can you believe it - over 1100 Photo Walks worldwide and over 30,000 folks walking - unbelievable!

My walk is filled to capacity and we are looking forward to a great time with everyone on Saturday morning. The weather is going to be hot they say, but who cares, it’s going to be a great time!  LaDawn and I are really looking forward to it.

Pricing Wedding Coverages

Money BAg First off, I did a post yesterday [link] about how we have our wedding coverages set up at the studio.  I knew someone way going to ask me to put prices on our coverages.  In my next  Business Day Thursday post I’ll plan to give you some direction in the pricing department.  Regardless of where you are now in your career, I think you will find it helpful, so stay tuned.

Great Book Review Over At DWF!

Hey, a GREAT BIG THANK YOU to Digital Wedding Forum for the super glowing book review [link].  For those of you that don’t know, DWF is the leading informational forum on-line when it comes to wedding photography.  They are a tremendous resource for anyone wanting to take their photography to the next level.

DWF plug To have the opening line of the review say, “This new book from David Ziser may just be one of the best Wedding Photo books on the market.“  Wow! I have to say I’m both humbled and honored - thanks DWF.

Whoops! Today’s Post Was Going To Be On Retouching

That’s right,  I had planned to discuss the subject of under and over retouched images.  It looked like it was going to get quite involved and I was running out of time as it was so I’ve decided to postpone it to hopefully next week.

There are some great retouching software solutions available so stay tuned and I’ll walk you through what those solutions are and how we incorporate these software solutions in next week’s Friday “Studio Life” post.

What’s The BIG Secret Project?

Top Secret LR - Fotolia_526571_Subscription_XL OK, I’m going to just let the “cat partially out of the bag”.  Our BIG project is our - not yet public - ”Captured By The Light” lecture tour kicking off September 7, 2010 and traveling to 20 cities around the US.  I was hoping to have the website “live” today, but we still have several bugs to work thru.

For those of you that attended last year’s Digital WakeUp Call tour, this year’s program is completely new with tons of fresh information on lighting, composition, digital design, and marketing!  Did I say we’re giving away nearly $4,000 worth of door prizes in each city!
(Psst, “David, quiet, you’re letting too much out of the bag!”)
We are still working hard to get all the pieces in place and that should happen by mid next week. Stay tuned, I can’t wait to tell you everything that’s planned - it’s going to be a kick!  I’ll give you the whole story next week.
______________________________________________________
Hey gang, I’ve got to get moving.  We have about a dozen plates spinning to get the tour kicked off on time next week so, please plan on stopping back for all the details next week.

Have a great weekend, enjoy your Photo Walks if you are signed up in a community near you, and I’ll see everyone back here bright and early Monday morning.

See ya’ then,  David

Wednesday, June 30, 2010

Technique Tuesday, on Wednesday: Fantastic Facial Enhancement Using Lightroom 3; Already Nearly 800 Strong For Next Week’s Webcast! WOW!

Good Morning Everybody,

Crowd graphic 2 LR We did it, we got my upcoming webcast Fast and Easy Digital Design - Part 2 launched yesterday and have nearly 800 folks registered already!!!

Remember, the webcast is only 6 days away and we can accommodate up to 1,000 attendees for the webcast so if you want to be sure you have a seat, be sure to register here right away.  If the attendance continues to grow like this, we’ll start a stand by list.

Hey gang, thanks for letting me move our Technique Tuesday episode to Wednesday.  With the short notice on our webcast announcement, I just didn't want to postpone it to today.  Anyway, it's a really fun tutorial today, so let's get right to it!

You Look Marvelous: Fantastic Facial Enhancement In Lightroom 3

1024x768 - You Look Marvelous OK, everybody knows I'm a big fan of Lightroom, especially Lightroom 3. I was playing around with a few new features and literally tripped over the technique I'm going to show you today. 

I was playing with the adjustment brush trying to figure out a way to locally retouch and enhance parts of the subject's face.  I was working with the clarity and sharpness slider even combining both of them to see what kind of result I could obtain.

I was reasonably happy with the result but was having difficulty applying the effect as accurately as I wanted. That's when I had my "eureka moment." Somehow the exposure slider got moved very far to the left and the brush application, all of a sudden, got very weird.  I had these black splotches all over my image!  But, I could accurately see where I was painting.  When I returned the Exposure slider back to normal what remained was my very accurate facial enhancement to my subject - very cool.

Why not hit the PLAY button below to see exactly what I'm talking about.  The second part of the tutorial also shows you a "Plan B” to get the same great result.  You're going to like this one.  Enjoy!

________________________________________________________

Right now I've got to get moving.   I have one of my favorite clients stopping by to fine tune the album selection for her son's Wedding. It was a fantastic party and it will be a blast to design the albums. The wedding took place in Vail, Colorado - it will be nice to catch up with mom this afternoon.

Everybody have a great time with everybody that comes into your life today. I remember a piece of advice I heard many years ago, "The best way to have a great day yourself is to help someone else have a great day too."

Hey everybody,  see ya’ tomorrow!

-David

Tuesday, February 16, 2010

Technique Tuesday: Test Driving All The New Features Of Viveza 2

Good Morning Everybody,

Deck View It seems no part of the country has been exempt from snow this year.  We just got hit with 9 inches or more of the white stuff all day yesterday with about 2 more inches expected today.  This is a view out our back door to our deck. I love the snow so LaDawn and I are planning a snow photo walk later today. Now where are those boots?  ;~)

Test Driving All The New Features Of Viveza 2

Hey gang, I'm really fired up today.  I just received my brand new copy of Viveza 2, loaded it up on the computer, and ran it through it's paces.  Wow!!! Is this a cool piece of software or what?  I love it.  It's easy, intuitive, and fun to use.

Viveza 2I know, lots of folks are going to be wondering what’s new in Viveza 2 - here is the quick list:

  • Global adjustments - All the adjustments that were previously available in Viveza 1 are now available in the new interface and give the user the ability to apply them globally.

  • "Structure" adjustment slider - this slider brings a brand new tool to the table that lets you adjust localized contrasts.  You might think its like Lightroom's "Clarity" slider but it is different enough to warrant a look.  I like the effect if gives to the images.

  • Viveza2a "Shadow" adjustment slider. I know what you're thinking, "Lightroom already has a "Shadow" adjustment."  You're right but now you can apply the adjustment locally with Viveza 2 - a great feature.

  • You can now group and ungroup the "U-Points" you've placed in your image so making an adjustment to one of them controls all the others you've grouped with it.  This is very handy particularly if you've duplicated several across the area of your image and need to tweak all of them just a bit for your final result.  This new feature speeds up the process for you.

  • Curves adjustments now available, too.

  • Works in Adobe® Photoshop®, Adobe Photoshop Lightroom®, and Apple® Aperture®

In today's tutorial, I'll run you through all the new features. OK, I have to admit, I was having a little too much fun with Viveza 2 and the tutorial runs a little long.  You just might want to view it in two sitting.  A better suggestion - skip tonight's edition of "Entertainment Tonight" and just tune in to my Viveza tutorial.  Hit the PLAY button below and enjoy the show!

What did you think - pretty cool, eh? I highly recommend NIK's new Viveza 2.  Remember, you can head over to NIK's site and download a 15 day trial [link].  It's definitely worth the test drive.

Want to read more?  NIK is featuring 6 short 1-2 minute tutorials right here. Also, check out Ron Martinsen's review right here. Read what blogging buddy, Scott Kelby has to say when he featured Viveza 2 in his Gonzo gift guide too right here.

_______________________________________________________

Hey gang, that's it for me today.  We've got to shovel the walks, throw some salt, and dig out the cars.… I love winter.  See ya' tomorrow for another episode of PhotoFAVS Wednesday.

Tavvauvusi (“That's Good Bye Everybody” in Eskimo),  -David