Wednesday, December 31, 2008

"A Quiet Moment"

"A Quiet Moment"
©David A. Ziser

This is another image I came across during a recent "hard drive" cruise of our 6 Tera-bytes of data at the studio- yep, 6 Tera-bytes and I've only been RAW the last 9 months. I have no clue how many images I have on our system, but it is quite a lot and I love looking back over some of my earlier images. This is one of those earlier images made back in my film days shortly before starting our migration to digital in 1999. Anyway, it was taken at the Phoenix - another favorite wedding venue in Cincy. The couples love the beautiful staircase here. The architecture really lends itself to some great wedding shots. Camera specs: (to the best of my recollection) Hasselblad camera fitted with 50mm Distagon lens, F5.6 at 1/20 second, Kodak Vericolor 800 film.
Enjoy! -David

Wednesday: Analysis of A Wedding Shoot Part 5

Good Morning Everybody and Happy New Year's Eve,
Wow, I feel a whole lot better today than these last few days around here and am getting fired up for the new year! Well, can you believe it- LaDawn and I are heading out on yet another trip super bright and early this morning. We are heading to Orlando, Florida to bring in the New Year and work some more on my wedding book. My deadline is the end of the month so I've really got to get a lot of the major editing wrapped up on this trip. I'll continue to keep you posted.

Being in Florida allows us to give a little different look to some other projects, Tour plans and studio procedures I've got lined up to review for the next few weeks - at least that's my hope. Anyway, I took a little break from my series, The Analysis of a Wedding Shoot during all the holiday happenings - but joyfully it is back again today. Hope you enjoy it. Off we go...

Analysis Of A Wedding Shoot: 5 More steps for shooting “Altar Return” and Limo Photographs:
A few weeks ago I discussed basic group shots you need to take of the wedding party, families, and friends. This week, we want to add some sizzle to that series of images. I call them my “Signature” images – a short series of images that are definitely a part of all of my wedding coverages. These images signal the style that my clients seek out and have become familiar with DAZ Photography over the years. Let’s hit it with 5 more steps for shooting the “Altar Return” images.

1 -- These images usually include compositions that are quite more dramatic than just standard wedding photographs. The first one is a back-lit aisle photograph. My assistant simply gets about 12 feet behind the couple, with a flash about 4 feet off the ground and points the flash at their shoulder blades. I've actually covered “Backlighting” in an earlier post here at Digital ProTalk – here is the link.
2 -- Next, I'd like to get a couple great photographs of the bride and groom within the beautiful surrounds of their magnificent church. We move about two thirds of the way back down the center aisle towards the back of the church. Here I set up a few more dramatic photographs -- dramatic because of the composition. I want to show the bride and groom in this wonderful location. I only allow myself about six or seven minutes for these images. Once I've captured the images were heading outside the church.
3 -- My assistants and I are pretty well rehearsed at this point, my assistant is grabbing the gear, and we are making our way outside the church first so that I can get a shot of the bride and groom as they come down the church steps. My assistant knows to be behind the couple and I quickly shoot off a few more photographs.

4 -- The next shots I need to capture to continue the wedding day story is inside the limo series. Once they are seated in the limo, I peek in the back door of the limousine, ask the bride to fall into the groom's arms, have them both looked back at the camera giving each other a big hug. This is my last photograph before they drive off.
5 -- Next, if I can, I try to get one more photograph of the front or the rear of the limousine in front of the church building. This basically wraps up the ceremony coverage and the next images I'll be making will be at the wedding reception.


Folks, I tried to move through this fairly quickly but, it still gives you a pretty good idea what I'm trying to capture in those last few minutes I’m with my clients before heading for the reception. I work quickly and try very hard not to detain the couple more than about 10 minutes for these images.

Check in tomorrow for my New Year's wrap up here at DigitalProTalk.com.

Tuesday, December 30, 2008

"Taking A Break From The Party"

"Taking A Break From The Party"
©David A. Ziser

I ran across this image as I was cruising through some wedding images over the weekend. I had forgotten I had taken it, but loved it when I saw it again. It was made at one of our most popular venues - Drees Pavilion - here in the Cincy area. The really cool thing about this venue is the fact that it over looks the entire Ohio River valley giving great opportunities for capturing some wonderful photographs. It was a hot July evening and some of the wedding guests had stepped outside to enjoy some fresh summer air and take in the view. I thought if I added a little light to the scene, I could pull off a great shot. The rest is history. I had my assistant line up in front of the crowd, pointing the flash back to me. I selected a shutter speed and aperture that would capture the effect I wanted and made the exposure. I love the contrasts, the long shadows, and the colors of the city in the background - I got just what I wanted. Camera specs; Canon 30D fitted with 17-85mm IS lens at 17mm, F 5.6 @ 1/8 second, ISO 1600. Enjoy! -David

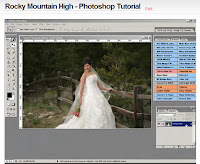
Technique Tuesday: Revisiting A Classic - Rock Mountain High

Good Morning Everyone,
I know, I know - what happened to that tutorial on "Finding The Light" I've been talking about? Well, it just wasn't meant to be today. I woke up with a major "bug" yesterday, spent 3 hours in the doctor's office and pharmacy and was down most of the day.
I thought I would just put together a quick substitution, but then was reminded by my very sore throat that I could hardly talk. LaDawn suggested I do what network TV does when they run into content issues or when Letterman or Leno are under the weather, on vacation, or out of town on a gig - run a re-run. Oops - Encore presentation!

I stressed about the suggestion, fretted about the impact here at DigitalProTalk.com - Would my readers leave in droves claiming that, "Ziser just runs the same old stuff, let's see what's happening over at the Strobist?" No, no - please don't go!!!

I wrestled with my decision, but then heartbroken decided to take her advice. Hey, it sure beats a "No Blog" Tuesday, doesn't it? So today, I give you "Rocky Mountain High - the Director's cut." Well, it's not really a director's cut, but it's still a terrific episode.

Why am I running this episode? Because it represents a very early episode which many of you more recent readers may not have had an opportunity to view. It's one of my first Technique Tuesday posts and had a very low view count. Secondly, it covers some really cool Photoshop techniques which we use around the studio nearly everyday. And thirdly, because I truly need to get some rest ;~) Doctor's, not to mention LaDawn's orders!

Anyway, give it a watch, even if you've seen it before - it's still great information. On that note gang, I'm out of here. The doc says I should be fine by tomorrow, so I'll see you then for another episode of "Analysis of a Wedding." See you then, -David


Monday, December 29, 2008

"Mountain Magic"

"Mountain Magic"
©David A. Ziser

This image was made on our recent trip to Asheville, North Carolina. We were visiting the Biltmore Estate and had just completed touring the home and decided to stroll the outside gardens and surrounds. The late afternoon filtered sun coming in from above and behind the mountain ridges with the mountain mists just starting to settle in the valleys was adding very interesting tonalities to the Blue Ridge Mountains in the distance. It was the graduated, almost monochromatic tones complimented by the gentle curves of the ridges themselves which works so well in this composition. Looking closely, you can discern the individual trees lining the tops of each ridge. I loved the scene. Camera specs; Canon 5D Mark II fitted with 70-300mm IS lens at 300mm, F8.0 @ 1/2000 second, ISO 800.
Enjoy! -David

Quick Hit Monday- Master Class News; Short Wait List For Canon 5D Mk II; How To Use 5D MkII Video Feature; Free Presets and Actions

Good morning everybody,
Well, I hope everyone made it through the first phase of the holidays. Now if we can all make it to the New Year, we will be home free. Things are a little slower at the studio. We always take this time off to catch our breath, regroup, and get ready for a brand new year. Things will be pretty much back to normal at DigitalProTalk too so how about on with the news…

Conversations/Discussions, and Insights- Oh My!
Hey gang, I just wanted to say thank you for the great response to my post Conversations/Discussions, and Insights that I posted last Wednesday. Here is the link again. That’s what I was hoping would happen.


By reading though all the comments from our DPT readers we were presented with a wealth of ideas and perspectives on the subject. Thanks to all who contributed to the post. We will have to do that again soon. I’ll fill you in on what I decide my shooting strategy will be as soon as I continue to fine tune my process.

My Very Popular Digital Master Class – At The Best Price Possible
I’ve mentioned my Digital Master Class [link] occasionally over the last few months. Here's the deal – we are also trying to help with this country’s economic stimulus package too and are holding the cost to $795 for a full week of eating, sleeping, and breathing digital photography, Lightroom and other magic bullet software solutions, business building and more.

After January 1, 2009 the cost will be $895. So give the studio a call at 1-800-292-2994. If we are out, leave a message and Jennifer will reserve your seat at the $795 price. Next week, that price ($795.) will be gone forever.

Tired Of The Long Waiting Lists For Your New Canon 5D Mark II
Wait no more, or at least, don’t wait so long. Someone asked me in a post how I had gotten my Mark II so quick. Everybody else had the super long wait lists so I just gave my buddies at K&R a call.

K&R Photographics is run by my buddies Rob and Wilma Kumler literally just minutes down the road from me about one exit away. They are one of the biggest Hasselblad dealers available dealing with all that high end photo equipment. I got my first Hassey from them many years ago. Anyway, they just became a Canon dealer earlier this year – hence no long waiting lists for the camera. Give a call at 859-341-6986 and see if they can shorten the wait for you too.

Canon 5D Mark II Tutorial On How To Use The Video Feature
And speaking of The Canon 5D Mark II, check out this handy tutorial I found over at 1001 Noisy Cameras. This is like a twenty minute lesson but covers a lot of the camera settings to get the most out of this new camera feature – worth a peek - here is the link right here.

Free Lightroom Presets and Actions From Epic Edits:
I got an email from fellow blogging buddy, Brian Auer over at EpicEdits.com. Brian runs a very hot site covering a lot of different and interesting topics ranging from shooting film (must be that San Diego sun – just KIDDING!!!) to setting up a project to create a resource for free presets and Photoshop actions [link].

I opened the email late so I’m just getting the news out, and I’m afraid, a bit late. But, hopefully, the Preset/Action goodie basket is worth a peek. He did a review of a very cool action submitted a week or so ago – check it out right here.

Hey everybody, that's it for me today. But, don't forget to check back tomorrow for Technique Tuesday -- Finding and Seeing the Light. (If the weather holds, that is.) See you then, -- David

Thursday, December 25, 2008

Holiday Wishes From DigitalProTalk

Merry Christmas

Merry Christmas
Good Morning Everybody,
Let me extend from the bottom of my heart, Christmas wishes to each and everyone of of our DigitalProTalk readers every where in the world. May your holiday be filled with peace, joy, and love. May you find some time today just to catch your breath, pausing the world around you, if only for a moment, to celebrate the goodness of this day regardless of your faith, background, or beliefs. Again, may you be filled with peace and joy this day. Merry Christmas, Everybody! -David

P.S. We will be taking tomorrow off as well to spend time with family, friends, and loved ones. Be sure to check back in next Monday and we start to wrap things up for 2008 and get ready to kick things off for 2009. I'll see everyone then. Have a great extended weekend and just remember, pixels are counting their calories too during the holiday season. See everybody on Monday, -- David

Wednesday, December 24, 2008

"Madonna and Child"

"Madonna and Child"
©David A. Ziser

This is an image I made of a mother, one of my brides, and her newborn baby just a few weeks ago. I thought is was a good post for today this being Christmas Eve and all. I love the shot because of the tenderness and feelings from the mother and she softly caresses her newborn innocent babe. The expression, composition, and subtle tonalities were enhanced in Photoshop to draw viewer's' attention to the gentle interaction of the mother and the baby. I think it works well. Camera specs; Canon 40D fitted with 100mm Macro, F 11 @ 1/80 second, ISO 400.
Enjoy! -David

Wednesday: Shifting Gears On Christmas Eve – Business Day Thursday On Wednesday - Saying Thank You To Your Clients

Good Afternoon everybody and Merry Christmas Eve,
Many of us are at the height of the holiday season celebrating and enjoying good cheer with all of our family and friends. And that's all good. This post was for Business Day Thursday, but since tomorrow is Christmas, I thought it would be more appropriate to post it today on Christmas Eve.

I was thinking how I could make this post not too much business but still a beneficial post for our Business Day Thursday on Wednesday. Here is what I've come up with.

I thought I would you share with everyone what we do at David A. Ziser Photography during the holidays. You know, we should all take time to sit back and reflect about our successes and the reasons for those successes in our business each year.

The easiest way we can do this is by saying thank you to our clients. And, the easiest way to say thank you around the holidays is to send a holiday greeting card. I have been doing this for a number of years here my studio.

Hit The Read More... link below for the rest of the story.

Here's how we go about doing it. Our holiday card list is composed of three groups.

Group 1: Long-term clients. This group represents our best clients; clients that have been doing business with us for a number of years. This group also reflects clients that continue to recommend us to their family and friends. This is a very important group to stay in touch with. This group gives our business continuity year after year. Many of our clients in this group have been receiving holiday greeting cards from us for a very long number of years.

Group 2: Current clients. This group is pretty self-explanatory. It includes clients that are active -- a client whom you are in the process of working with and still in the process of delivering their final order. This group also includes all clients that have done business with us in the current year and clients, particularly wedding and bar bat mitzvah clients, that have you booked for an upcoming event in the future.

Group 3: All your vendor buddies. This is a super important group for your business. It's your vendor's who grease the wheels helping you provide great customer service to your clients. Our vendor list includes everybody we do business with. There may be some instances where we don't do business with them very often in the course of the year but they're still on our list. Basically, any vendor that has been active with us within the past three years is part of this group.

We review and update the entire list every year. We verify the names of all the contacts and their current addresses. Once we are sure that our list is complete and accurate, we run the labels.

Holiday cards are just off the rack cards that you can pick up at any retail location, but are always the best. It's important to me that these are some of the best looking cards that are clients and vendors will receive.

You may be wondering why we just don't order preprinted cards with the studio's name printed right on them. Well to me, this is what makes our holiday card-sending project special. Each card is personalized with a thank you wish to each of our clients and each of our vendors together with a wish for them to have a great new year. The card is then personally signed, sealed, and delivered to the post office.

I think, psychologically, what this does for the studio, is that it gives us a sense of appreciation for our clients and our vendors -- the clients and vendors who support us. It also makes us pause, if only for a moment, and recall that connection with that client or vendor. It's these connections, these relationships, which any successful business needs to maintain in order to continue their success and grow their business.

Yes, it seems like a hassle to get these out right in the middle of the holiday rush - we sent out 300 this year - but, I think it's vitally important to say thank you to our clients and supporters as many times as we possibly can in the course of the year but, especially during the holiday season.

Just another food for thought.

Merry Christmas, Everybody, -David

Tuesday, December 23, 2008

"Radiant Splendor"

"Radiant Splendor"
©David A. Ziser

This is another image I made during the Bat Mitzvah service I photographed a few weeks ago. I had just picked up my new Canon 5D Mark II and was stoked about putting it through its paces. One thing I wanted to try were a few shots with my Sigma 8mm fisheye lens. On the full frame Canon 5D Mark II, it would render a circular image. Since I could shoot at higher ISOs with the new camera, I was able to take the image at F8 -- the sweet spot of the lens -- and get a much sharper image. I cropped the final image square and loved the finished result. Even though I threw away one-third of the pixels, I still had 14 mega-pixels left after cropping with which I could still print a great image. Camera specs; Canon 5D Mark II to fitted with Sigma 8mm Fisheye lens, F8.0 @ 1/30 second, ISO 3200. Enjoy! -- David

Technique Tuesday Again: Conversations, Discussions, Questions and Insights

Hey Gang,
I wrapped with my clients about 5 p.m. The ice storms just hit Cincy and things are a mess on this Christmas Eve Eve. Anyway, my clients just left - I hope they travel safe, another just showed up to pick up a gorgeous family portrait, and I just hit the keyboard with this new idea - Conversations, Discussions, Questions and Insights.

Give the video a watch, post you feed back, and let me know if we can go anywhere with this interactive concept. Now it's time to check in with the real world - LaDawn, Christmas, & Law and Order on TNT ;~) See ya' tomorrow. -David

Technique Tuesday: Something New Happening Later Today - All The Pixels Willing

Good Afternoon Everybody,
Whew! Things are jumping a bit too much this time of year. We celebrated Christmas yesterday with LaDawn's family and got in late last night. Early morning holiday responsibilities took us both up to 12: 30p.m. today. And, I've got a client arriving in 30 minutes - no time to get the Technique Tuesday organized that I had planned. Plus the weather dropped to 5 degrees Fahrenheit which negated my outdoor tutorial.

Anyway, Plan B popped into my head last night over a late night cap - so it was a great idea - and I can't wait to give it a go today. It's something a bit different but I think still pretty cool. That's the good news, the bad news is that I won't have the opportunity to produce the post till later today - probably late, late this afternoon. Anyway, check in again, check it out, and let me know what you think. Got to go, clients due any second. See ya' later today, -David

Monday, December 22, 2008

"Hanging Out In Winter Wonderland"

"Hanging Out In Winter Wonderland"
©David A. Ziser

I made this image at the Bat Mitzvah I photographed last weekend. This party was a pretty big deal and quite a bit of planning had gone into the theme and all the preparations. The setting was to be a Winter Wonderland and I think it was pulled off beautifully both in lighting and decor. Of course, my job as a photographer of the event, is not only to capture the guest of honor, in this case are beautiful Bat Mitzvah girl among the surrounds, but to also capture the magnificence of the room (tent) and decor.

Once again, I used my magic Z-Ray lighting technique to make the shot. I positioned my young subject among the beautifully created wintry surrounds for the best composition. I next determine the exposure for the scene and then adjusted the distance of the Z-Ray flashlight to spotlight our subject consistent with the overall exposure of the scene. Camera specs; Canon 5D Mark II to fitted with a Sigma 12-24mm lens at 24mm, F6.3, 1/30 second, ISO 3200.
Enjoy! -David

Quick Hit Monday: What Recession; Canon 50D Review; 50 Photography Photoshop Tutorials

Good morning everybody,
Well we made it back to Cincy late yesterday afternoon - a much easier drive if you blow off the scenic route at midnight over the mountains in the fog as we traveled last Sunday making our arrival into Cashiers N.C. We woke to the first sunny day all week and a gorgeous drive home.

Things are revving up for the holidays around here so I'm making it short and sweet today. The post is
not necessarily holiday related but still a good read and a little giggle along the way. Enjoy!

Recession, What Recession – Seen The Price Of Cameras Lately?
Wow, I hear about the recession every day on the news but have you checked the prices of cameras lately? I caught this story over at 1001 Noisy Cameras last week but it still makes me smile as I read it. It seems that the Canon 5D Mark II has been selling at a premium price because of its limited availability at several places on the Internet. Check out the whole story right here.

And speaking of
high prices, our intrepid newshound at 1001 Noisy Cameras, also posted this hot deal from Willoughby's camera [link]. Wow, at $12,700 for the camera bundle -- what recession?

And did you see
this one over at You-Tube where an infamous face of yesteryear looking forward to his new Nikon D3x but was shocked when he saw the price of the new camera. Here is that link. It's pretty funny and I think you'll get a giggle out of it. Thanks to DigitalProTalk reader, Doug Peek for the heads up on this one.

Still Need Christmas Ideas – How About A New Canon 50D
Christmas right around the corner and you still don't know what gift you're going to get your wife or girlfriend? Well, you can read the latest review on Canon's new 50D camera over at Photography Bay. Here is the link. Need some more information on the camera? Here is more info right here. That should help you make up your mind for this gift giving season and heck, she might even let you borrow it now and then.

One for the Road -- 50 Photography Photoshop Tutorials
Hey gang, before I hit the road let me point you to this link over at Smashing Magazine -- a terrific blog by the way -- where they have listed 50 photography Photoshop tutorials [link]. These aren't your junk run-of-the-mill tutorials but a great series that you can really sink your teeth into. Just consider this link a little gift from me to you this holidayseason;~)

Hey
everybody, that's it for me today. We are celebrating Christmas with LaDawn's family this afternoon and evening and Chef Daveed Arnold is doing the cooking - watch out Emeril, where ever you are, because I'm kickin' it up two notches!

And, don't forget to check back tomorrow for Technique Tuesday -- Finding and Seeing the Light. See you then, -- David

Friday, December 19, 2008

"The Old Sentry"
©David A. Ziser

I captured this image yesterday while we were visiting The Biltmore House in Asheville, North Carolina. Although there were some wonderful mountain vistas all around, I was taken by these craggy old trees in the valley behind the house. Something about the textures and colors were intriguing to me. This one tree in the foreground was the biggest and appeared to be the oldest and most weathered compared to its younger siblings in the background. I also liked how the last vestiges of fall, the last few leaves on the trees, were still clinging to their winter counterparts. Camera specs; Canon 5D Mark II fitted with 70-300mm IS lens at 140mm, F8 @1/100 second, ISO 800. Enjoy! --David

Gear Bag Friday: The Case For The Room Light; More Copyright Issues; and First I Was Lost and Now I Am Found

Good Morning Everybody,
Ahhh, fresh air, sunshine - yep, LaDawn did drag me away from the computer yesterday. We took the day off and headed to Asheville, NC to visit the Biltmore House, the largest private residence in the world. I was ready with camera in hand, approached the large front entranced, and saw the sign - No Photographs! Seems this place is Copyrighted too according to the picture police - unbelievable!

Anyway, we did have a nice tour and got some great shots around the exterior of the property. And, yes, those are the Blue Ridge mountains I've been looking at. Oops - I've been calling them the Smokies all week. But hey, yesterday was the first day the fog lifted, we actually saw blue skies occasionally and it was my first day out of the cabin. I finally got a chance to see where I am;~) How about another peek inside my never ending gear bag...

The Case For The Room Light
You know, when you look at many wedding photographs, particularly wedding reception candids, the illumination is far too often, flat and two-dimensional. The main reason for this is because so many photographers are just relying on their on-camera flash to supply the illumination on the scene.

Granted, some photographers are using the fill flap on their on-camera flash or, even adding some larger fill flaps and light adapters to their on camera flash. Folks, I'll say it again now as I’ve said a million times, unless you get the light off of the camera -- let me rephrase that, unless you get the photons coming from a direction other than the direction of the camera is pointed -- you will never create detail, depth, and dimension in your lighting.

Last week I discussed how I use my off-camera flash to create that wonderful three-dimensional effect in my lighting. And, that off-camera flash works great in most situations. At a wedding reception though, I want my light to have even greater detail, depth, and dimension to it. And the only way I’ve found to be able to accomplish this in some really large reception venues is to add an additional room light to my lighting setup.

This is easily done and the cost for that room light does not have to break the bank. I prefer to use inexpensive studio lights like Paul Buff’s Alien Bees or White Lightning flashes. As I said, they do not break the bank budget wise and are really effective at the wedding reception.

Regardless of what flash unit you decide on for your room light, I would suggest at least a 400 to 600 watt-second unit. When using a studio light of this power at the reception, you will most often have the power setting turned down to half or maybe even one third power. This gives you very quick recycle times that can keep up with the rapid firing of our DSLR’s as we quickly follow the action at the wedding reception. The above fisheye shot shows the relative locations of my assistant on the right and the room light in the upper left corner.

I can remember another studio light I used years ago as we were transitioning to digital. As I revved up my shooting speed at the wedding reception because of mighty motor driven digital SLR, I found that this particular unit simply could not keep up with the rapid shooting speed of the digital camera and was constantly blowing its fuses.

So, be sure that your unit – which ever one you decide upon - has a fast recycle time and is not blowing fuses as you're covering your wedding reception.

Take a look at the images accompanying this post and you can see how much the room light adds to the overall look and feel of the wedding reception candids. Notice how much more depth there is in the lighting particularly when looking at the larger overall views of the reception. Even in the cake cutting photographs, and you can see that guests are still illuminated in the background because of the room light. The room light basically, helps us avoid what I like to call the "Black Hole of Calcutta" reception lighting. In the "Black Hole of Calcutta lighting," we have the subject in the foreground nicely illuminated but then everything goes very dark in the background. The room light helps us avoid that situation giving a much better look to our images. I even like how the room light adds a bit of accent light to the scene too. Now here's some good room light news. I've always said that the way to create more business for ourselves is to constantly be differentiating ourselves from the competition. As I present the programs to photographers around the country, I always ask how many you are using a room light for their wedding receptions. The answer unfortunately is that most do not.

So for the photographer using the room light, he/she brings a substantially nicer look to his/her wedding photography. This becomes one of the BIG differences that allow his/her images to stand head and shoulders above the regular wedding shooter.

When your clients are selecting you for your “differences” chances are they will pay a little bit more for those “differences” as well.

Just remember you can charge more for Differences in this profession than you can for Samenesses.

Hey gang, that's it for me today. I better get back to working on my book -- deadlines are approaching -- and so are the holidays. Everybody have a great weekend and I'll plan to see everybody next Monday the pixels willing. See you then, -- David

Thursday, December 18, 2008

"Quiet Majesty"

"Quiet Majesty"
©David A. Ziser

How about one more image from 20,000 feet? This image was made soon after we lifted off from Cabo, Mexico heading for home. The simple play of the clouds on the water was the first thing that intrigued me about the view. The other, and more important aspect of the image was the softness of the spread of the sunlight on the water. It wasn't too bright - it was just right to keep the detail and textures in the water. The monochromatic feel of the scene adds to the quiet feeling I was sensing as I was composing the picture. All in all, I find the image a tranquil rendition of the ocean's quiet majesty. Camera specs: Canon 40D fitted with 18-200mm IS lens at 28mm, F 8.0 @ 1/2500 second, ISO 400. Enjoy! -David

Thursday: How Do You Present Your Work – Cafeteria style or Fine Dining Style?

Good Morning Everybody,
Day 4 in the Smokies and I'm still locked to the computer. LaDawn is dragging me out today for a little fresh air and a little sight seeing - I think I could use it today.

On a different note, I was up early this morning trying out the video capabilities of my 5D Mk II. Here is what I'm thinking - this camera would be great for creating some upcoming Technique Tuesday episodes.

The camera captures in Quicktime/MOV format which my latest version of Camtasia 6 will now accept. That means the edit should be quick and easy. My first tests were really encouraging. I'm going to give it a try for next week's Technique Tuesday so stay tuned. Anyway, how about we get on with Business Day Thursday - it's a really good one today.

How Do You Present Your Work – Cafeteria style or Fine Dining Style?
Two weeks ago, as you know, LaDawn and I spent a week in Mexico with our friends Kent and Sarah Smith. It was about midweek at the end of the day when Kent and I got ourselves a glass of red wine and headed outside onto the back patio to watch the stars and discuss business in general.

Whenever we get together we are always talking about our businesses and how to fine tune both the production and selling aspects of them. This particular evening we got talking about sales, and how his staff prepares for a sales session at his studio. The gist of that conversation is what I want to share with you today.

Most photographers go out shoot to photograph high school seniors, family portraits, wedding photographs, babies, executives or whatever. Once those images are out of the camera and onto the computer, the photographer has to decide what kind of presentation he's going to make to his client of those images.

For many photographers, it's simply getting them posted online, letting the client make their choices, place their order, and then deliver the finished images. By the way, two week's ago, in my post, “Are You Doing Your Customers A Disservice and Cheating Yourself As Well?" I discussed that this was probably not the best way to maximize the impact of your images or your sales with your client.

Some photographers may present the images in some kind of a proof presentation. But, as I said last week, unless we are proactively involved with our clients in the sales process, expect the sales to go nowhere.

The main reason for this lack of sales, both in the Internet proofing and what has been called the proof pass for a number of years, is the fact that the client really has no way of knowing what all the different image possibilities are and in what various means they could enjoy their photographs – they are only picking out pictures, but never any product!

Anyway, as Kent and I were talking, he says, "You know, it's not the time it takes to photograph the subject that takes up most of our time at my studio. Most of our time is spent editing the images and then creating our list suggestions for how the client might use and enjoy the photographs."

It was that remark that struck me. What did he mean creating suggestions for his clients? What kind of suggestions was he making to his clients? How can making these suggestions anyway enhance the final sale?

If you think about it folks, many photographers just shoot the photographs and get them in front of the client eyes without much ado about how to sizzle the photographs and their presentation. This is what I call the cafeteria approach to image presentation. And you know when you shop for food in the cafeteria, it's not about the food presentation, it's not too appetizing, it's fast, and it's usually less expensive then available at other fine dining restaurants.

Kent and I discussed how his staff not only does a tight edit on those images but, it's also the photographer’s responsibility to shoot their images keeping in mind many of the products that his studio offers. For instance, if they've photographed an entire family, additional photographs would be captured of the children individually, the children together, mom and dad together, and any other combination that they feel really gives a good coverage for the family portrait session.
During a senior session the photographer may purposely move to a softer background and softer lighting that better enhances the painterly effect they often create for their clients.

Now, what to do with all these photographs? Several are converted to B&W, some are shown in a painterly fine art presentation, and many are shown in various product templates featuring many of the studio’s best products for this particular shoot.

You get the idea here, I hope. What Kent’s studio does is prepare and then show each of those “best of the best” images from the shoot in their best light and best product possibilities before the client even walks through the door to view the images. So, two things are happening here. First, he's not making a cafeteria style presentation of his images. Secondly, he's found a way via software -- in this case Pro-Select -- to show these images in his studio product line that he feels his clients will love. And most importantly, his staff is proactively involved in the sales process beginning with the photographers during the actual shoot planting seeds of expectation and then showing the full range of product ideas the studio has to offer as they move through the sales appointment with the client.

What's the bottom line? The bottom line is that if we really want to be successful in this business, we really have to give a first-class presentation of our best images and also present the full range of products we sell. We really need to be the fine dining photography studio if we really want to experience our best in sales.

Does this work for my friend Kent Smith? Well, in the course of that conversation he shared with me that for the first time in his photographic career, that his studio will break $1 million in sales for 2008. In these economic times as studio after studio continue to close their doors, I think success speaks for itself.

Food for thought.
Hey gang message for me today. Remember don't be a cafeteria style photographer. Work with the ingredients -- your images – and your product line, and experience a nice up-swing in your sales. I'll plan to see everybody again tomorrow for another edition of Gear Bag Friday – The Case For The Room Light.

Everybody have a great one – David

Related Link:
Are You Doing Your Customers A Disservice and Cheating Yourself As Well?

Wednesday, December 17, 2008

"Street Walking"

"Street Walking"
©David A. Ziser

Another image made while strolling back to our hotel as we made our way along Oxford Circus Street in London, England. The street is one of the shopping meccas of London and is just crammed full of people, stores, colors, and energy. I made this image outside a fashion boutique - I loved the colors, the shape of the building itself, and the juxtaposition of the street sign in the foreground playing against the very interesting composition of the building. I have two versions of this shot, one slightly tilted and the symmetrical version here - my preference. Camera specs; Canon 40D fitted with 10-22mm lens at 10mm, F 4 @ 1/40 second, ISO 1600. Enjoy! -David

Wednesday: Altar Returns - Anaysis of A Wedding Shoot - Part 4; Lightroom 2.2: & Mini Z-Ray Update

Good morning everybody,
Day three down in the Smoky Mountains - the drizzle may finally be letting up a bit today, at least I can see the top of the ridge this morning - so we may get out for a little walk-a-bout today. I'm looking forward to investigating the area.

There are two things I wanted to mention before getting to today's main post. In Monday's post, I mentioned the little LED flash lights - my Mini Z-Ray - I used when making my Cabo three minute portraits. I neglected to mention the color temperature of these little guys. Most LED flashlights work best at the camera's "daylight setting" - 5600K. I actually shot those images at 6000K which was in the ballpark. I've updated the post to reflect the new info.

And, did you hear the news? Adobe just released Lightroom 2.2 which supports Canon's 5D Mark II among others. I've already downloaded the new program and loaded up this past weekend's Bat Mitzvah. Things are looking gooood.

Click here to download Adobe Photoshop Lightroom 2.2 (Windows)
Click here to download Adobe Photoshop Lightroom 2.2 (Mac)

OK, gang are you ready for another episode of Analysis of a Wedding Shoot? Let's get on with Part IV...

Altar Returns - Analysis of A Wedding Shoot - Part 4
Boy, these posts seem to get longer and longer. So, today I want to try to shorten them just a bit. Anyway, let's get right to it. Let's discuss the images I take of the bride and groom, the wedding party, and family members in the front,(alter area) of the church.

Here are my 11 steps for shooting “Altar Return” photographs – Part 1

1 -- Assemble everyone together in front of the church. Be sure that they are not sitting too far forward in the pews or they may be in some of the photographs in smaller churches. I ask everybody to take a seat in the left side pews as we’re facing the front of the church. This allows my assistant to move freely through the pews as he is positioning the off-camera flash on the right-hand side of camera position.

2 -- I mentioned to all the guests that I'm going to be working quickly and I sure would appreciate it if they can hold their photographs until the reception. My goal is to have everybody finished up in about 20 or 30 minutes and then family and entire wedding party can head to the wedding reception. I also mention that with additional cameras firing, some of the wedding party may be looking into the guests’ cameras instead of my camera and that could be quite expensive for the bride and groom because of the additional retouching to get the eyes centered properly.

3 -- Here is the order in which I shoot the groups.
First, the Bride and Groom with the bride's mother and father.

4 -- Bride and groom with bride's mother and father and immediate family with spouses and children family. After photographing the immediate family, I ask the grandparents to join into the group. I always position them in the “matriarchal and patriarchal” position or centered in the group between the bride and groom. Then ask all family members to step aside and just photograph the bride and groom with the grandparents. If there are no additional extended family photographs, such as aunts and uncles, nieces and nephews alone with the couple, cousins..... the parents are free to leave first to attend guests already enjoying their cocktail hour or reception.

5 -- Now repeat the series for the groom’s side of the family. They become the second group released to the reception.


6 -- I typically have photographed the bride with the bridesmaids and grooms with the groomsmen at some point before the ceremony. Therefore, my next photograph is going to be of the entire wedding party. After getting them arranged in a very pleasing composition, my next job is to get the best expressions. I take several of this group, even up to a dozen of images and like to zoom in on the bride and groom coaxing the entire wedding party to give each other a group hug as I do so. The spontaneous expressions are wonderful. The wedding party is then released to gather belongs and load limos as I finish with the bride and groom.

7 -- There may be some other group photographs you might want to take at this point. They may be the bride and groom with their god-parents or, any other special family and friends that may have made the trip to be at the wedding.

8 -- You may even want to get a photograph of the bride and groom with the best man and maid of honor. I typically don't take this photograph at the alter area as I've typically already shoot these combinations earlier in the day but, it does come up as a request every now and then.

9 -- Once I'm finished with the big crowds, I need about seven or eight more minutes to work with the bride and groom alone. The first photograph I take of the bride and groom is a full-length photograph of them together, slightly turned towards each other inside arms around each other and looking back into the camera. This photograph is always taken full-length and always shows the bride’s gown in its entirety. Folks, this is the BIG money shot -- this is the image they will show to the grand kids.

10 -- Now the cool thing is, they're already standing there; we're shooting with our digital SLR with a zoom lenses attached -- so take several more photographs zooming in at various settings to get several additional photographs of the bride and groom from full-length all the way into a tight head and shoulder shot.

11 -- Another very important shot we need to get is a full-length of the bride alone. I simply asked the groom to step aside arrange the bride into a pleasing and flattering pose, be sure my assistant is in the right position, and shoot away. Then once again, I will zoom in and capture several additional images of the bride. This is repeated then for the groom but not quite as extensive shoot as with the bride.

Hey gang, that’s it for today. I’ll cover 5 more steps next week. These will be the “sizzle” shots that really make this part of the wedding coverage sing. So, until then, I’ll see everybody tomorrow for another Business Day Thursday: How Do You Present Your Work – Cafeteria style or Fine Dining Style?

See ya’ then, -David

Tuesday, December 16, 2008

"Last Day On The Beach"

"Last Day On The Beach"
©David A. Ziser

On our last morning in Mexico, LaDawn asked me to go on a sunrise walk on the beach with her. The weather was beautiful and the sunrise was gorgeous. This image was made about 45 minutes after the sun had risen. I love how it is backlighting the waves. I was interested in what kind of composition I would get racked out to 200mm on my lens. I just shoved it out there and explored the long focal length compositions of the beach. This was one of my favorites. The blue water in the foreground, the back-lit wave and water spray, the distant hills, and early morning glow combined for a great landscape image. Camera specs; Canon 40D fitted with 18-200mm IS lens at 200mm, F 8.0 @ 1/320 second, ISO 400. Enjoy! -David

Technique Tuesday: Shooting The Groom; Keeping It Simple, Natural, and Classy

Good Morning Everybody,
Day one turned out to be a pretty easy day down here in the smokies. A light drizzle most of the day still gave a rich, saturated look to the last vestiges of fall color still clinging to some of the trees outside our windows. Because of all the moisture here at 3500 feet, many of the trees have what seems to be a perpetual mossy - a slightly muted green color - look on their trunks. The last time I saw this same moss on the trees was in Scotland about 2 years ago. It really looks cool to see it on so much of the foliage here. I'm looking forward to getting a chance to capture the beauty with a mega-pixel or two this week.

But enough about the weather already. It's Technique Tuesday, so let's get on with the show...

Shooting The Groom; Keeping It Simple, Natural, and Classy
Last week I discussed how I photographed the bride on the wedding day. Well, let's not forget the groom on the wedding day either. I've said so many times in my seminars that we photographers are always concerned about her “bridal” portraits. But nobody ever talks about the “groomal” portraits we need to take.

In this tutorial, I’ll walk you through a series of images I create for the groom on the wedding day. These images are more than just quick snaps of the groom looking straight back into the camera. My goal is to make the groom look comfortable, handsome, and at ease in these shots. Hey, we always make the bride look good – we need to do the same for the groom as well.

I also want to show the groom among his surrounds. So in this tutorial I'll walk you through several images in which I photograph the groom by window light, natural light outdoors, in the sanctuary of the Church, and in many other types of situations. So, sit back and relax, hit the PLAY button below, and enjoy the presentation.

Hey everybody, that's it for me today. Check back tomorrow for another edition of the Analysis of A Wedding Shoot - Part 4. Have a good rest of the day, and I'll see you tomorrow.

Adios, -David


Monday, December 15, 2008

"Street Contrasts"

"Street Contrasts"
©David A. Ziser

Who would have thought some old fallen leaves could look so interesting? Well, they did to me, not just because of the rich saturated colors of the subject matter, but because of the color contrasts once again. Is there a theme here - maybe, because I do enjoy finding these kinds of color contrasts and can be seen in the daily image posts lately. Granted, I did enhance the colors a bit in Lightroom here, but only to emphasize what was already there. I still love the image. Camera specs; Canon 40D fitted with 18-200mm IS lens at 100mm, F 5.6 @ 1/40 second, ISO 400. Enjoy! -David

Updated - Quick Hit Monday: Saved On My Photons, But Went Way Over Budget On my Pixels On Saturday; Images From Hi-Def Video: and My Mini Z-Ray

Good Morning Everybody,
This week I'm going to be reporting from Cashiers, North Carolina. LaDawn and I made what we thought would be an approximately 5 1/2 hour drive down to this beautiful area of North Carolina. Turns out that the last two hours of our trip turned into an additional 2 hours of a "white knuckled" journey through the pea soup thick fog, which "socked-in" the Smoky Mountains. We finally arrived safe and sound about eight hours later, got settled into our beautiful home in the woods, and are both looking forward to a relaxing week of book writing and editing.

I’ve got lots of good information for today, so lets get right to it…

Saved On My Photons, But Went Way Over Pixel Budget On Saturday
Wow, what a great photo extravaganza I had this past Saturday. I don't think I mentioned it last week, but as luck would have it I got my hands on my very own Canon 5D Mark II’s on Thursday. I got a chance to lightly breeze through the manual on Friday. Nevertheless, I packed it with me to my Bat Mitzvah shoot on Saturday.

I couldn’t wait to check out the images so between the morning services and the evening party, back at the studio, I loaded up the images and gave him a peek on my computer. I have to say, I was blown away with the images I previewed.

Just for starters, check out this temple pictorial I did early in the morning before the service. Now check out my super close crop of the same image – it’s unbelievably sharp with nary a pixel out of place. It’s amazing what you can see in a 60 Meg Jpeg. Lightroom still hasn't come out with version 2.2 which will recognize the 5D Mark II files so I was shooting most of the day in Raw and large JPEG. My first surprise was finding that I could only shoot about 470 images on the 16-gig card with those settings! Man, I guess were heading to the 64 gig cards down the road, right;~)

One feature I like about the camera is that it'll let me shoot in a smaller RAW file – at SRAW1 I got a file that was equivalent to the RAW file I get for my Canon 40D. So, what I did basically to save card space, was to shoot all the important family photographs and the group photographs in large RAW and large JPEG and the rest of the images at the smaller settings.

It struck me that the bulk of the images captured did not need to be saved as large RAW files, so I decided to set the camera to the medium raw and large JPEG setting. This gave me a lot more images on my 16-gig card.

When I just wanted to grab some quick test candids, images that were more for me to see how the camera was working, I shot in large JPEG mode only. Even though these JPEG's are 10 Megs big, that setting sure freed up some space on my card.

Here's another cool thing about the camera -- it has three custom settings which you can preset different camera settings. What's wonderful about this is the fact that I basically get three separate cameras all rolled into one package. This is very handy when shooting under various lighting conditions and also effective when switching between my various file size settings. I simply registered them into my custom settings and I was able to work quickly for the entire shoot. Very impressive feature.

The other thing my Saturday experience confirmed for me was the absolutely super low noise at the camera’s 6400 ISO setting. When I run Noise Ninja on these 6400 ISO files, the noise index is actually less than the noise index I get with my 800 ISO images out of my 40D! It's just simply amazing the lowlight capabilities of this camera.

That said, I decided to try some higher ISOs when shooting my family groups and some of the other pictorial images I create at my typical Bar/Bat Mitzvahs. Instead of setting my camera and ISO 400, were I would be normally on my 40D, on Saturday I kicked it up to ISO 1600, adjusted the light output for my off-camera flash and shot away.

Wow! the results were just gorgeous. I loved how the ambient light was picked up in the background and just added so much more to the overall feel of the images. The fact that I was able to shoot at a much higher shutter speed really made life good, too. Since I never shoot on a tripod -- because tripods slow me down way too much -- the higher ISO and a higher shutter speed gave me a wonderful combination of speed and versatility in carrying out the shoot quickly and efficiently.

At the end of the day I had shot about 56 gigs of data and, because of the high ISOs I was shooting, I barely depleted the batteries at all on our flash units.

I've got a lot more observations on the camera, but this post is running long already so I'll plan to get them formalized a bit better and share them with you here at DigitalProTalk in the upcoming days - all good stuff.

A Few More Quick 5D Mark II Hits
Last week I ran a few resolution tests on the Canon 5D Mark II’s 1920x1080 high def video capture. I have to say that I think there are some possibilities here. I'm looking at 12 inch by 22 inch images we printed in-house and I have to say they look pretty darn good. Now let me say, I'm not recommending that we shoot video in lieu of our regular stills but, I certainly think it opens up some great possibilities for shooting sequences, creating a series of JPEG's from those sequences, and laying out some really cool pages in the client's bridal album. Just food for thought.

The Mini Z-Ray
Last week I mentioned I would share with you the light source I used to create my three-minute portraits from Morgan's Restaurant I posted last week. So here it is tiny, compact, and just the right amount of light for high ISO portrait sessions. You can pick up these little powerful LED lights at any hardware store for under 10 bucks. I thought in a pinch they worked beautifully and let us get some really great images during our very brief shooting session while visiting in Cabo, Mexico. Most of these little LED flashlights balance best with your camera color balance set to "Daylight" - I took the shots at 6000K.

Just remember, it's not about having the most expensive gear, it's always about the light, how to find it and how to use it. The bottom line is this -- size doesn't matter.

Hey gang, that's it for me today. I've got to get pounding away at the keyboard in my "Fortress of Solitude" in the middle of the Smokies and really put a good dent in the book this week. So, don't forget to check in tomorrow for another episode of Technique Tuesday: Shooting the Groom. It's another take on what we did last Tuesday. But this week, I'm giving the groom equal billing.


So until tomorrow have a great one and I'll see you then. -- David

Friday, December 12, 2008

"Hot Salsa - 2"

"Hot Salsa Too"
©David A. Ziser

Here is the last of the three minute portraits I did in San Jose, Mexico at Morgan's Restaurant last Saturday. This image is of my good buddy Kent Smith. There was a small staircase next to where we were sitting. I asked Kent to go up the steps just a bit and get comfortable. LaDawn was holding my little halogen flashlight just out of camera range to the left. I had her move a bit more to the left so that Kent's shadow dropped mostly out of the shot - hence the split lighting on his face. I like the split lighting, because in this situation, it brings the subject right out of that rich red background. My favorite part of the composition is Kent's perfect symmetry - dead center - within the composition. Notice too, how his arms create the second part of the X, crossing with the banister on the back wall - all very cool for a portrait. Folks, its always about the composition and lighting - that's what makes this portrait work. Camera specs; Canon 5D Mark II fitted with 24-105mm IS lens at 28mm, F4.0 @ 1/15 second, ISO 5000. Enjoy! -David

Gear Bag Friday: The Most Important Light Of All!

Good Morning Everybody,
Today I have another episode of Gear Bag Friday - Most certainly, I've got to be getting to the bottom of that gear bag before too long, don't I?

Tomorrow is a busy weekend so today is spent prepping the gear and verifying the job details for tomorrow - not a big day, but I still have to get the 'ducks in a row" as they say. LaDawn and I are heading out on one more trip next week. We are heading to Cashiers, North Carolina. Things are pretty well caught up here at the studio and I'm taking the week away to wrap the main body of work for the book. Don't worry, DPT will still be alive and kickin' all next week.

That said, let's hit it with another Gear Bag Friday...

The Most Important Light Of All!
Anyone who has been following DigitalProTalk for any length of time, knows that my gig is getting great lighting on the subject. Most of the time, that great lighting is achieved with my off-camera flash.
Sure, the camera is the most important piece of equipment that I use in shooting weddings, bar or bat mitzvahs, family portraits, or any other kind of photography. But, my off camera flash is the second most important piece of gear I use.

As I've said so many times before, you've got to get the light coming from a direction other than the camera, to create detail, depth, dimension, and color saturation on the scene.

I use my off-camera flash with the light coming directly out of the flash head, or shooting through a translucent 36" umbrella, or even in the bare bulb configuration. Many of these point have been discussed in previous posts at DigitalProTalk already.

Here is a quick listing of my off-camera flash gear:

1 - A Quantum T5d flash head.

2 - Powered by a Quantum 2x2 power pack.

3 - I may switch to the smaller power pack -- the Quantum SC turbo -- at the wedding reception. I also use this smaller pack for any smaller photo sessions for example, family portraits or high school seniors. The flash head is mounted on a Bogen/Manfrotto monopod via a Bogen/Manfroto 026 Swivel Umbrella Adapter.

The flash is fired remotely with Quantum's FW7Q radio receiver attached to it. The Quantum flash head powers the Quantum receiver directly. And, as I mentioned last week, the radio transmitter sits, Velcro’d to the top of my on camera flash - Canon 580 EXII flash.

That's pretty much it. It's a simple setup that gives me great portability, flexibility and speed when shooting any event. Its portability is so very important when I'm on location photographing on location such as a family portrait in the park. My lighting gear is simply, fast, and easy to use.

So gang, that's about it when it comes to off-camera flash. There are several posts right here at DigitalProTalk that describe how I use the light. Let me point you towards one Technique Tuesday post, "Dancing With The Light Fantastic" [link] that I think ties perfectly to this post and should give you a great feel for how I use an off-camera flash and set exposure in the various shooting situations in which I find myself.

If you are interested in an in-depth discussion and demonstration on how I use my off-camera flash, then I recommend that you check out DavidZiser.com, hit the Digital Resource Kit button, and look at the description of my DVD entitled, "Shooting Digital At The Speed of Light". If you're interested in ordering the DVD, just give the studio a call at 800.292.2994 and anyone can give you more information on this DVD.

Hey gang, that's it for me today. I hope you enjoyed the post and I’ll see everybody on the flip side of the weekend. Just remember, photons and pixels are best friends. See you on Monday, -- David

Related Links:
Quantum T5d Flash Head
Quantum Turbo Batteries
Bogen MonoPod
Bogen Umbrella adapter