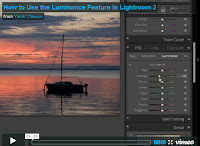
 While on a recent Internet cruise, I came across this short video tutorial which explains in detail, how to use the often misunderstood Luminance sliders in Lightroom. This tutorial was put together by Yanik Chauvin, a professional photographer who runs Yanik's Photo School, an on-line training resource that has some nice gems among it's archives. Hit the link right here for Yanik's Lightroom tutorial. After giving it a peek, take some time to check out his other tutorials too - some great information - way to go Yanik.
Hey gang, that's about it for me today. We are planning to shoot all day today and maybe, if time permits, fit in a Layers TV episode. By the way, RC Conception of Layers fame, was my lighting assistant yesterday for video 3 of the Kelby Training videos. So once again, we are off and running. Check back with me tomorrow, I going to answer the Skribit questions that have been hanging unanswered for a while. See everybody tomorrow. -David

Thanks so much for turning me on to Yanik!
ReplyDeleteI've always been a little confused about when to use luminance vs. saturation. This tutorial has helped to clear it up...somewhat.
That doesn't mean I'm not still confused...that's the state I live in.
I use the luminance sliders a ton, but never had seen a tutorial on them! For baseball, I can make the infield grass a little less "flourescent" looking and tone it down using the green slider and not lose any of the other details of the game. It also helps reduce the shimmer of those Sunday red home uniforms in the sunlight!
ReplyDeleteIt can also be useful if you increase saturation on blue and then reduce luminance to help get a washed out sky to pop a little - depending on the photograph. Sometimes this doesn't work very well.
Now that I've blathered on, guess I'll go watch the tutorial to see if I've been using it correctly :-)
Thanks for the link back David!
ReplyDeleteI really like this tutorial but it got buried quickly since LR isn't (yet) as popular as PS. Thanks for bringing it back from the dead! :)