Friday, November 30, 2007

"A Sticky Situation"
© David A. Ziser

I made this image yesterday while on a walk around the neighborhood down here in Cabo. I really like the simple lines and colors of the cactus contrasting against the very dark background. I find it is a very nice study of nature's simplicity that each of us can see- if we only take the time. More images below in the Creativity 3 article. Camera specs: Canon 40D fitted with 100mm Macro lens, F16 @ 1/200 second, ISO 200. My Quantum radio controlled Canon 580EXII flash supplied the side to back lighting. Enjoy! --David

So Sad It's Friday

Good Morning World,
Yep, today is our last day in sunny Cabo - although as LaDawn and I were sitting on the patio, we were hit with 16 raindrops. They say it only rains seven days a year down here - I don't know if this counts as one of those times but it still was not going to rain on our parade. If you want to follow the trip in more detail, head on over the Dave and LaDawn on the road right here.
Hey, before I forget, let me thanks all who have been linking to the articles these last few days. Whenever that happens, I like to go check out what by fellow bloggers are up to - it's usually pretty good info. Head over to Dave Cross's blog - he is one of NAPP's Photoshop gurus and always has good stuff over at his site right here. Another reader and fellow blogger, Nath Kaplan (who also uses the same tripod head I use in that rare moment when I use a tripod) also some good things posted over at his Photo World site right here. One of my favorite links is right on his front page - it's a link to over 60 Macro photography articles and tutorials. I mention this because it relates to our third "Creativity" article today. Thanks again, now on with the barrage on info, news, photographic items, and inspiration you just can't live without today....

Give Youself Some Homework - Creativity 3

One of the more fun and relaxing things I do when I take the time, it to come up with a self assignment. It never has anything to do with wedding or portraits photography, it's just something I do to get a better understanding of the equipment, color, line, shape, composition...... It's like a deep breath of fresh air - my camera is not pointing at anything it is normally pointing at - it's usually flowers, bugs, textures, colors - not one bride or groom, most often no people to be found.

For me this helps keep the creative juices flowing, both personally and professionally. People jog, do Pilates, work out for their bodies, but what do we do for our minds?? For too many of us, it's plopping down in front of a rerun of "Survivor". Hey, don't get me wrong - I like a little "junk food" TV myself (like Law and Order - why would you watch anything else?). But we do need to squish the brain cells now and then to keep our photographic talents and lives fresh, new, exciting, and challenging.

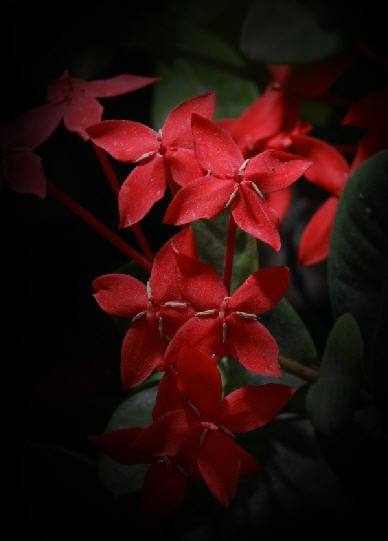
This is exactly what we did yesterday on our walk. I wanted to pick one lens, in this case my 100mm Macro lens - see yesterday's post - but I added this self-assignment. All shots must be illuminated with auxiliary lighting. For me it was creating the direction of light on each subject- in this case mostly flowers and cacti. I wanted to use this single light to establish my own creative context in which the subjects were rendered leaving only the natural element itself mostly removed from it's natural surrounds thereby allowing the viewer to focus on nature's beautiful simplicity. "Sticky Situation" - today's image exemplifies that simplicity. Also, check out the image of the palm frawn below, again beautiful simplicity.

And let me leave you with "Beauty in Blue" - a simple shot of part of a "Bird of Paradise" flower. Simplicity, elegance, beauty - not bad for a little walk around the block. I invite each of you to enjoy the experience at least every few months or so. Hey, that's better than a Pilates workout everyday ;~)

P.S. I'll discuss the technique next week in our "Technique Tuesday" so tune back in then.

An Even More Good Stuff - Three Great Lighting Lessons

OK, OK, I just found out that these Portrait videos were featured over at the Strobist a while back, but I just came across them over at PhotoNovice. They are created by Burt Stephani and he has put together three really good tutorials pertaining to:
  1. Creating "portrait lighting" in not to good "portrait lighting" situations - like high noon sun.
  2. Finding Good backgrounds
  3. More Stuff From 1 & 2
Why am I making such a big deal about these videos?? Gang this is what I do every time I shoot a wedding or outdoor portrait. Mr. Stephani has nailed the technique and produced some great results in not the best of conditions. Let me say it loud and clear - every portrait and wedding photog should watch these videos! One more time, here is he link to Bert Staphani's lighting tutorials. Really, really good stuff!

More Inspiration Than You Can Shake a Stick At - 99 Great Portfolios

An speaking of creativity, you have got to check out the portfolios of some extremely talented photographers posted over at DigitalPhotographySchool right here. This is an amazing collection of work that is sure to inspire. Please give a few of them a look, then "favorite" the list and check back occasionally if you need a quick photography fix. Really good stuff here.

Every Single Thing You Ever Wanted to Know About Photography

All in one place and that place is George Eastman House. They are planning that it will take two years to develop (no pun intended) the site. I think this is a great boon to photographers anywhere. You can get the whole George Eastman House Wiki story right here. And wait, there's more George Eastman House has several podcasts available right here at EastmanHouse.org. You can also check out several of the George Eastman House YouTube videos right here. Give a 6 minute watch to "Ansel Adams - Celebration of Genius" below to get just a taste of their rich content.

That's it for today, everybody. We head on back to Cincy bright and early tomorrow. Have a great weekend!

See ya' Monday. --David

Thursday, November 29, 2007

"Loving Advice"
© David A. Ziser

I made this image years ago on my trusty old Hasselblad camera. It was shot right before the ceremony as everyone was gathered in the bridal room. The original image was a fairly wide angle image of all the bride, bridesmaids, and parents. When I saw the proof, I also saw the real story taking place in the top left hand corner of the frame. I cropped it in close and there it was, a very tender moment of the bride's father leaning over giving his beautiful daughter a few final words of loving advise. The close crop on the image left me with quite a bit of film grain, but I think the grain along with the light flaring a bit in the top left corner of the image adds much more to its storytelling appeal. Camera spec approximate: Hasselblad camera fitted with 50mm Distagon lens, F4 @ 1/30 second, Kodak Vericolor 400 film. Enjoy! --David

A Thoroughly Thoughtful Thursday

Good Morning Everybody,
I have to say, this Cabo visit really has all of us in slow motion. I'm taking a constant "ribbing" from my friends and wife, LaDawn - their mantra - more margaritas, less blogging! All kidding aside here is what is on for today: Part 2 of my "Creativity Series"; some creative insights from master digital artist, John Caponigro; an invite to Matt McGraw's site; and some Christmas goodies, so on with the program...

P.S. Anyone interested in signing up for our Spring Digital Master Class at the 2007 prices should call Jennifer at 800.292.2994 right away. You can get all the info on my Master Class right here.

To Many Choices, Too Little Time - Creativity: Part 2

Pick one, only one lens - don't let anyone pry it from your fingers - and head on out for a few hours shooting. This is one of my favorite things to do when I want to head on out to a relaxing, not for pay, photo shoot. Giving yourself only one lens choice forces you to concentrate on the subject, the colors, the composition - the gadgetry is left behind. Only your attention to the subject remains. It's a good place to be when you are in the creative process. I posted just such an exercise several weeks ago where I used a macro lens for all the shots. You can re-read the "Up Close and Personal" post right here.

My favorite lens for this kind of shoot 24-105 IS, 100mm macro ( boy, I sure wish Canon made an IS macro like Nikon has), 70-300 mm IS, 10-22mm wide angle, and maybe the fisheye. I tried this exercise with the fisheye a few days ago and kept shooting my feet. When we get back in town, I'm going to pick up some extension tubes - then I will really be ready - Fisheye macro photography. Anyway, I hope you get the idea here - it's just fun to play. In a few hours, we are heading out on a walk to explore our surrounds here in Cabo. I'm all set up with my 100mm macro. I'll share a few images tomorrow.

A Master at Creative Imagery

Here is another peek on mastering your creativity by John Caponigro. I get John's newsletter every month although he is planning two quick posts this time around. For some insights, and info on John's creativity, photography, and printmaking go sign up for John's newsletter right here. He has a whole page of articles on creativity right here. A very good short read on the subject.

Some Very Cool Wedding Images From One of the Best In North Carolina

Speaking of things monthly like newsletters and such, Matt McGraw sends me updates to his periodic blog. Man, he really has some great wedding images to show. I don't know how to tell you how to get on his newsletter list, but at least you can check out his images and galleries right here. It's a good visit for a wedding photographer - enjoy the trip.

Only 27 Days Till Christmas!!!


First Christmas Lights
Originally uploaded by seelview

How About Some Free Stuff - yep that's what I said. You can get a whole bunch of free goodies right over here at Adidap.com. They got the tips on how to shoot Christmas lights, gift ideas from inexpensive to pricey for the photog in your life, 300 Christmas brushes and Christmas card templates for Photoshop, even Photoshop templates for your 2008 calendar.

But wait, there's more! - there is even a Photoshop tutorial on how to turn any of your pictures into a snow globe!!! What better way to get into the holiday spirit. On that note, gang, I'm heading out for a bit more sunshine. See everybody tomorrow. --David

Wednesday, November 28, 2007

"Heading Out to Sea"
© David A. Ziser

I made this image on Monday evening while watching the sunset over the capes of Cabo. One cool thing about sunsets, the show is not over till it's over. We sat there for well over 90 minutes watching it's splendor. By the way, I think this is about the most beautiful place on earth at sunset. Camera specs: Canon 40D fitted with 17-85mm IS lens at 85mm, F8.0 @ 1/60 second at ISO 200.
Enjoy! --David

Wednesday - Cabo Musings

Good Morning Everybody,
This is our fourth day down here in Cabo San Lucas (actually, Cabo San Jose - just down the road a piece.) Since I've been away from the regular studio routine for a few days, I'm been musing on a few thoughts on Creativity which you can read below. Along those sames lines, I got messin' in Photoshop and that also led to some more thoughts on the subject which you can also read below. Today's post also wraps up on a few more Fisheye pointers and a great link to some outstanding Senior Photography - and I don't mean old people. Enjoy the read today.

How To Get the Brain Juices Flowing

You know, many of us get so wrapped up in the day to day nature of our studios and our lives, we actually constrict our very own creativity. Photographically, it seems we just move through the routine process and yet, still do a nice job, hopefully exceptional job, for our clients and create good images . Sometimes, we just need to clean the dust out of our mental rafters. Eliminate the routine. Here is the first of three short DAZ tips on doing just that:

Number 1: Point the camera at something you normally don't point the camera at. I'm have been involved, over many, many months, an on-going project showing how the congregants of a wonderful and active faith community here in Cincinnati are involved with their faith and their community. Making over 6000 images over 4 year period of time on this project has been almost liberating creatively. My assignments with the group were not my "every weekend" wedding shots. I was pointing my camera to different faces and different situations. Telling a new story. This allowed me - forced me to see differently and think creatively about what I was doing - I was not allowed to be on "auto-pilot." This got those mental juices flowing. Those images then further resulted in creating six large art pieces, 44x96, hanging at the Wise Center where people can enjoy them everyday. Below are three of the latest examples.It's a cool process - a process I recommend to anyone wanting to clear the cob webs out of your creative attic. Number 2 - tomorrow.

Cabo - Variations on a Theme

Speaking of creativity exercises, here is a little thing I was doing yesterday. We had just returned with our group from a day at the pool. I'm not to much a pool or sun guy, so I just poked around the local with my camera. One of my first images was that of a simple palm tree against the blue ocean - nothing spectacular, just an interesting play of colors and shapes.After getting back to the house, I happened on the image and popped it in to Photoshop. I started "goosing" the colors, and then started changing the color relationships with the Hue slider - (Image>Adjustments>Hue/Saturation.) I found the results intriguing. I leave you to judge the final result - for me, it was just letting my brain go out and play, which, by the way, I think all brains need that now and then.

Fisheye Continued... (technique Wednesday)

More of the same but completely different - that's the topic today. It was a fairly long post yesterday so I'm adding a few more ideas again today. Check out the first image below - I took it at the beach yesterday as I was being chased by the waves. The point was to keep the horizon line dead center as to cause no distortion and therefore not hint that a fisheye lens was being used. Here are three reception fisheye ideas. One from overhead, one from the floor and one, in your face. For the overhead and on the floor shoot, be sure to place the wide angle diffuser over your flash so get get the maximum amount of flash coverage on the scene. For this "in you face pic", I also dragged the shutter - slowed down the shutter - to pick up the ambient light of this fantastic Bar Mitzvah party. Keep the wheels turning - there are a million ideas out there. How about adding you personal images, some Flickr posts, over at the DigitalProTalk Flickr group - remember, add and tag your images with "Fisheye". We will post the best right here. Here is the link to DigitalProTalk's Flickr group. See ya' there.

Heading to SPA, That's SPA - Senior Portrait Artists Meeting

Speaking of creativity - this convention is one of the best opportunities for just a thing to happen. The SPA EVENT brings together some of the most creative Senior Portrait photographers in the country. The meeting this year is held in Tuscon, Arizona from January 20 - 23, 2008. You can get all the SPA info right here. Also, check out this wonderful gallery of images right here to get a feeling about what I'm talking about - for the portrait photographer, inspiring!

That's it for today, Gang - hope you are having a good one wherever you happen to be. Until tomorrow, Adios! --David

Tuesday, November 27, 2007

"Beauty All Around"
© David A. Ziser
I love the "dramatics" of this image created with my Nikon D1x which I owned a few years ago before I made the Canon switch. The camera was fitted with Nikon's Fisheye lens - see fisheye lens article below - exposure was made with the naturally occurring illumination from the lighting in the church. The very low angle picked up what looks like a ceiling panorama of the wonderful decor within this beautiful church. Exposure approximate: F5.6 @ 1/20 second, ISO 800. Enjoy! --David

Hey, It's Technique Tuesday in Cabo

Good Morning Everybody,
I wonder what the weather is in Cincinnati, Ohio today, but heck do I really care? Just relaxin' in the cool breezes and warm sun in a very beautiful part of the world, Cabo, Mexico. But, I did find a little time to get a pretty good "Technique Tuesday" put together. Hope you enjoy the Fisheye article at the end of today's posts - off we go...

Breaking News - Just In!!!!!+!

One of my most sophisticated commercial lighting techniques, featured a few weeks ago right here was just featured again over at the Strobist this morning. This technique may just revolutionize how product photography is done :~) I'm not saying any more than that - here is the Strobist link for the whole story.

Here is 1% of 99% You May Have Missed

Hey, have you seen the latest issue of Photoshop User magazine - the issue with 100 Hot New Photoshop Tips. The tips come from Scott Kelby, Moose Peterson, Corey Barker, R. C. Concepcion, Peter Bauer, Lesa Snyder King, Rick Sammon, Mark Fleming, Laurie Excell, and yours truly. This has always been my favorite issue of an already terrific publication. You know, 70,000 members who receive this magazine as part of their membership, can't be wrong.

For this Technique Tuesday, I'm going to share one of mine. I call it "DAZ Softar". The Softar filter was a very expensive filter for Hasselblad lens, but it gave a beautiful soft effect to the images. Here is how to get a very similar effect in Photoshop. First select a really nice portrait image - someone close up is a good choice. Duplicate the layer and change it's mode to "Overlay". Hit Filters>Other>High Band Pass and set to 10 pixels for starters (try different resolutions for different cameras.) See how the image got a lot sharper. That's because this is a good sharpening technique in some instances. But the next step is the "beauty step" - hit Control-I to inverse the effect. 
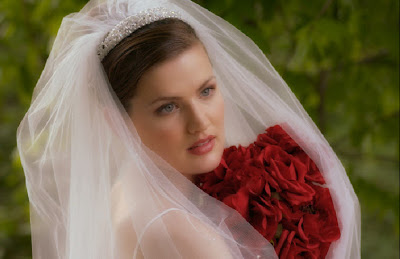
Very cool, don't you think? Just adjust the opacity of the overlying layer until you achieve the softened result you want. What I like about this technique is that you very seldom have to go back in and mess with the layer masks.

Hey, if you want the next 99% of the tips, and you are not a NAPP member, get right over to PhotoshopUser right here and sign up - it's the best Photoshop budget money you will ever spend.

Wow! I'm World Famous

Well, not really, but almost. One of my images was just featured on the cover of an international publication - the Journal of the International Society of Organbuilders. How did my image end up there you ask. Well, Plum Street Temple, one of the most beautiful synagogues in the world just restored their historic 1866 Koehnken pipe organ.

I had taken several images before, during and after the renovation project and actually had the opportunity to meet and get to know the organ builder, Fritz Noack, quite well. Apparently, the restoration was to be featured in the ISO Journal and I was the "go to" guy for the images. One thing lead to another, my images were forwarded to France where the ISO Journal is published, and the rest is history.

It was kind of cool to open the envelope from France and pull out the magazine with my photograph on the front cover. But fame is so fleeting, I'm sure the next issue is in the works and I will soon be forgotten as a great pipe organ photographer. Andy Warhol was so right - everybody gets 15 minutes of fame in their life. So what does this have to do with wedding photography - I do a lot of weddings and Bar Mitzvahs here - and get to hear the beautiful music of this historic organ.

And Speaking of World Religions - JPG vs. RAW Again

Our good buddies over at Luminous-Landscape (one of my favorite sites) have yet another really good article on the subject - good content and well illustrated. Now they are from the tribe of "Raw" and show the the clear advantages over JPEGS - visually, of course. I'm from the tribe of "JPEG" and probably will never be saved. Please, no emails - keep smilin' and enjoy the Luminous-Landscape article right here.

Technique Tuesday - In the Eye of the Beholder - the Beholder's Fisheye, That Is.

OK, I've been a Fisheye lens fan for years. It started when I picked up the 30mm Fisheye for my Hasselblad - only $6000 back in 1990 - what is that in 2007 dollars - oh , about $7400 at B&H today. The digital 35mm versions are only about $750 - boy, do I love digital!!!

This lens is not about big faces and noses like you see a lot over at Flickr. The lens gave a perspective that was so unique and different, it definitely differentiated me from the competition. You had to learn a few tricks to get the best out of it though - don't put the subject too close to the corners or you would create a "Mr. Gumby" stretch effect, the curvature is OK if used creatively, and don't take a picture of your on-camera flash or your feet, just to name a few of the simple yet needed-to-know tricks. Take a look at these few images created with my old Hassy Fisheye - still pretty cool looking. There are two kinds of Fisheye lens, those that make the circle fisheye like the lens Sigma's 10mm for full frame 35mm and their 4.5mm fisheye for APS sensors just introduced last week and the cropped Fisheye's made by Canon, Nikon, and Hasselblad. The Sigma's circular fisheye lenses shows a 180 degree field of view around the entire image area while the other version shows the 180 degree field of view just from corner to corner. Nikon used to make a 220 degree fisheye, but has since been discontinued.

The cropped lenses from Nikon and Canon work really well on the APS sensor cameras because the sensor is only seeing the "sweet spot" center of the lens, plus the fisheye distortion is minimized near the center too so we have a very wide, low light lens in this case. Heck, you can even correct the distortion with several solutions out there like Photoshop and DXO optics.
I own Sigma's 10mm circular fisheye for a full frame 35mm camera and really enjoy using it on my ASP sized sensors on my Canon 40D. The effect is still quite dramatic in the right situation. If the subject matter has "curvy" lines, I think the fisheye effect adds to the "dramatics" of the images like this image of the Netherland ballroom below.

You have the choice of going with the partial circle or cropping off the circle effect and being left with what I used to get with my trusty old Hasselblad. Check out the following image. 
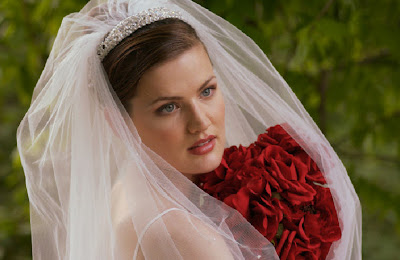
Check out these last two images - where they made with a fisheye lens - you can't really tell, can you. That's because I kept the horizon line in the center of the viewfinder and the subjects near the center of the frame. The rest of the subject matter had no point of reference from a distortion point of view so "appears" not to be distorted in the image - hence, the extremely wide angle shot without the "Fisheye" distortion. The fisheye lenses today sure don't break the bank like in the Hassy days, so they can be part of your equipment arsenal should you want a very different look to your photography. Give it a try - It opens up a entire new world of shooting possibilities. That's it for today, Gang, we are off for a day of sun and fun over at the Hilton - best views from a pool in the world. See everybody tomorrow. Adios, --David

Monday, November 26, 2007

"Awaiting the Kiss"
© David A. Ziser
We were in the park doing the wedding groups, and having finished them moved on to the images of the bride and groom. After I did the regular compliment of images, I wanted to do something special of the bride and groom. I put the 70-200mm lens on my Nikon D1x - the camera I was using a few years back - selected F4 on "Aperture Priority" mode and shot away. I really like the close crop on just the hands, ring, and lips of my subjects. It captures a really tender moment that I love. Enjoy! --David

Reporting Monday and All Week From Cabo Mexico

Good Morning Everybody,
Well, we finally made it down to the land of fun and sun - weather is a perfect 82 degrees, the sky is blue with white puffy clouds - heck, I just need a bride and groom and I will be ready to go. We will try to keep the postings going as usually but I might be tempted to bail early if LaDawn wants to hit the beach ;~) If you want to follow the trip more closely, Dave and LaDawn on the Road is live again. Here is the link right here.

Anyway, I still found a little time since we got here and thought these items would be a good read for today, so on with the show...

Revisiting Carrot Cake Lighting

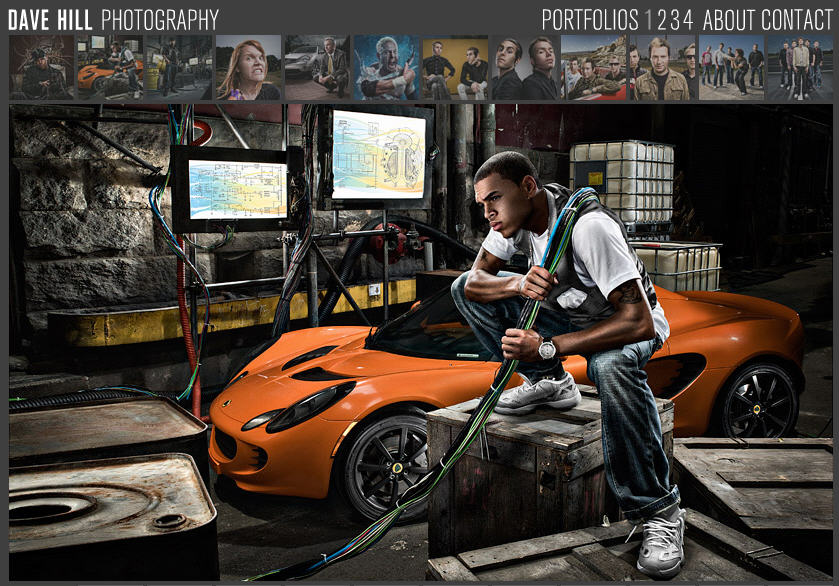
So what do three photographers talk about when they get together for dinner the first night together? They talk about "Carrot Cake Lighting" of course! If you remember, I posted a kind of a tongue and cheek posting while in Florida a few weeks ago and it kind of went all over the net. Here is the link to that "Carrot Cake Lighting" post right here. The gist of the article is how to get directional lighting from an on camera flash. Read the article for the details. I showed Kent how to do it and he came up with this great image of Sarah. I did perk up the exposure in Photoshop, but the direction of light is all "Carrot Cake Lighting" Hey, all in the name of photography and good fun.

Good Information - Better Printing

I was checking out some of my past links I had saved and came across my old PDIA link. PDIA used to stand for Professional Digital Imaging Association. It's goal was dedicated to helping photogs get better output from their digital printers. They eventually were wrapped into Lexjet - a great company selling ink-jet paper, ink, everything digital. Lexjet continued with "Great Output Magazine" - a really good source of the same info PDIA was focused on. Anyway, head over to "Great Output Magazine" on the net and check out all the past issues, archived articles, and Lexjet news. You can even sign up for their "hard copy" bi-monthly newsletter too. Good stuff here especially if you're considering incorporating your own output into your production. Enjoy!

Tomato - Tomaato; Nikon D300 - Nikon D3

More Nikon information in one place than you can "shake a stick at" - another Kentucky colloquialism - BYThom.com is a great site dedicated to all things Nikon. I've been following his site for a long time and he always has some really good Nikon content over there. For those readers looking to make their next Nikon acquisition a D3 or D300, be sure to read Thom's in-depth comparisons of the two cameras entitled "Some ways of thinking about the differences between the two cameras." Make no mistake about it - this guy knows his stuff. It's a good piece, so check it out

My Ears, My Ears - 1001 Noisy Cameras

OK, if you haven't checked them out yet this site is jammed packed full of stuff - I can't wait till they put up the Christmas lights. But here is the article that caught my eye - a photography reality show called "The Shot" Yep, 10 aspiring photogs thrown together all trying to get the best shot while rock climbing, tracking wild animals, you name it. If you don't make the cut, you're history. Here is the whole story on "The Shot" right here. The fourth episode was on VH1 just yesterday, but you - lucky reader - can download the past episodes from Amazon right here.

Hey, Gang, that's it for today, I've got to "catch some rays". Actually, I'm not even a "ray" kind of guy - but it sounded so "Cabo". See ya' tomorrow everybody - a very interesting "Technique Tuesday" in the works" - Adios, --David

Friday, November 23, 2007

"Cabo Colors #9"
© David A. Ziser

I made this image while on a trip to Cabo San Lucas a few years ago. We were just strolling through one of the small villages up the coast from Cabo and happened upon several little shops full of bright and rich colors - at least that's what I seemed to be seeing. It was the richness of the primary colors that caught my eye and my camera's lens. Camera specs: Canon 5D fitted with Canon's70-300mm DO IS lens at 300mm; F5.6 @ 1/40 second, ISO 800. Enjoy! --David

The Day After - Oh My!

Good Afternoon Everybody,
I hope everyone had a good day yesterday - for LaDawn and I it was nice to have a break from a very busy studio season. Ahhh! But now the good news, for us anyway, is that we are headed to Cabo, Mexico on a 6:00 a.m. flight bright and early tomorrow morning. Heck, I might be showing Cabo 1 - 8 in the next several posts. On that note, be sure to check out Dave and LaDawn on the Road right here for almost daily updates from our travels. Don't worry, I keep the posts up to date here as well. We make this trip about once a year with our very good friends, Kent and Sarah Smith - excellent photographers from Columbus, Ohio. We only talk a little photography, enjoy the sites, food, people, colors, and a little or a lot of Tequila. We are looking forward to the time off. That said, how about a little Friday news before we hit the road.

How Long Will That Print Last In the Window?

Sung to the tune of "How Much is That Doggie In the Window" - sorry, I'm still recovering from yesterday. If you are doing any of your own printing and wonder just how long those images will last coming off your ink-jet printer, check out Wilhelm Imaging Research right here. This site tests and posts the image longevity on about a million combinations of ink and paper. They have set the standard for this kind of testing.

Here are the kind of ink/paper permanence results you can read about: Epson Durabright inks printed on Epson Professional Matte Paper under glass - 105 years. Office Depot ink printed on Office Depot Professional paper - , 8 months!!! Typical Epson Luster Paper with a UV coating (we use Neuschen-Accutech's 1400 acrylic lacquer with UV protection) will last about 165 years, but in dark storage - read closed wedding album - then >200 years! What is surprising to me is how quickly many of the third party inks fade.

Wilhelm Imaging Research has ratings for all the top printers and inks from Epson, Canon, and HP. These BIG three have very long ratings on their paper/ink combinations. This is a great resource site for just this kind of info.

Some "Film News" on DigitalProTalk!

For all the film shooters out there, there is a well done article on Kodak's P3200 T-max film over at Photo-Utopia. This is a great site, by the way, for the analogue shooter out there. (I love that term) Mr. Smith goes into quite a bit of detail about film speed ratings and developer recommendations.

Back in my film days, one of my favorite film developer combinations was Kodak Tri-X film processed in Ewal's FG-7 developer mixed with a 9% sodium Sulfite solution. This was the best combo I had ever found for high speed film shooting with the finest grain - nothing touched it in my opinion. Hey, you can still get it over at Adorama for only $12.95 a gallon. At the time, Accufine was the de-facto standard for getting the highest speed out of your good old Tri-X, but still couldn't touch my FG7 soup. DiaFine was another product by the same manufacturer, purportedly giving you the ability to get that good old Tri-X up to ISO 3200 - I never had much luck with it - too grainy for me (and we never had an analogue "Noise Ninja" to handle the situation.

Flicker Fame Forever

So you want to get the most notice out of your image posting over at Flickr. Well, here is your step by step road map to do just that. Brian Aurer over at EpicEdits, one of the hottest new photo sites out there, has a great guest post by Martin Gummel on just that subject. It's literally a 10 step plan for Flickr success. Heck, I always said, "The best way to be the best in about anything you do is just work harder than the other guys." Check out the EpicEdit link right here. By the way, you may even see an article or two from me over there in the near future.

It's All About Speed

Kind of seems this way with the posts today, but I wanted to let you know about the the new Nikon D300 images posted over at Imaging Resource are amazing. I've been a speed junkie - film/digital speed junkie, that is, since I got into this profession. I always wanted to shoot at the highest speeds usually to stop the sports action back in my college days. To get great results - hence the Ewal's FG7. I like the same challenge in our digital world and am always on the lookout for high ISO - good image cameras.

I downloaded the ISO 3200 image and it looked pretty darn good - like really, really good. After I ran it through "Noise Ninja" - it was amazing! Something to be checked out. Here is the Nikon D300 link right here. Don't you love this digital technology - it only keeps getting cheaper, faster, better.

BONUS POST! And on a Final Note Today - and Only Slightly Related to Photography

LaDawn and I had the most pleasant surprise yesterday when we were out and about yesterday and ran into to our our old friends Mark and Michael. Both had worked as my wedding assistants for a number of years. The were both going to the University of Cincinnati at the time. Currently tall Michael is in Baltimore working on his Masters in Sociology and Mark is finishing up his Engineering degree at UC. What a nice surprise that they stopped by today to say hi. We reminisced about the old wedding days together. Both were quick to point out the displayed studio images they were involved involved in assisting.

So anyone looking to two of the best wedding assistants in the world, you can catch up with Michael in Baltimore and Mark right here in Cincy - although both are claiming to be retired from the business. So what are they doing later today - a good question you ask. They are making Turducken for a small party tomorrow - hey, I didn't know what is was either, but you can find out right here - 25,000 Youtube viewers wanted to know too.

Hey, Gang, that's it for today - early wake up call tomorrow morning. I'll be reporting from the warm beaches in Cabo on Monday! Have a great weekend! --David

Thursday, November 22, 2007

"Heading Home"
© David A. Ziser

I made this image while on a recent visit to Tampa, Florida. The sun had just set a few moments earlier and was working it's evening magic on the sky. I find it intriguing that people walk away from a sunset long before the show is over. I love how the sky takes on its deep azure blue color just before the stars began to appear.

As I was watching this sunset's final chapter, I noticed a fisherman packing up his gear and started heading home. I thought I missed the shot because I was hoping to have him framed right where the sun had set (in the left third of the image.) Nevertheless, I kept shooting.

Now looking at the image, I believe he ended up in the perfect position slightly right and heading out of the. This illustrates even more that he is indeed heading out of the sun's light into the evening's dusk, to home , to rest, to relax, as I hope all of get to do today.
Happy Thanksgiving. Enjoy! --David