Friday, February 27, 2009

"The Colors Of Summer"

"The Colors Of Summer"
©David A. Ziser

This image was made on a very, very hot afternoon in September. The challenge was this. Was there any way I could capture the rich color of the blue sky with beautiful cloud formations behind the bride? The typical “F16 sunny day” rule for correct exposure is;
1/ISO @ F16. You can see from the camera specs that I was in the ballpark for the exposure. I managed to keep the bride in the shade but I still needed to sync my Canon 5D at 1/500 second – no problem –just hit the “high speed sync” button of the back of the flash and I’ve got it. Because of the giant power dump of the flash in high-speed sync mode, my second 580EX flash had to be fairly close to the bride. That wasn’t a problem either because of my tight field of view with my long lens. With the bride in the shade, the shadows went a bit dark. This was an easy fix with my on-camera 580EX flash dialed down to the appropriate intensity for the contrast I wanted. Hey, a little complicated but I think we still captured a nice shot. Canon 5D fitted with 70-200mm F2.8 IS lens at 120mm, F14 @ 1/500 second, ISO 400.
Enjoy! -David

F-Stop Friday: F5.6, The Friendly F-Stop

Good Evening Everybody,
Well welcome to my almost midnight post today at DigitalProTalk. Is anybody still awake?? I've been at a keyboard for 12 straight hours wrapping up my presentation I'm giving at B&H on Sunday. I hear from the boys in New York that it's going to be quite the crowd. The room holds about 70 to 80 people but I hear we have 104 registered for the presentation. I'm really looking forward to it and I'm kind of curious how I’m going to get through my 400 slide PowerPoint in five hours. I've got it --- nobody gets “potty” breaks we just go straight through:~)

Anyway, my apologies for the very late post today. My first priority was to get the PowerPoint done for my presentation on Sunday. I was planning to finish a little bit earlier today, get the DPT post up much earlier, but things are what they are.

I thought I would do another episode of our F-Stop Friday Series because it gives you some insight into why I do what I do when I'm shooting my images. So without any additional whining from me about being at the computer all day let's get right to it.

F-Stop Friday: F5.6 - The Friendly F-Stop
Back in the old film days F8 was my favorite, friendly F-Stop. With a medium format camera F8 gave us plenty of depth of field for the candid images we were shooting. When you look at the numbers below, you may not think so. But as most of us have migrated to digital 35’s, the wider equivalent focal lengths that we used on those cameras give us more depth of field at the same aperture than we had in the old film days.

Here is how that works:
An 80mm lens on a 6x6 medium format camera is equivalent to a 50mm lens on my 5D mark II and a 35mm lens on my 40D.

Now let’s look at the DOF (depth of field) numbers. The depth of field at 10 feet at F8 when shooting my 80 mm Distagon lens on my Hasselblad was 8.57-12ft or a total DOF range of 3.43 feet.

When shooting the equivalent focal length, a 50 mm lens, on my Canon 5D Mark II, my depth of field at 10 feet is significantly more 7.77-14 feet or a total DOF range of 6.28 feet.

Now look what happens to the DOF on the APS sized sensor cameras like the Canon 50D. The equivalent focal length lens is about 35mm. So on a Canon 50D fitted with a 35mm lens focused at 10 feet with the aperture at F8 we have quite a bit of depth of field 7.28-16 feet or a total DOF range of 8.69 feet.

That's why it's so easy to get by with F5.6 on our digital 35s. We actually end up with even more depth of field our full frame digital SLR and even more depth of field on our APS sized sensor cameras like the Canon 50D.

Following this logic further - we can see that we can actually shoot the Canon 50D at 35mm optic focused at 10 feet at F4 and actually have more depth of field that I was getting at with my Hasselblad fitted with its 80mm lens. I always thought it was interesting that so many film photographers as they transitioned to digital 35s continued to shoot at the same F8 aperture they used on their medium format cameras. Many didn’t even realize that they were increasing their depth of field tremendously.

That means that with our digital 35s, we can shoot a full 2 F-stops wider for the same depth of field as in the film days with the medium format cameras. That means that we need less light to make the image. This is a benefit to us, especially if you're using your on-camera flash and bouncing off of a side-wall to bring the light in from that off-camera direction that I've talked about so often here at DigitalProTalk. Combine that with our new high ISO cameras and we have all kinds of photographic possibilities open up to us. HOORAY!!

If you want to have some fun with this depth of field logic yourself, let me point you to Don Fleming's on-line depth of field calculator right here. You too can play around with a different focal length lenses on the different camera bodies and may find yourself amazed at what you discover.

The bottom line is this - I find that F5.6 gives me plenty of depth of field for all of my wedding day flash candids. As long as I shoot with the focal length between 24-50mm I’ve got plenty of depth of field to capture the action, and I'm assured that even if the auto focus misses a bit I'm still covered by my depth of field.

Hey gang that about wraps it for me today. We've got an early wake-up call tomorrow so I’ll see on the flip side of the weekend. Have a good one and remember even pixels buy their cameras at B&H Photo&Video. Adios, -- David

Thursday, February 26, 2009

"Stand By Your Man"

"Stand By Your Man"
©David A. Ziser

Here is another image from the old digital archives. As a Kodak “Mentor”, I was given Kodak’s high end DSLR Pro 14N to shoot. This was the highest megapixel 35mm DSLR at the time. This is one of the shots from that camera cropped nearly square. Having shot with my Hassey for so many years and loving it with the $6000 30mm Distagon Fisheye lens, I wanted to try to duplicate the shot with my much less expensive DSLR gear. I think I came pretty close. I have another image shot from the same camera which I printed to 3ft x 5ft – It was amazing to see a print that large from a digital camera. Camera specs; Kodak DCS Pro 14N fitted with Nikon 16mm Fisheye, F4.0 @ 1/20 second, ISO 400. Enjoy! -David

Business Day Thursday: It's Training Day Today - 7 Steps To Less Expensive, More Effective Employee Training

Good Morning Everybody,
Today is work on the "B&H Program Day". I hear the program is packed solid. Rumors are they are going to move my presentation to Central Park for the over flow crowd - just kidding;~) I'm hitting the "do not disturb" button and keeping my nose to the grid-stone. I'm fired up about getting it together because it's a lot of brand new content I'm adding to the presentation. There will be lots of tips and techniques on Lightroom 2, cool business building and marketing ideas and lighting, lighting, lighting. It's always fun to see how it all comes together.

So what else is happening today? Well, late last night Snoop, the newshound, my source for all things news worthy gave me a tip about something very cool happening for Nikon shooters. Now there is a place to hang for all the latest, greatest things happening Nikon - it's called Nikon D-Town. Here is the deal - my buddies Scott Kelby and Matt Kloskowski have put together a weekly presentation to show tips and tricks of all the current Nikon models. Nikon D-Town is also the place to hang if you want to get up to speed on Nikon NX too.

Snoop told me where I could preview the first episode which I viewed last under the cover of a moonless night. Nikon D-Town is live today. You've got to check it out. It's just like Photoshop TV but Nikon centric this time around.

As I watched the first episode I felt like a forlorn little Canon puppy standing in the cold on the outside looking in. I watched Scott demonstrate a very cool light balance trick using Live View. I thought, "Would it work on my Canon?" I grabbed my camera and tried it - it worked like a charm! So folks, the bottom line is this - whether you shoot Nikon or Canon, there is some darn good cross-platform tips and tricks to be found at Nikon's D-Town. Check it out right here. Of course, be sure to catch the Joe McNally commercial about 1/2 way through - it had me rolling on the floor. All great stuff.

I think I've got some good ideas in today's post, "It's Training Day Today." It's a fairly long read, but worth your time. Give it a read a let me know what you think. Just hit the "Read More..." link below for the whole story.

It's Training Day Today
It is amazing to me to see how successful company's run their businesses and how that differs in so many ways from those on the other side of the fence. One of the important differences between successful companies and their less than successful counterparts always seems to come down to training.

Now, I know what you are thinking - "Hold on one second, David. I'm a small one/two person shop - I'm already trained!" But how trained are you? Are you an expert at Lightroom, Photoshop, Lighting, etc? I know I'm not - that's why I spend time soaking up as much info so I can polish up the weaker areas of my expertise in photography, Photoshop, lighting, Lightroom, or whatever it might be.

Heck, being a blogger is pretty good medicine for that. I'm always looking for the latest, greatest, most interesting things to share with you guys and girls and in the process find some pretty darn good resources for "sharpening the ax" which, of course I share with you. When you do this on a daily basis, you cover a lot of ground.

But in today's post, I want to talk about training in a little different light. How do you train new or even temporary staff in your business. Maybe you outsource some duties like Photoshop to a third party. How do you guarantee consistency from that person to the next?

Here is where I'm going with this. We had a restaurant open up not too far away from us not too long ago. I remember the sign on the the door, "Two week training going on now. We'll be open on..." Two weeks training - to work at a restaurant! How hard can it be? But that's the point - they wanted well trained, well rehearsed employees who could handle a wide range of customer service and customer challenges BEFORE the customers started showing up.

What can we learn from this example. It's simple. We can set up our own training program for our self, our employees, or our third party help. How many times have you spent time figuring something - a new process or new procedure with a new piece of software that you only need to know once a year.

A good example for me is when I have this one semi-problematic NAS (network attached storage) device become "lost" on our studio network after a big lightning storm and we lose power. It just won't reset itself. Now once I figure it out, it's a piece of cake to get back up and running. The problem is that it takes me forever to figure it out. Had I created a short training session on how to do it, I could easily refer to it and be back up and running in no time. That drive has been down for months now because I haven't had the time to figure out how to get it up and running again.

A more important reason for setting up a training program for your studio is because of employee turnover. How much time does it take to train a new Photoshop artist to get your images to look like how you want them to look - lots of time. Remember this - It always takes two people to train one person - the trainer and the trainee. Folks it's time consuming and expensive if we go through the whole process of retraining the new person.

Is there any way we can leverage the training process so that we can alleviate a lot of the time and expense the 2nd, 3rd, and 4th time the need rolls around? Yes, Yes, Yes!!! Let me count the ways. Here how we do it at my studio and what we are planning to do in the future.

7 Steps To Less Expensive, More Effective Employee Training

Our training tools: Camtasia 6, PowerPoint, and Canon 5D Mark II

1. Retouching: We have set up many tutorials on how to retouch and enhance the images that run through our production process. These tutorials include a set of images that the trainee can use to follow along with the exercises. This alleviates anyone needing to sit with the new trainee for several hours showing them what the we've shown to past new employees and recorded on the tutorials. We set up the training once for the new hires who now work on the retouching exercises which my studio manager checking the trainees progress periodically instead of having to sit with them constantly- teaching. Setting up training on Camtasia 6 is a great training time-saver and targets the learning for your studio needs specifically.

2. Lightroom: Yes ,we do the same thing. My "Technique Tuesday" lessons for the the DPT blog are a great source for training someone on Lightroom if they have limited experience. These exercises are also targeted specifically to the needs of a wedding/portrait studio. They have become another great training time-saver for us at my studio.

3. Album design: We use a combination of my PowerPoint presentation on album design which point out what I'm looking for in good album design. It shows the good, bad, and ugly of album design. Using my PowerPoint with all it's examples sets the bar for what we do here at the studio. With Camtasia tutorials on how to use our album design software I can show how to get the job done.

4. Answering the phone: Something as simple as a tape recording of how you want your employees to answer the phone for new inquiries, setting up appointments, handling customer service issues, etc. is super easy to develop. With everyone trained in your studio with exactly what to say and how to say it, you bring consistency to your employees' responses across the broad range of customer interaction. Now everyone working in your studio is "ON message" with exactly what YOU want to communicate to your clients.

5. Production processes: How many of you know how to frame a print? It's more than just popping a print in a frame and adding the wire on the back. You've got vapor seals to add, a specific location for the wire hangers, etc. Why not use the new video capabilities of the Canon 5D Mark II or Nikon D 90 to record the entire production process. Both cameras record in easy to use movie formats - Quicktime .MOV files for the Canon and easy to play AVI files for the Nikon. I use the lower res mode to produce my videos because I get longer running time - 20 minutes. It works great in these instances.

6. Booking the client: This is really important. I have a sales video I produced years ago which goes through the exact process on what to say and how to say it to a client. It covers all the bases. I'll still use the same words today. Put one together for your studio using staff, friends, family to play the part of the client. This video taped role-playing exercise could be the most important training tool you develop. Again, it gets all your employees "on message" with exactly what you want them to cover in the interview and how to say it.

7. Training associates: OK, this is pretty easy for me since I have developed so many training videos. But you can too. Just set up any video inexpensive recording device. Now record what and how you want you associates to learn. Cover several aspects of equipment usage, lighting, shooting the job, etc. Folks, this is not "brain surgery". It just takes your time ONCE and then you are set to go.

Sure it takes time to set these training resources up - about the same amount of time it takes to train one employee, but once completed, you have a tremendous training resource for everyone you hire from this point on! The possibilities are endless, the financial savings are significant, and your time saved can be used productively running your business instead of having your business constantly running you.

Hey gang, that's it for me today. Oh, I almost forgot - my 4th video at Kelby Training goes live next week. I'll let you know exactly when next week. Hey, Don't forget to come on by tomorrow and visit a while - it's F-Stop Friday again. See ya' then. -David

Wednesday, February 25, 2009

"Precious Moments"

"Precious Moments"
©David A. Ziser

Here is one of my old time favorites – another film shot. This young lady has long since graduated college and I believe is married. Yep, I’ve been doing this quite a while. The image was illuminated with only window light and filled on the shadow side with a large white reflector. The image was made in the client’s home so I was able to use the antique toys and furniture provided by the client. I love how the image turned out. The arrangement and soft colors of the props along with the the gentle expression of the beautiful little girl combined to produce a portrait of lasting classic beauty. This image was a sample in my studio in years past – I still love it. Camera specs; Hasselblad fitted with 150mm Sonar lens, F4.0 @ 1/125 second, Vericolor 400 film. Enjoy! -David

Wednesday: A New Twist on The Wedding Shoot: Aiming For The Stars

Good Morning Everybody,
A few people have emailed about my program at B&H this weekend. Well, I have good news and bad news. First the good news - its FREE. Now the bad news - it's booked to capacity. Hey, be optimistic - there might be a cancellation and you might still be able to get a seat. Just head on over to B&H's web site and check it out. Here is the link right here.

We wrapped late last night and just relaxed for a bit listening to some musical selections LaDawn selected at Triple Scoop Music. For those of you putting together slide shows and presentations for your client, Triple Scoops royalty free musical collection is phenomenal. The selection process is quite easy too. Anyway, we were looking for new music for another slide presentation and we found some real winners. And, it was nice just to sit and relax for a few minutes.

After that, I popped a DVD we just got from Bebb Studios, really talented wedding shooters hailing from Vancouver, Canada. The Bebb's were about the first photographers to review the Canon 5D Mark II camera and in the process were taken with it's video capabilities. Their DVD showed how they are cutting video in with still images they take at a wedding. The call their product Fusion. It's all quite beautiful, but I have to admit, it looks like a bit of a learning curve to pull it off. I thought they were quite thorough on both the DVD's - the first on how to shoot it and the second on how to edit it. You can check it out right here.

OK, how about we get on with today's "Aiming for the Stars" post. I think you will enjoy it. Here we go...

A New Twist on The Wedding Shoot: Aiming For The Stars
I really enjoy looking at what other photographers shoot on the wedding day. And, at the same time I'm kind of surprised at what gets missed. Lots of photographers are capturing lots of the action and expressions of the day, but there is still so much more to photograph. There are different ways to see and photograph the "obvious". One of the easiest ways to see and shoot differently is to just look up.

So many locations have fabulous views when we point our cameras to the stars. This can include churches, synagogues, and reception venues.

It's how we look up that's important too. My favorite gear for looking up are my wide angle lenses. I prefer the 10-22mm lens on my Canon 40D. On my Canon 5D Mark II, the Sigma 12-24mm is utterly fantastic. Both the camera lens combos give you about the widest view you will ever need.

One more lens to add to your "looking up" arsenal is the Sigma Fisheye too. What's cool with the fisheye is that when you look up, you can still see what's ahead too. The curvature of the lines in the scene just add a different perspective to the image. I'm one who happens to like the effect.

Can we include foreground elements like flowers that add to the dramatics of the scene? Adding foreground elements places the ceiling in a different visual context in the image. Although the ceiling is indeed dramatic, it's the flowers in the foreground that dominate the composition because of the wide angle optic creating a quite striking image.

LaDawn and I were in Paris a few years ago and I strolled around the Eiffel Tower with the Sigma 12-24mm lens on my 5d at the time. I loved the images I captured - quite dramatic and a view quite different to what you normally see of this fabulous Paris landmark.


So next time out on a job load your camera up with a super wide angle lens and point your camera to the stars. It's lots of fun and the unique views you'll photograph will add a nice sense of the "dramatic" to the wedding album.

Hey gang, I've got to zippity-do-da today. Clients are do to arrive momentarily and I've got to get back to my real job. See everybody tomorrow for Business Day Thursday. See ya' then. -David

Tuesday, February 24, 2009

"Wind Beneath My Wings"

"Wind Beneath My Wings"
©David A. Ziser

This image is from one of my favorite shoots captured about 9 years ago soon after I acquired my first DSLR. The weather and sky cooperated spectacularly to create this striking image. The final gust of wind lifted the bride’s veil perfectly during my well-timed exposure. My assistant is behind the couple with my radio-controlled flash giving me just the right amount of light to add to the dramatic feel of the image. The very wide field of view from my fisheye lens captured just that much more of the dramatic sky. That’s one reason I like wide angle optics for my shots. Camera specs; Fuji S-1 fitted with 16mm Nikkor Fisheye lens, F9.0 @ 1/90 second, ISO 320. Enjoy! -David

Technique Tuesday: Jiffy Lube For Lightroom - Adjustment Brush Presets In Lightroom 2

Good Morning Everybody,
Well, the market's down another gazillion points, my 401K is about a 101K, my 2 month old 1.5T Seagate Extreme died while we were in Las Vegas last week- no data loss, it was the backup drive. Thankfully it came with a 5 year warranty. Heck, maybe it would have lasted 4 months with a 10 year warranty - my goldfish died, the dog ran off with the mailman, but no problem - Lightroom still loves me;~)

OK, all kidding aside today - let's get right to today's Technique Tuesday...

Jiffy Lube For Lightroom - Adjustment Brush Presets In Lightroom 2
You know, when a program has over 36% market share and is gaining more all the time, it's probably time to take a closer look at it's functionality. Sure, many of us fire up Lightroom, and go right to work with sorting, cataloguing, developing, and the like. But, you know, if you peek under the hood, you'll find Lightroom 2's 426 Hemi with four barrel carb ready to speed you through lots of your workflow.

When I first started tinkering with Lightroom, it was cool to see how all the program with so many dimensions worked, but you know, after a while, you want to roll up your shirtsleeves and see what else it can do. I don't know if many of you have ever tried to create "adjustment brush" presets, but it is a "piece of cake" and really revs up the flexibility of Lightroom 2. Hit the PLAY button below and I'll show you how to do it in no time.


Lightroom guru and all around nice guy, Matt Kloskowski at Lightroom Killer Tips, has a nice article on Adjustment Brush Presets right here which helps on the import for MAC users. Hey gang, that's it for me today. Today is picture day for the staff and we put the final polish on the Digital WakeUp Call website - Yep, you'll get a chance to see who really runs the studio around here. Anyway, gang, I've got to go - see ya' tomorrow. -David

Monday, February 23, 2009

"Dancing On The Square"

"Dancing On The Square"
©David A. Ziser

I made this image a few years ago and I still recall it being one of my favorite weddings ever. We started the coverage at noon and wrapped 14 hours later - but what a wedding it was. At the request of the bride, we headed for Fountain Square, a Cincinnati landmark. We wanted to pick up a little of the "urban" flavor of downtown Cincinnati in the wedding shots. In those days, Fountain Square was configured differently than today and the Tyler-Davidson Fountain always figured prominently in the composition. With the fountain's new configuration, the shots are not nearly as dramatic. I don't know why they didn't consult us wedding photogs before changing things around. Anyway, I love the setting of this shot. I am nearly leaning backward to get the sky-scape in the image the way you see it presented. That's because of the 180 degree view of my 8mm Sigma fisheye lens. Of course the clients think I'm "nuts" as I coax them to hug and kiss. They think I'm talking to somebody on the 20th floor of the Westin ;~) Anyway, the shots on the Square always make a great addition in the bridal album. Camera specs: Nikon D1x fitted with Sigma 8mm Fisheye, F4.0 @1/2 second (tripod), ISO 400. Enjoy! -David

Quick Hit Monday: The World Of Off-Camera Flash; A Digital PhotoBook For Your Customers; 2 Tera-Byte SD Card, and More

Good Morning Everybody,
We arrived home safe and sound last evening to a brisk 24 degrees, ahhhh, the great Midwest in February. Actually, I never care too much what the weather is like as long as the sun comes up in the morning. Regardless of the weather, it's always good to get back home.

We had a great week in Las Vegas, and the few days off after the convention gave me a little time to polish up the DWC tour presentation which is shaping up really well. We head up to B&H next weekend where I'll get a chance to test drive most of the presentation. My book needs to wrap this week too - just pulling the final images for it. I get to peek at cover designs later today, so I'm stoked about that.

Anyway, their seems to be lots of stuff to report on today - I've picked a few of my favs. Hit the "Read More..." link below for all the news you need to know!

The World Of Off-Camera Flash; A Digital PhotoBook For Your Customers; 2 Tera-Byte SD Card, and More

The World Of Off-Camera Flash
I have to tell ya' the WPPI convention seemed to be the year for off-camera flash. Three, count them, three manufacturers were showing off gear to fire remote flashes. My buddies at Quantum were showing off their new Trio units [link] with their built in radios and high speed flash capabilities. The sent me 3 of them to "play with" right before we left for the show. I only had time to read the manuals and am looking forward to trying them in the next week or two.

What I like about the Quantum is the amount of "juice" - light they get on the scene. As a wedding shooter, an off-camera 580EX II is just a bit too underpowered for me. I love my 200 w.s. fast recycling Quantums on the job. With the Trios now supporting high speed sync, I think the outdoor shooting options definitely get more interesting.

I mentioned, last week that Kevin King of Radio Popper [link] fame is letting me try a few of his new units too. I want to see how/if they work with the Quantums too.

Now on to player #3 of the off-camera flash arena - Pocket Wizard, has what I think may be the most interesting product of all. Their MiniTT1 [link] fits neatly between the camera and the flash. The remote unit, the Flex TT5 [link], mounts to the remote flash's hot shoe. With the units attached, you have complete Master/Slave and high speed flash functionality now operating with very reliable radio signals - way cool.

I'm making a call to them today to see if I can get a couple to test. Mr. Hobbie over at the Strobist.com had a super in depth review of the new units - definitely worth the peek [link]. Hopefully, I'll have all three solutions in house and can see how they best work in a wedding/event situation. There's lots of wonderful new products and solutions in the off-camera flash department - no reason to be shooting like Uncle Harry any more. I'll keep you posted.

A Digital PhotoBook For Your Customers
I caught this post by fellow blogger, Eric over at Photography Bay. It talked about the new Digital Foci Photo Book [link]. This new electronic "proof book" offers some interesting features - here are a few:
8” digital LCD with 800 x 600 resolution.
Large 4 GB internal memory holds thousands of digital photos.
Built-in memory card slots provide native support for: CF, SD/HC card, MMC, xD-Picture Card, MS/MS PRO (Supports mini-SD, RS-MMC, MS Duo with adapter).
USB host capability - supports USB flash drives.
Copy albums directly from memory cards for USB flash drives to internal memory without needing a computer.
Run automatic Full-Screen or Photo Book photo Slide-shows with adjustable time intervals.

Heck, for only $189 it looks like another alternative for the wedding photographer to me.

Here are a few of quick ideas:
1 - Give it to the B&G as an electronic honeymoon album to preview their wedding.
2 - It could serve as a electronic proof book.
3 - Maybe it could be included with the wedding album after a certain minimum order.
4 - How about using it as a portable electronic portfolio?
5 - Let the B&G's parents pass it around at the wedding reception.

Hey, those are just a few ideas dancin' in my brain for this cool little gizmo.

2 Tera-Byte SD Card
OK, what's 24x32mm and 2.1mm thick? How about a 2 tera-byte SD card for your Canon Sure Shot? Yep, you heard right - 2 TERA-BYTES. That's an estimated 100 HD movies or 480 hours of HD recording or 136,000 fine-grade photos, or 4000 RAW images. Man, one of these little puppy's would cover me for an entire wedding! The SD Association is releasing the "specification" for the new SDXC cards. Their press release - you can read it over at Ephotozine right here [link] - The SD Association points to 64 gig cards being first to be offered.

Think how this will impact all of us - not just photographers, but anyone requiring lots of storage in small places. I can see it now - new laptops with "instant on" capabilities and storage to spare! All sounds pretty cool to me!

A Few More For The Road
Impact Protection For Your Camera

When LaDawn and I were picking out her new cell phone a week ago, one of the “up-sells” was the neoprene protective cover for her new Verizon "Dare". Well, it turns out you can get the same thing for your camera too. I found the post about it over at the Imaging Insider, a blog always packed with insider information and worth the visit. It’s made by the Camera Armor Company and does exactly the same thing for your camera that the protective cover does for La Dawn’s phone – worth a peek [link ].

PMA Predictions
With the Photo Marketing Association [link] PMA show happening in Las Vegas next week, Photography Bay has some predictions for you. The PMA show is another one of those venues where the camera, lens, and equipment manufacturer latest and greatest goodies and make announcements about what’s down the pike. Hey, it always kind of fun to see how many of these guesses turn out to be true. Anyway, check out Eric’s best guesses [link] and tune in next week to see how many he guessed correctly.

Hey gang, that’s it for me today. It’s the first day back after a week long trip and my desk is heaped pretty high – time to start digging in. See everybody tomorrow for another episode of Technique Tuesday. See ya’ then, -David

Friday, February 20, 2009

"The Touch Of Your Lips"

"The Touch Of Your Lips"
©David A. Ziser

We wedding photographers are always taking photographs of the bride and groom kissing. We take a few shots of them looking lovingly at each other and then a few more of them kissing. Let me give you a hint how to make it an even better shot. After you get a few images of them looking romantically at each other, encourage them to draw closer - closer -ALMOST KISSING - but not fully kissing. It's the anticipation of the kiss that heightens the emotional thrill of the shot. One note here, DON'T have them pucker as they draw closer to each other - otherwise they will look like two "Kissing gourami" fish. So remember, almost kissing, no pucker, adds romance to these kind of shots. Camera Fuji S-1 fitted with 80-200mm lens at 105mm, F2.8 @ 1/70 second, ISO 320. Enjoy! -David

Business Day Thursday On Friday: Customer Service Or Customer Appreciation - 20 Ways To Appreciate Your Customer

Good Morning Everybody,
At least it's morning here in Las Vegas. Boy, will I be glad to get back on schedule next week. I was going to do another "The F-Stops Here" post today, but decided to hold off till next week to post it.

Here's why. Last evening, I was reading a copy of Success Magazine that my buddy Bruce Hudson gave me at the WPPI trade-show. I had subscribed years ago and had always enjoyed the magazine so it was a nice surprise to see a copy again. While reading an article in the issue it reminded and struck me as to the real importance of customer service we provide our clients. Give today's post a read and let me know what you think.

Hit the "Read More..." link for the rest of the story.


Customer Service Or Customer Appreciation?
Here is a quote from the article, "Every single person on this planet has an invisible sign on the front of them that says; Appreciate me and make me feel good." That quote caught my eye right away and I started wondering how well I appreciate my own clients. Was I doing a good enough job at it. Sure, I thanked them for their business when they picked up their order. Sure, I thank them for a referral when I saw them the next time, which many times was several months later or even worse never. Sure, we would send them our promo pieces asking for more business - but does that even qualify as a Thank You? I think not.

Let me ask the question differently. Is thanking your client part of your marketing plan or simply the end of the transaction? Unfortunately for most of us I think the latter. For too many businesses or those wanting to grow their business, a customer out of site, is also a customer out of mind.

For too many businesses, marketing is simply getting their name out there, offering some kind of special, and hoping the customers will come to them. Folks, I DON'T believe this is the wave of the future when it comes to building our business - I think it's the wave of the past. Look how many businesses, large and small, are using Facebook to connect and build relationships with their clients. Don't get me wrong, I'm not saying Facebook should be at the heart of your marketing plan, but I suggest you take a peek at it.

I've been driving the same make of car for over 25 years which means that I've seen many levels of service and more importantly, appreciation for my business, from a number of dealers I've experienced over the years. The dealer that stands out for me is my current dealer that has gone above and beyond the call of duty to rectify a few service issues with my car when the warranty was long since expired. It was the personal connect that made a difference to me.

Let me try a little test. Also, let me preface this by saying I'm not necessarily picking on any one company here.

Think if you have felt appreciated as a customer in this situation:
1. Getting tech support on your computer - almost any brand.

2. Even getting through to tech support at Symantec for Norton's Anti-virus. I've never gotten through.

3. Paying the extra "BAG" charge to get on an airplane.

4. Dealing with airline "Customer service" if there was a change of plans. True story - I was trying to change travel plans last year when my mother was dying. After offering not many alternatives for my travel plans, the "customer service" rep told me to have a nice day! Did she hear me? My Mother was dying -- Unbelievable!

5. Having your EULA - End User Licence Agreement tell you that you are eligible for only two installs when you have a work, home, and laptop computer. Their solution... just buy another copy for the third install. That only doubles the price for the last install, doesn't it.

6. Being told the software won't work on a MAC / Being told the software won't work on a PC. I heard them both this week at WPPI.

7. And lastly, trying to buy a new cell phone. True story - LaDawn and I just last week visited a Verizon Store, or more correctly, an authorized Verizon reseller. My advice - avoid the Verizon resellers like the plague and only do business with a Verizon corporate store. The two guys working behind the counter looked like they should be working for Jiffy Lube with their frayed ball caps and less than professional appearance.

The first guy made it seem like we were an inconvenience to him because we were asking too many questions. We were ready to buy the phone for a savings of $50 off the $199 price. I offered my Amex card and they said they didn't take Amex - red flag #1. The other guy - the store manager - made a snotty remark that lots of stores don't take Amex - red flag #2. He may be right, but national corporate stores surely do.

Even though, we nearly sealed the deal, the red flags on their lack of customer appreciation made us walk out of the store and drive the extra 3 miles to the corporate Verizon store where we picked up the same phone for - get this -for only $30! By the way, we spent 3 hours in the corporate store as they finally managed to undo the lock on the account the Verizon authorized reseller had levied on the account.

Whew! What a day, but you get the point. An unappreciated customer may never return. So folks, it's not always about having the best product or the best price. That may get them to make the first purchase. But it's about appreciating your customer on a regular basis that keeps them coming back.

So how well do you appreciate your clients? Do you send your wedding clients anniversary cards every year? Do you send birthday cards to the kids you have photographed? Do you send random Thank You or Thinking of You cards to your clients just - get this - just to say Thank You or I've Missed You without including a pitch or a new offer to buy your product?

Let me say this, "A client that feels appreciated will help grow your business much more than a client whom you just say Thank You." OK, I've gone on for quite a while here, but let me wrap by having you think about this. How often do you get to appreciate your client from the time of the first phone call? Let me count the ways.

20 Ways To Show Customer Appreciation
1. Sending a Thank You note for initially contacting you.

2. Mailing then directions to your studio for their first appointment.

3. Monthly or maybe bi-monthly, before their wedding letting them know how much you are looking forward to spending their wedding day with them.

4. Calling the week of the event just to check in verify schedules, adjust for any last minute change of plans, secure immediate family names and relationships and wrap any loose ends.

5. Showing some of their wedding images at their wedding reception on your laptop.

6. Telling them and the bride and groom's parents how much you enjoyed spending the day with them as you get ready to leave for the evening.

7. Dropping them a note within the week telling them how great their pictures look maybe even including a 4x5 image from the day. They get to read the note when they get back from their honeymoon.

8. Posting a short show, maybe with Animoto, to let them and their families share in the "preview of coming attractions."

9. Thanking them for their order after it's placed. Thank them for referrals.

10. Dropping them a note while their wedding album is in process letting them know how great it is going to look.

11. After delivering the album, follow up with yet another personalized Thank You note with your own personal message.

12. Send out Birthday cards on their birthdays - you asked for that info during the booking process.

13. Send them an anniversary card every anniversary.

14. If you hear they having a baby give a call or send a note. We include a free sterling silver frame with an invitation for complimentary Mom/Dad and Baby shoot.

15. Give them free family portrait session for life, maybe include photographs of the new baby.
16. Send birthday cards to the baby each year, and don't forget mom and dad too.

17. Send holiday cards every year.

18. Make the occasional phone call just to say HI and/or you were thinking about them.

19. Be sure to ask and then let them know if you are going to use any of their images in your promo materials and be sure they receive a copy of the promo material with a complimentary photograph used.

20. Pick a few of your clients randomly each month and just send out a little gift, say something as simple as a brownie or cookies. This will really get the buzz going for your studio.

21, 22, 23, 24, 25, 26, 27, 28......... Continue to add your own - you get the idea.

The truth is that if you constantly work at building client relationships, you will have a customer for life! Sure you have to go the extra mile, but as Roger Staubach said, "There are no traffic jams along the extra mile."

A quick note - my Digital WakeUp Call - A New Dawn kicks off in only 5 weeks. This post is just the tip of the iceberg - I'll be covering several other business building ideas at the program too. Here is the link to the Digital WakeUp Call website - see ya' there!


Hey gang, that's it for me today. We head back to Cincy on Sunday, so I'll see you on the flip side of the weekend. Have a good one and I'll see you Monday. -David

Thursday, February 19, 2009

"Night At The Museum"

"Night At The Museum"
©David A. Ziser

We occasionally have the wonderful opportunity to work a wedding at the Taft Museum in Cincinnati, Ohio. William Howard Taft announced his presidency on the portico of this beautiful home. It's a more intimate venue for smaller weddings, but serves as a great background for this type of image. We always try to work this shot into the client's coverage when the wedding is held here. It's an easy shot to set up. My assistant is behind the the bride and groom holding my radio controlled Quantum. The random bounce of the light highlights the porch area and creates a nice compositional interior frame around the couple. We take several of them just looking at each other and always finish with a few of them kissing. These images are always favorites for the album. Camera specs: Canon 5D fitted with 12-24mm lens at 15mm, F5.6 @ 1/15 second, ISO 800. Enjoy! -David

Thursday: 4 Photographers - Lots Of Ideas and Tips

Good Afternoon Everybody,
We made it to Thursday and get a little break in the action today. We're sticking around a few days, mostly to wrap tour details and put the finishing touches on the book. There it is, I see it - a little light at the end of the tunnel - but heck, better busy than not.

Today I've got that long promised video for you. It's taken a little while to put together but I think it came out kind of cool. I hope you like it. It features Joe McNally, Michele Celentano Hanson Fong, and Mary Fisk-Taylor giving presentations at various booths at the WPPI trade-show.

Michele and Hanson were both presenting at the Canon booth as they are both Canon "Explorers of Light". Mary Fisk-Taylor was presenting at the Marathon booth giving some marketing ideas. Joe was giving his presentation at the Nikon booth. All presenters were gracious enough to give me their permission to post the videos. My thanks to them.

You know, I think this is a good idea and is an easy way to get a quick peak at other photogs we sometimes hear about but seldom get a chance to see. Anyway, I hope everyone enjoys the show. Just hit the play button below and enjoy.

One last thing, I was talking to my office today and they tell me we only have 2 more spaces left for my upcoming Digital Master Class April 27 - May 1 so give Jennifer a call [link] if you want to reserve a space. Hey gang, that's it for me today, I'll plan to see everyone tomorrow. See ya' then, -David


Wednesday, February 18, 2009

"Angel Eyes"

"Angel Eyes"
©David A. Ziser

I always like photographing the kids at a wedding, but how do you get a shot of the small child quickly in the heat of the shoot? The easiest way is take a photograph of the bride and child with the bride’s reassuring hand on the child’s shoulder. After I take a few shots of both of them, I drop to my knees and capture a few of the child by herself. With the bride still adding reassurance and support at her side, the little girl still feels composed and confident and I get the shot. I also like how the the bride frames the scene too. Camera specs; Nikon D1x fitted with 50mm lens, F2.8 @ 1/160 second, ISO 400. Enjoy! -David

Better Late Than Never Wednesday: Yes, Bloggers Do Have Faces; Helicopter Videos: New Radio Poppers

Good Evening Everybody,
I'm breaking from my regular series, The Analysis of A Wedding Shoot, to bring you a few updates on what we've discovered at the WPPI Tradeshow. The last few days I've been shooting some videos of some of the celebrity speakers giving their presentations at the various booths in the trade show.
My idea was to pick up a tip or two from each one of them and share them with our DPT readers today. Late programing and early wake up calls today kept me from posting earlier today. So, if all goes well look for it tomorrow. I've got video snipits of Joe McNally, Michele Celentano, Hanson Fong, and Mary Fisk-Taylor. There are some good ideas there so I hope you enjoy it.

Conventions do make the posting a bit inconsistent. I thought I was going to bail today but I found a few minutes, get this, at the Bloggers Lounge at WPPI. Yep, even Spidy was there. Oh.... the addiction of all this. I wonder what Freud would have said about all this blogging. Anyway it has been a great show in Las Vegas - over 12,000 people - a new record - have attended the trade show and programs! - Unbelievable!

New Radio Poppers Hit The Market!
While I was in the middle of the post I got a call from Kevin King, the inventor of the very popular Radio Poppers. He was showing the models at the show and is letting me give them a try when we get back in town - I can't wait to run them thru their paces. I headed over to the Radio Popper blog and there is a ton of info and videos on these handy dandy little dudes. Here is the link - worth the peak. That's a picture of famous blogger, Syl Arena, from Pixsylated.com helping me test them on the show floor.

Bloggers Have Faces Too
I'll tell ya', when you blog you get emails and comments from other bloggers. For me, I always check out their site to see whats up. Kerry Garrison from CameraDoJo.com fame dropped me an email and we planned to hook up today. Shortly after that, I received a note from Syl Arena from Pixsylated.com about hooking up at the show too. So as we found each other amongst the crowds we had a great visit talking blog stuff while LaDawn just rolled her eyes at the whole thing. I really don't get it - Kerry, Syl and I along with the hundreds and thousands fellow bloggers have simply figured out the meaning of life;~)

The bottom line was this, it was like meeting old friends you haven't seen (in forever). We had a great visit. In the photo, from left to right is me, Kerry, and Syl.
Kerry just put up another post, "Understanding Exposure". Here is the link. Syl was telling us about his experiments with high speed flash sync and hooked up 12 - yes 12 - Canon 580 EX II flashes with Radio Poppers and used the set up for some very interesting images. Check out his post right here where he used the multi-$1000 rig to photograph Ben Willmore - very interesting. Anyway, I hope we all get to catch up again.


Video From A Remote Controlled Helicopter
Yep, you read right - this had to be the most interesting product I saw at the show. For under $300, you could buy a remote controlled helicopter complete with video camera, transmitter, and receiver! The company selling the helicopter was DigitTronics - here is their link. The demonstration was so cool. The gentleman in the booth would show how easy it was to control the helicopter and we could all see the video image on the monitor - definitely a "toy" for the kid in lots of us. Yep, I bought one - can't wait to see how it works.

Hey gang, I know it's late for me and I've got to go. Dinner plans with friends happen in less than an hour. I'm planning to cut the video together from the show so look for it tomorrow afternoon - remember, I'm on Pacific time this week. So I'll see everybody then. -David

Tuesday, February 17, 2009

"April Breezes”

"April Breezes”
©David A. Ziser

I remember taking this image so vividly. I took this image on a Monday afternoon during a bridal shoot. Three days later, after a soft spring rain, all the delicate white buds you see on the trees were on the ground. What struck me was how short lived and such a limited opportunity I had to capture this beautiful scene. I was lucky enough to be at the right place at the right time. My radio controlled off-camera flash was coming in from the right and cast a beautiful light on the bride. For me, it's always about the light – highlights next to shadows to create detail, depth, dimension and added color saturation. This recipe always kicks the beauty of the image “up a notch”, at least in my opinion. Notice the shutter speed of 1/400 second – just a bit faster than the native sync speed of the camera. But as long as you keep the subject in the “flash sync” part the viewfinder, you still receive the benefit of the faster flash speed in controlling the ambient light. Camera specs; Canon 20D fitted with 70-200mm lens at 135mm, F 4.0 @ 1/400 second, ISO 400.
Enjoy! -David

Technique Tuesday: 5 Good Ideas - Uh, Tomorrow?, and Revisiting a Classic

Good Morning Everybody,
Man, Oh Man, yesterday was quite a day! Right after my program wrapped, we had a short break, then headed back to the convention to help my buddy, Mark Garber with his program. Mark and his wife, Jennifer, gave a great program on how to juice your business with some good ideas most of us don't even think about. Here is the link to their nicely designed site - check out the "Photographers" button especially. I'll give you a sneak peak on Business Day Thursday on a few of their best.

I've been experimenting with what I think is a good idea on the trade show floor. There are so many booth presentations going on - so much learning, so little time to take it all in - I'm getting tidbits from many of them and hoping to get them posted through out the week. My plan is to have tiny video segments containing one good idea from that particular speaker. We'll see how it works out. I'm cruising the show again today - stay tuned.

In today's Technique Tuesday, I'm going to revisit a classic past post entitled, "Easy John Henry". I posted this technique once before and received a lot of positive comments on the idea. When I revisit one of the classic posts, the idea is to put a new twist on it or come up with a new way of using an old idea. Check out today's Technique Tuesday and I think you quickly understand - good information.

Hit The "Read More..." link below

Easy John Henry - With A Twist One More Time
Whenever I do my week long Digital Master Class, which is coming up - April 27-May 1 - here is the link, this Photoshop technique is always one of the favorites. It shows how to add your own personal signature to an image by creating a"Signature Brush" in Photoshop. It's cool how easy it is to do and always adds a nice touch to our larger wall portraits we deliver. With just one mouse click, we can easily sign our prints. Here is where the twist begins. If it's that easy to make a "Signature Brush", why not develop some other "brushes" that can help us in our work flow. That's exactly what we do. After each wedding shoot , we have to edit the images, prep them for order, slightly tweak them in lightroom if needed, create the client presentation, and get them on-line for the client to view. One of the key elements in creating the client presentation is the "titling" process. I want a beginning title image and an ending title image as part of each presentation.
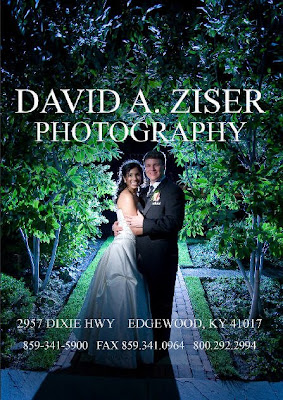
The beginning title is easy. We create a virtual copy in Lightroom, pop it into Photoshop, add the text, that includes the bride and groom's names, date of wedding celebration, my signature - and we are good to go with the beginning title. Well, I also want an ending title too. The end title is basically your business card info placed over one of the more dramatic images from the shoot as shown here. You could just go into Photoshop and create all that information for each new client, but what a waste of keyboarding. Why not just create another brush with all the same info. Now it becomes super-easy to create the ending title to the presentation.

With my new DAZ brush in my brush pallet and saved in the brush presets, all I have to do is create another layer, hit it with my new brush, bevel and emboss it, and I'm good to go with my ending title. There are times when I need to re-adjust the size of the brush which may not place the bottom text - the address info - exactly where I want it placed. No problem, just place the the top text on a new layer, then use the erase tool to delete the miss-positioned bottom text, Create a second layer, place the bottom address text, erase the top text, and you have your end title ready to go.
We are working on other Text Brushes to make life easier at the studio. The other brushes might include, Thank You, Special promos, what ever you can dream up. With you new brush set, you can easily and quickly create personalized invites, reminder cards, etc for your client.

I loved what Mark and Jennifer had to say yesterday, "Photoshop is NOT marketing - don't spend all your time there when you could be spending time doing real marketing."

Hey gang, enjoy revisiting the John Henry tutorial below. See what ideas you can dream up and let all the DPT readers know in the Comments section below. Time for me to get back to the convention - I want to give it a good browse today and see what's hot. See ya' tomorrow. -David


Monday, February 16, 2009

"Morning Glory"

"Morning Glory"
©David A. Ziser

I love the feel of this image, even though it received a small boost from Photoshop. My off-camera flash supplies the illumination, of course. Here is where it got tricky. I was using two Canon 580 EX flashes in “High Speed” sync mode with the on-camera flash set NOT to fire so as to not light up the foreground. My assistant had the off-camera 580EX flash “zoomed” to a tighter cone of light to keep the light off the ground and only on the subject. My assistant was out of camera range to the far left. Notice how his light position gave a perfect loop lighting pattern on the bride’s face. By controlling the shutter speed, I can control to density of the sky which added quite a bit of richness by under exposing slightly. Photoshop gave the final boost to the colors. Pretty cool how it all worked out. Camera specs; Canon 20D fitted with 10-22mm lens at 10mm, F 4.5 @ 1/2000 second, ISO 400. Enjoy! -David.