Tuesday, February 16, 2010

"Kinsale Tranquility"

Kinsale Tranquility

"Kinsale Tranquility"
©David A. Ziser

I made this image about 10 years ago while on a trip to Ireland.  One of our stops was to the beautiful little town of Kinsale, Ireland west of Cork.  Cork, by the way, is the home to the famous Blarney Stone - not an easy stone to kiss, by the way. Kinsale is a wonderful little town of history and beauty.  The town sits at the mouth of the River Bandon which offered lots of photographic possibilities for our trip.  Its always the colors in Ireland that seem so much richer and vibrant. The colors of the buildings, the water, and all the surrounds radiate that richness on a beautiful day.  This is a simple landscape photograph but I think it really captures the feeling the little town emanates - peacefulness, tranquility, gentleness, and color.  A walk through Kinsale was truly an experience to see moments frozen in time. Although a simple landscape, I did tweak the colors in NIK's new Viveza 2 software via Lightroom. Camera specs; Fuji S1 Pro fitted with Tamron 24-135mm lens, F 7.7 @ 1/250 second, ISO 400. Enjoy!  -David

Technique Tuesday: Test Driving All The New Features Of Viveza 2

Good Morning Everybody,

Deck View It seems no part of the country has been exempt from snow this year.  We just got hit with 9 inches or more of the white stuff all day yesterday with about 2 more inches expected today.  This is a view out our back door to our deck. I love the snow so LaDawn and I are planning a snow photo walk later today. Now where are those boots?  ;~)

Test Driving All The New Features Of Viveza 2

Hey gang, I'm really fired up today.  I just received my brand new copy of Viveza 2, loaded it up on the computer, and ran it through it's paces.  Wow!!! Is this a cool piece of software or what?  I love it.  It's easy, intuitive, and fun to use.

Viveza 2I know, lots of folks are going to be wondering what’s new in Viveza 2 - here is the quick list:

  • Global adjustments - All the adjustments that were previously available in Viveza 1 are now available in the new interface and give the user the ability to apply them globally.

  • "Structure" adjustment slider - this slider brings a brand new tool to the table that lets you adjust localized contrasts.  You might think its like Lightroom's "Clarity" slider but it is different enough to warrant a look.  I like the effect if gives to the images.

  • Viveza2a "Shadow" adjustment slider. I know what you're thinking, "Lightroom already has a "Shadow" adjustment."  You're right but now you can apply the adjustment locally with Viveza 2 - a great feature.

  • You can now group and ungroup the "U-Points" you've placed in your image so making an adjustment to one of them controls all the others you've grouped with it.  This is very handy particularly if you've duplicated several across the area of your image and need to tweak all of them just a bit for your final result.  This new feature speeds up the process for you.

  • Curves adjustments now available, too.

  • Works in Adobe® Photoshop®, Adobe Photoshop Lightroom®, and Apple® Aperture®

In today's tutorial, I'll run you through all the new features. OK, I have to admit, I was having a little too much fun with Viveza 2 and the tutorial runs a little long.  You just might want to view it in two sitting.  A better suggestion - skip tonight's edition of "Entertainment Tonight" and just tune in to my Viveza tutorial.  Hit the PLAY button below and enjoy the show!

What did you think - pretty cool, eh? I highly recommend NIK's new Viveza 2.  Remember, you can head over to NIK's site and download a 15 day trial [link].  It's definitely worth the test drive.

Want to read more?  NIK is featuring 6 short 1-2 minute tutorials right here. Also, check out Ron Martinsen's review right here. Read what blogging buddy, Scott Kelby has to say when he featured Viveza 2 in his Gonzo gift guide too right here.

_______________________________________________________

Hey gang, that's it for me today.  We've got to shovel the walks, throw some salt, and dig out the cars.… I love winter.  See ya' tomorrow for another episode of PhotoFAVS Wednesday.

Tavvauvusi (“That's Good Bye Everybody” in Eskimo),  -David

Monday, February 15, 2010

"Pipe Dreams 2"

24x36-0253_DAZ-MasterClass05

"Pipe Dreams 2"
©David A. Ziser

Here is an image I made a number of years ago as I was just switching to Canon cameras.  I think you will be surprised with the camera specs listed with this image.  The image was made, with special permission, in the organ loft at St. Mary's Cathedral in Covington, Kentucky.  I photograph the occasional wedding at this beautiful location so it was a real treat to be able to use the organ loft for this shot. I had just gotten my brand new Canon 20D and owned only one lens for it at the time, the 17-85mm IS lens.  Hey, that was enough for me to get this great shot.  I illuminated the bride from camera left with my assistant leaning out from the organ loft holding my Quantum flash and shooting through a translucent umbrella to soften the light on the bride.  I also slowed the the shutter speed down in order to pick up some of the ambient light.  The balance of the ambient with the flash resulted in a very dramatic portrait of our bride. I then used Photoshop to straighten up the organ pipes by using the “Crop” tool with “Perspective” checked.  Camera specs; Canon 20D fitted with 17-85mm IS lens at 53mm, F5.6 @1/25 second, ISO 800. 

Enjoy!  -David

Quick Hit Monday: DPT Blog Enhancements; Syl's New Book LIDLIPS; Crash's New WOW!!! Site; and More

Good Morning Everybody,

DAZ Signing books It's been quite the weekend.  I signed 500 copies of my "Captured By The Light" wedding book and my writing hand still works. I've been receiving some very nice comments on the new book too.  Thanks a bunch!

If you noticed, the count for my Free webinar, noted on top right of DPT is already well over 250 attendees in only 5 days!!! I hope we have enough room for everyone who wants to attend ;~)

We are planning to give away 6 DOOR PRIZES on the air - 3 copies of my book [link] while on the air.  I'm also kicking in 3 copies of my new "Digital WakeUp Call" 4-DVD Set [link] which will be available by the time the webinar airs.

A few of you won't be able to make it because of scheduling issues.  We are working on details to make it available after that date. We are still in the planning stage on that one so stay tuned.

Hey gang, we've got lots of projects (and snow) going on today so let's get right to it.

Digital ProTalk Blog - Major Enhancements

Architecture project I spent a good part of the weekend tweaking things here at Digital ProTalk.  Notice the brand new TITLE BAR at the top of the blog. 

I've added 9 new pages of content to make DigitalProTalk an even more valuable resource for our readers. The links are pretty self explanatory so why don't you give them a "cruise" and tell me what you think.

I also added the “ReTweet” button to each post for your convenience so I hope you will spread the world about the good things happening on DigitalProTalk.

One more thing, notice the right column of DPT. See the weekly video tutorial.  I'm planning to keep each video on the front page of DPT till the next week's video goes up.  That should make it easier for you to find if you miss a few days of reading. Anyway, I hope it's an added convenience for you.

Syl's New Book – LIDLIPS – Good Read

LIDLIPS Fellow blogging buddy - Pixsylated.com, great photographer, and now author, Syl Arena has just released his new book entitled, "LIDLIPS - Lessons I Didn't Learn In Photo School." [link]  I have to tell you, I am really enjoying Syl's book.

Think of it as a "Devotional-a-Day" book for photographers. This book isn't about lighting or technique.  It's about how you think about photography, how it intertwines with your life, how it excites your passion.

Each thought is presented in a brief concise fashion and I think should be enjoyed one-spoonful-at-a-time, just like a delicious dessert.  Way to go Syl, great job!!

Kick Your Creativity Into High Gear - Books By David duChemin

Visionmongers I had the honor of meeting David duChemin at Photoshop World last year.  I had just finished my presentation at the Peachpit Theater and David duChemin was following my time slot.  We said a brief hello to each other and that seemed to be that.

Well now, it seems, everywhere I look, I see David's name popping up.  Recently Chris Ward posted a review on David's new book, "Visionmongers, Making a Life and a Living in Photography" published by Peachpit.  Here is the link to the review right here - it's a nice read.

Well, David also has a great set of downloadable eBooks available at CraftandVision.com right here.  The cost of the books is next to nothing – something like $5 - and all the proceeds go to help support David's humanitarian initiatives.

I had the opportunity to download and read many of David's eBooks.  It would be foolish to say that they are worth every penny because they only cost pennies. These eBooks are about the best priced resource out there for exploring your passion and creativity in this wonderful profession.  You've got to check them out.

Hey, don't forget to check out David's blog too - tons of good stuff right here.

WOW! What An Inspirational Photography Site

Crash Taylor's new site just "blew me away."  Crash, as you know publishes a weekly interview with wedding photographers working worldwide. Here is the link to Crash's interviews right here.

Crash Still Image Well, a few weeks ago I get an email from Crash about this new site he's putting together and he asks me to take a look.  I hit the link, and that's when it happened - my jaw dropped and hit the top of my desk - OK, I'm exaggerating just a bit here, but the truth is this.  This site entitled, "The Still Image With Crash Taylor" [link] is one of the most beautiful collection of images I have ever seen. 

The site is more than weddings. It encompasses many styles and disciplines with the photography profession.  Just check out this image by photographer Joel Grimes and his website www.joelgrimes.com and you'll get an idea what I mean. Each image is a visual feast for the creative eye.  But not only that, you also get the entire back-story and equipment list for each shot!  Be sure to check back with the Still Image often for a wonderful helping of creativity and inspiration!!! Well worth the visit . GREAT job Crash!!! 

______________________________________________

Hey gang, that's it for me today.  I've got real work to get completed and I've got to get moving.  Why don't you plan to check out the new features of DigitalProTalk and tell me what you think. Also, don't forget to stop back tomorrow for a brand new episode of Technique Tuesday.  Hope to see ya' then.

Adios,  -David

Friday, February 12, 2010

"Playing In The Breeze"

Playing In The Wind

"Playing In The Breeze"
©David A. Ziser

I made this image near the end of the wedding shoot.  We were heading into early evening with the sun getting closer to the horizon hence the strong backlighting on the scene.  This shot is strictly available light. My exposure was set for the bride's face.  The wind was just starting to gust and the bride was trying to keep the veil out of her face. Instead of waiting for the wind to calm down, I just kept shooting.  I ended up with a great series of "windy" images.  This is one of my favorites.  Camera specs; Canon 1D Mark III fitted with 70-200mm IS lens at 115, F5.6 @ 1/640 second, ISO 800.

Enjoy!  -David

Friday Frenzy: Canon 5D Mark II vs Canon 7D - Which One For Weddings?

Good Afternoon Everybody,

DAZ with Books Yes, it is Friday Frenzy around here today.  I know a lot of you are looking forward to receiving your copy on my wedding book.  Good News! We just received 500 copies of my "Captured By The Light" wedding book show up on our doorsteps this morning.  It looks like I'm going to be autographing a lot of books over the weekend. And, it looks like we will be shipping on Monday!! THANKS again for all your patience and understanding as we prepare the books for shipment.

Also, it's official. My book is also shipping from Amazon, Barnes and Noble, Borders, and Peachpit.  Amazon's stock went up yesterday. Heck, maybe it’s because of my book sales ;~)

Amazon Stock

Remember, you can order an autographed copy from our Digital Resource Center [link] or a regular copy (unsigned) from your favorite bookseller by using the widget on the right ->

Hey, and don't forget to sign up for the free "Captured By The Light" webinar too.  You can do that by hitting the link on the right or by clicking here. I'll be walking you through some of my favorite sections of the book. We've got nearly 150 signed up so far and the room will hold up to 1000, so don't be shy - come on by.

I have to admit, this is all pretty exciting.  Again, my thanks to Scott Kelby for his encouragement and support through the entire book writing process.

OK, time to get on with today's post.  Here we go.

Canon 5D Mark II vs Canon 7D - Which One For Weddings? 

Canon 7D-b This question keeps popping up on the Skribit widget on the right - yes, I do review each suggestion - and take note of all your emails suggestions as well.  So today I thought I'd discuss the issue in depth.

Hit the "Read More..." link below for the rest of the story.

I bought the Canon 5D Mark II right after it came out back in October 2008.  I loved the much higher resolution sensor (21.1mp), high resolution LCD screen, the new super high ISO's, and the video capabilities.  The camera is currently selling for $2,500 and worth every penny.

I also purchased the Canon 7D the day it became available back in September 2009. I liked the much higher resolution sensor (18 mp), high resolution LCD screen, the new fairly high ISO's, and again the video capabilities.  The camera is currently selling for $1,600 and in my opinion is a "steal of a deal"!

Having said that, let me give you my impressions of both cameras as tools of the trade for shooting weddings. Now I have been a BIG fan of the 40D since it was released.  It was a great wedding camera - accurate LCD screen, decent resolution, decent low noise characteristics, fast and easy to use.

So, right off the bat, I loved the new higher resolution LCD screens on both cameras. It was driving me crazy to shoot both the 40D lo-res LCD along with the hi-res 5D Mk II LCD so I jumped on the 7D when it came along to make that frustration disappear.

Camera resolution is not that big of a deal for me. How many mega-pixels do you need to shoot a wedding?  I think the "sweet spot" is about 10mp anyway. That said, resolution does come into play for family portraits when the final print could be 30x40 inches. 

Canon 5D Mk II The 5D is the perfect tool for the portrait photographer, but I really don't need 21.1 mp for weddings.  The fact of the matter is that I usually shoot the 5D Mk II at medium RAW anyway, reserving the higher res setting for large groups only.

I also thought the 5D Mk II's low light focusing was better and faster than the original 5D.  Oh, and I love the video capabilities of the 5D Mk II as well. What a cool feature for any wedding photographer.  Now I can grab snippets of the day for my Animoto shows.

I also loved the 3 custom setting I could use to basically give me 3 cameras in one.  I covered that in a previous post right here.

The high ISO capabilities of the camera blew me away.  I could actually get by shooting at ISO 12,800, albeit a bit noisy but nothing NIK Dfine 2.0 couldn't fix. But, you know, those new high ISOs let me capture images I couldn't get before.

The higher ISOs also let me shoot my routine candids at a ISO 800, 1000, 1200, and 1600.  And you know what that means - less flash power needed for each shot which translates into MANY more shots per charge.  I don't even go through a set of batteries these days on a job and I typically shoot A LOT of images.

And lastly, I loved the super wide angle view I could get with my full frame 12-24mm Sigma lens.  A full 122 degrees rectilinearly corrected view - WOW!

Needless to say, the 5D became my wedding camera of choice for a number of months.

Finally the Canon 7D came out last September - I jumped on it. I couldn't wait to put that baby through it's paces. Well, I've been shooting with it for about 5 months and I'm loving it. Here's why in no particular order.

1. Less mega-pixels - remember my 10mp "sweet spot" - 18 megs is plenty big for wedding photography.  Medium RAW gives me 10.10 Mega-pixels (3,888 x 2,592), equal to the 40D's 3888 x 2592 pixel count, uhmmmm...

2. Nice bright hi-res LCD - I'll never go back to the lo-res version on earlier models.
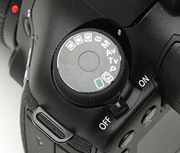
7D 3 Cs3. The 7D has those 3 custom settings on it too - three cameras in one again.

4. High speed continuous shooting at 8 fps.  Hey, I don't use it often, but it's nice to know I have it when I need it.

5. I love the video options and, the on board mic is better than the 5D Mark II.  The 5d Mark II's internal mic would always pic up some weird internal noises that the 7D does not.  An outboard mic is best, but in a pinch the 7D's mic works just fine.

6. Pop up flash.  OK, I know what you're thinking, "Ziser, get real.  Who uses a pop up flash for a wedding?"  Well, it not for weddings that I want the pop up flash.  I want it for my vacation pics;~)

7. I like the magnification 1.6x factor.  Here is another point where folks think I'm crazy.  What I am is practical.  Now my 200mm lens becomes a 320mm optic and my 300mm lens becomes a 480mm lens - pretty cool for super close up wedding candids.

8. I really like the new button layout on the 7D especially on the video side. Now it's a "piece of cake" to go from still mode to video mode almost immediately and have things in sharp focus.  I'll have to cover that in an upcoming Technique Tuesday.

9. OK, I'm waxing enthusiastic over the 7D, aren't I?  Well, I do love the camera.  I just wish it's noise characteristics were as good as the 5D Mk II's.  Don't get me wrong, I'm still fine with the 7D's lower noise characteristics and I still routinely will shoot the camera at ISO 800, 1200, and 1600. The 5D Mk II is better in the noise department though.
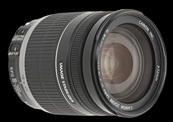
18-200mm Canon 10. I love shooting the 18-200mm IS lens on the 7D.  It's a great all purpose combo for my flash wedding candids.  Remember though that I have room lights set up at my events.  That's why I can get away with using it as my candid lens too.

Somebody's going to call me out for the optically quality of this lens and that I should be using something sharper.  The fact of the matter is that most of the images taken with this camera/lens combo are only going to made into 8x10's maybe 10x10’s at the largest - the 18-200mm IS lens is plenty sharp for that. Hey, I'm just  practical.

Hey gang, that pretty much wraps it up.  So which camera do I prefer for my weddings. Well, both of them.  That's why I own both of them.  OK, now you're going to twist my arm - "OK, Ziser, if you could only get one of the them, which one would you select first?"

I would opt for the Canon 7D first - fitted with 18-200mm IS lens.  Next pic up the 10-22mm wide angle. Now you're covered from 10mm to 200m of focal length.  Take the 1.6x magnification factor in and you'll go from 16mm to 480mm - WOW!

Hey, did you hear that Canon's coming out with a Rebel T2i [link] that uses the same 18mp chip as the 7D, hi-res LCD viewfinder, external mic connection, and shoots HD video too and all for $799$ Too bad it doesn't have an on board sync connection.

________________________________________________________

OK gang, that does it for me today.  Sorry for the late post.  We had a few meetings and appointments today I needed to tend to AND all the books arrived.

I'll plan to see everybody on Monday, all the pixels willin'. And, just remember that unlike snowflakes, every pixel in your digital camera is exactly the same;~)

Have a great weekend everybody,  -David

Thursday, February 11, 2010

"Fantasy In White"

Beauty In White

"Fantasy In White"
©David A. Ziser

Here is an image a made a few years ago.  The challenge was to get a great shot of the bride in very adverse lighting conditions – in this case, direct bright afternoon sunlight.  I thought, “Why not just shoot the shot and worry about it later.  The original image in color was not all that exciting.  But, after I de-saturated the image and raised the levels of the mid-tones, I was liking it better and better.  A final tweak with the highlights finished the job. Lots of folks have their favorite way to convert an image to black and white.  My favorite for wedding images is the quick technique I described above.  I love the soft, airy, almost fantasy feeling of the image. Give it a try – just remember, it’s the mid-tone Photoshop slide in “levels” that works the magic. Camera specs; Canon 40D fitted with 70-200mm IS lens at 115mm, F8.0 @ 1/250 second, ISO 200. Enjoy!  -David

Business Day Thursday: My Wedding Book Shipping!; New Webinar Announced; Once, Twice, Third Time’s The Charm

Good Morning Everybody,

Snow in CincyWe arrived back home safe and sound yesterday, albeit with 12 inches of snow on the ground – just perfect  for a few quick snow angels :~)  Looks like things might be a bit slow around here till we hit the spring thaw – just kidding.

Pre-Ordered Copies of “Captured By The Light” Shipping Next Week

Shipping BookHey gang, guess what?  I just got word that we will receive our shipment of my wedding book, “Captured By The Light, The Essential Guide To Extraordinary Wedding Photography” in just a few days.  I know several of you are anxious to receive your pre-ordered copies.  Looks like we will be shipping by Tuesday and Wednesday.

Remember, if you order your copy through the Digital Resource Center [link] by February 28, 2010, I’ll autography your copy for you.

Free “Captured By The Light” Webinar March 3, 2010”

And speaking of the book, why not plan to attend my FREE 90 Minute Webinar entitled, “Captured By The Light” on Wednesday, March 3, 2010 at 3:00 P.M. Here is the link to REGISTER. 

Captured By The Light Webinar Logo In this 90 minute FREE webinar, I’ll give a peek inside the book, “Live and In Person.”

Here are a few of the topics I plan to include:

  • Professional posing and composition tips
  • Simple on-location lighting setups that are specially designed for the wedding photographer
  • How to get gorgeous images using a minimal amount of time and equipment
  • Creative lighting techniques that anyone can use to create dramatic wedding portraits that will set you apart
  • My own camera settings and lens selections (which lenses to use when, and why), and how to get the best results with your existing gear
  • How I use on- and off-camera flash, and a host of tricks of the trade that will make you more profitable and have you delivering the type of wedding shots you’ve always dreamed of!

It should be fun. Hope you can make it. Here is the link to REGISTER one more time.

Look for more fun book events happening too – I’ll keep you posted.

Hey everybody, time to get on with today’s post.

First, Second, Third Time’s The Charm – For Booking The Job

Small girl busy with shopping. You know, we can learn a lot from kids and dogs when it comes to sales.  How many times have you been in a grocery store and watched kids constantly pester their parents for the nearby candy bar or snack.  We’ve all seen it a million times but never from our kids, right?

Anyway, here is my point.  Sure it drives you crazy, but many times doesn’t the tired parent succumb to those multiple requests? How often do we ask our perspective client for the sale?  Not often enough, if you ask me.

When we get a phone call, email inquiry, or Facebook comment asking about our products and services.  How do we respond? 

Hit the “Read More…” link below for the rest of the story.

For my studio, it’s IMPERATIVE that we shoot for the “real live person” contact.  It is only then that we can reflect our enthusiasm for our product in that personal phone call.

We can ask questions and listen to the prospective client’s answers that we can intelligently discuss the client’s options.  OK, but it’s still more than that.  I want to get my studio information packet into their hands – the information packet is one of the things that separates us from the masses of wedding shooters.

DAZNOTE: I discussed our studio information packet several months ago here at DPT.  Here is the link to that post right here.

OK, here is the deal.  We send out our information packet – some photogs may just respond with a quick email , tweet or comment – but the point is what do you do next?

Do you just hope, pray, and wait for the potential client to respond or do you pro-actively follow up with the client?  Folks, it’s been our policy at David A. Ziser Photography for years to follow up with the client AT LEAST 3 TIMES about their interest in our services.  It’s kind of like being the pestering kid in the grocery story – we keep trying till our potential client prospect tells us NO.

Here is how it works:

Woman in home office with computer using telephone smiling 1. As we are finishing our phone conversation with our prospect gathering address info, etc., We ask the prospect permission to check back with them in case they have any questions.  They always answer in the affirmative.

2. Three days later we call the prospect and ask if they did indeed have any questions.  If they do, we gladly answer them.  This phone contact gives us another chance to book an appointment with our prospect.

3. Still no appointment or booking after three more days, then it’s time to call our prospect the second time. Our call to them is, many times a reminder to them to re-connect with us to move the booking process forward.

Booking The Job - Fotolia_10042517_Subscription_XXL 4. Still no kind of commitment from the potential client – then it’s time for that 3rd call.  I want to hear my prospect say, “We’ve hired another photographer.”  Hey, if they don’t want to hire us, I want to know which photographer succeeded in booking before I call the lead a cold lead.

If they tell me that they’ve hired another photographer, I always ask whom they hired. Why? It’s simply a means of marketing research.  It helps me determine why we didn’t sync up for the job.  Was it money, style, personality – I want to know.

Regardless of the answer, I always affirm the prospect’s choice, particularly if I know the photographer they’ve selected, and wish them the best with the rest of their wedding plans.

Two positive things come from how we handle the prospect if they’ve booked another photographer. First, since I have NEVER “badmouthed” or talked negatively in any way about my competition, my competition is a good source of referrals over the years.  They know that we can be trusted. Hey, you always need to keep all your doors open for business, even if some of that business comes from your competition.

The second outcome, much like the first is more of a long term benefit.  If the prospect’s experience with their choice of photographer doesn't work out, we are once again in the running to book a future friend or family member’s wedding.  That has happened more than once over the years.

Just a few years ago, we didn’t book a wedding and I was quite surprised.  I thought I had hit it off quite well with both the bride and her mother.  Well, I was half right – the bride had another photographer in mind and I lost the job.

Eight months later, about 4 weeks after the wedding, I get a call from the bride’s mother explaining that after they had seen the photographs from the other photographer, they were not pleased with the result. Could I shoot some additional images of the bride and groom?

I was happy to oblige.  We spent about 2 hours with the couple on a weekday morning, took about 300 images and got some great shots.  The client loved them and ordered a 40 image album, several 5x7’s and 8x10’s, and a 24x30 portrait on canvass. Her bill came to just under $4,000. Not bad for making those three follow-up phone calls.

_____________________________________________________

Hey gang that’s it for me today.  We’re still digging out of our winter storm around here.  Hope to see everybody tomorrow for another scintillating post here at DPT.

Oh, what’s the topic you ask?  How about Canon 5D Mark II vs Canon 7D – my favorite camera for weddings.  You’ll have to tune in tomorrow to find out.

See ya’ then,  -David

Wednesday, February 10, 2010

"A Walk Up Bourbon"

A Walk Up Boubon

"A Walk Up Bourbon"
©David A. Ziser

Here is an image I made while walking through the French Quarter on Monday.  We walked nearly the full length of Bourbon Street.  Sure, we passed all the party stops within the first half of the walk but further up you'll find yourself in a much more residential area.  The buildings are historic and old and look like they've been painted many times over the years. This part of Bourbon Street has quite a bit of character, color, and personality.  The walk reminded me a bit like our very colorful Cabo San Lucas walks.  I love this image from Monday's walk.  I shot the scene much wider that what you see here. I decided to crop it as you see it here.  I purposely truncated two of the three shutters so I could isolate just the single set of shutters in the top right of the composition.  This allowed all the main colors - reds and blues - to bleed out of the image area creating a cool abstract collection of colors and shapes.  Only one edge is aligned with the right edge of the image.  No other edge in the scene is aligned to anything speaking to the age and settling of the structure. Bourbon Street - a great place for photographs.  Camera specs; Canon 7D fitted with 18-200mm IS at 40mm, F9.0 @ 1/250 second, ISO 200. Enjoy!  -David

PhotoFAVS Wednesday: Photographs, Photographs, Photographs

Good Morning Everybody,

Today we wrap our wonderful trip to New Orleans.  Who would have thought that when we planned this trip that the New Orleans Saints would be in the Super Bowl and go on to win the big game? 

Lombardi Trophy Yesterday the Saints Victory Parade wound it's way through the city and yes, we were two of the tens of thousands that witnessed the historic event. Yep, that’s Sean Peyton, the Saints’ coach with the Vince Lombardi trophy. It's not often one gets to spend time in the middle of the universe, but that's exactly what has happened on his trip!!!

Our plane leaves in just a few hours so lets get right on with today's post. Here we go...

Photographs, Photographs, Photographs

When you travel, how often do you bring your passion to your travels?  I don't just mean grabbing your camera and shooting away.  I mean seeking out museum exhibitions, galleries, even book stores featuring wonderful collectible, historic, and vintage photographic images.

In New Orleans we visited one of my favorite shops, A Gallery. Here is the link to their sight right here. It's located at 241 Chartres Street and features one of the largest collection of collectible and vintage photographs I have seen anywhere.  

AGalleryThey feature works from Adams to Weston and several in between.  Just think about browsing through the original works turn of the century photographer Edward Curtis or, enjoying the extraordinary images of Margaret Bourke-White, Alfred Stieglitz, Henri Cartier-Bresson, Gordon Parks and so many more.

It's one thing to know these great photographers by name.  It's another to see their works in books and magazines.  But, it is quite the inspiring experience to see the famous photographers work in person. 

Ansel 1During our recent visit, I asked Jenny if she had any works by Ansel Adams.  She gestured to a wall close by and there it was - a wonderful silver print of Mr. Adams' Moonrise Over Hernandez. It was printed in the mid-seventies and is  one of the best examples of Ansel Adams photography capturing the full tonal range of the scene. Ansel 85m Hey gang, it was for sale, but I chose to pass this time around - price; $85,000!!!

That's what the experience is all about - just seeing these wonderful images in person. A Gallery is one amazing location to be witness to the artists works.  Here is a list of the photographers who work you may find on display [link].  It's fun just to search their inventory. Next time you are in New Orleans, you've just got to make the visit.

DAZNOTE:

Jenny tells me that New Orleans Photography Workshops has a 5-day session coming up with fine art portrait photographer, Jock Sturges [link]. Dates are March 7-11, 2010. Give A Gallery a call at 504-568-1313 for more info.

POYi2 We also visited the Louisiana State Museum and viewed their latest exhibition "Visions of Excellence" representing the best in the field of photojournalism. - Pictures Of The Year International [link] sponsors the judging event each year.

The 50 images were mesmerizing, shocking, beautiful, emotional, and all of the above.  You can get a peek at several of the images by perusing the winners listing right here. Enjoy the browse.

Lastly, we visited the Photo Works - New Orleans gallery [link] on Jackson Square and viewed the wonderful work of Louis Sahuc.  I loved the artist's wonderful black and white images. Be sure you cruise this site too and soak up the beauty of his images.

Photo Works Our host also pointed us to PhotoNOLA, and organization dedicated to the annual celebration of photography in New Orleans.  Here is the link to their site right here.

Anyway, I think you get my drift. It's simply the process of visiting these galleries in a city you happen to be visiting, or heck for that matter, in your own home town, and viewing works of photographic art outside your regular field of photography that can really get your "brain juices" flowing.

Hopefully it's the few jolts of this kind of inspiration that will propel your own photography to new levels of creativity. That explains, in a nutshell, why not missing these kinds of photographic opportunities are one of my PhotoFAVS.

_________________________________________________________

Hey gang, that's it for me today.  We are packing our bags and beads and heading north.  It will be great to get back home but I promise you, we will be taking some great memories (and photographs) back home with us from the WHO DAT capital.  See ya' back in Cincy tomorrow.

Adios, -David

Tuesday, February 09, 2010

"The Perfect Day"

The Perfect Day

"The Perfect Day"
©David A. Ziser

This image is one of my first digital images made almost 9 years ago.  I still love it.  My first digital camera was a Fuji S-1 Pro. At the time, it was the camera to beat - about 3 mega-pixels and only $6000 - Wow! What a steal!  The next closest priced camera at the time was Kodak's DCS 650 at about $20,000+.  The Fuji was known for great color, you just couldn’t enlarge the image much past 11x14 inches. Anyway, saving a $1000/wk in film and processing sure looked like an attractive fiscal option to me. I was hooked on digital and NEVER looked back to using film again.  This image was made early one Spring evening, just as a storm was brewing in the distance. We finished the shoot before the rains hit, but the clouds sure add a wonderfully dramatic aspect to the image. Camera specs; Fuji S-1 Pro fitted with 16mm Nikkor fisheye, F8.0 @ 1/100 second, ISO 320.  Enjoy!  -David

Technique Tuesday: Cool Banners Made Easy - Part 2

Good Morning Everybody,

French Quarter Yesterday we took a long stroll through the French Quarter - always a great place for photography, enjoyed some Cajun cuisine for lunch, and finished with a refreshment on one of the restaurant balconies at Toulouse and Chartres.  I've always wanted to see what the view was like from one of those many balconies I've seen in the Quarter.

You know, while walking through New Orleans these last few days, every day has looked like  game day and so too today - EVERYBODY is wearing the "black and gold."  Way to go "Who Dat" country, you have the entire country behind you.

In just about an hour we are hooking up with friends at the famous Cafe Du Monde for beignets and coffee.  Later in the afternoon we plan to watch the Saints victory parade along with several thousand other fans.  That will wrap our whirlwind trip to New Orleans and then it's back to a snow covered Northern Kentucky tomorrow.  It's been a "blast"!

Hey gang, before we head out today, I want to get today's Technique Tuesday up "on the air." 

Cool Banners Made Easy – Part 2

Last week's post took you through the first part of how I produced those 8 giant sized banners for an event I photographed recently.  Here is that link again right here.

It was a cool project so today I want to walk you through the final steps of the process. 

Today's tutorial will show you how I used readily available materials we picked up at a Lowe's to create the header and footer bars for the banners and how I attached them to the banners.

The assembly was easy, inexpensive, and efficient.  It shows how easy the entire project was to put together.  My intent is to show you that even though these large banners are impressive event decor, it's not "brain surgery" to put them together and they offer lots of marketing and promotional possibilities for your studio. 

These banners can be an impressive product and service you could offer your clients, used for dramatic studio promotional pieces,  or even become the beginning of exciting new product offerings for your studio.  Hit the PLAY button below and enjoy the show.


Related Links:

Cool Banners Made Easy - Part 1 [link]

10 Profit Building Uses For Banners In Your Business [link]

______________________________________________________

Hey everybody, that's it for me today. We have one more day in "Who Dat" country and plan on soaking up a lot of its excitement before we head back tomorrow.

I'll plan to see everybody back in the frozen snow covered north tomorrow. 

Have a great one and I'll see you then,  -David

Monday, February 08, 2010

"New Orleans Welcome"

New Orleans Welcome

"New Orleans Welcome"
©David A. Ziser

I captured this image after we departed the plane and walked through New Orleans airport on the way to baggage claim this past Thursday. As you know, I'm a big fan of symmetrical compositions and the ceiling of the New Orleans airport fit the bill for me.  The monochromatic tones were offset by the blue sky just peeking in the small ceiling openings at the top structure. The parallel lines of the ceiling made to converge with my wide angle lens contrasted well with the semicircular features of the ceiling too.  All combined into a simple geometric composition accented by small touches of color for a pretty cool image.  Camera specs; Canon 7D fitted with 18-200mm IS lens at 18mm, F 5.0 @ 1/60 second, ISO 200.  Enjoy!  -David

Super Bowl Monday: In The Middle Of The Action

Good Morning Everybody,

I had planned to do a regular Quick Hit Monday post today, but that all changed last evening when the New Orleans Saints won the Super Bowl! 

Football Hey, the most exciting news happening in the country today is the  Saints win. Add to that that the entire city of New Orleans is in the middle of it's 2 week Carnival celebration, too.  Most of us are very familiar with Mardi Gras and Fat Tuesday and all the wild celebrations going on. But what you may not know is that there are more that 50 parades that take place in the Big Easy beginning about 2 weeks before Fat Tuesday.

That adds up to one heck of a lot of partying going on in the city.  Add to that the Saints wining the Super Bowl and you have a "perfect storm" a really positive "perfect storm" for all the residents of the city devastated by Hurricane Katrina 4 1/2 years ago.

The city's energy and life is back and the whole world can see it for themselves this weekend. It is a thrill, perhaps a once in a life-time thrill, to be part of it all. We hear over and over, "They might be playing the Super Bowl in Miami, but the party is in New Orleans!"  That has definitely true!

So having said that, I'm putting a new twist on today's post.  So far I've taken over 1200 photographs so I thought I would choose a few and give you a look into the back story of what goes on in a photographers mind when he's covering the action in a different sort of way.  I hope you enjoy the post.

King and Queen of the Ball

NO - King and Queen This image was`made as the King and Queen of the Ball presented themselves to all the attendees.  The goal is to keep the couple in focus while still getting their best expressions in the rapidly changing light of a very bright spotlight. 

I set the camera to "automatic pilot" in these kinds of situations.  First, I set the ISO on "auto" ISO - I wanted the camera to make the best choice for the rapidly changing lighting conditions.

In order to guarantee a good exposure in the contrasting lighting conditions, I chose to use "spot metering" metering off the couple to be sure I didn't miss the exposure. I was also set to AWB since the spotlight was closer to daylight than tungsten.

I sat in the floor near the action and captured some great images.

Children Of The Court

NO Kids 1 The kids were so cute.  I wanted to capture the fleeting expressions, but also wanted to still show all the pomp and circumstance swirling around them.  Camera settings shifted wildly from the settings above.  This shot was taken at F5.6 @ 1/160 second, 110mm 918-200mm IS lens), ISO 3200. With my camera on "auto pilot"  I got this nice shot the these 3 very cute kids in all their regalia.

NO Kids 2 I love the second shot from behind too. Look how much the settings changed for this shot - F4.0 @ 1/50 second, 28mm, ISO 200.

Power Grid

NO Power Grid This image was made as we were driving across town to visit the Krewe of Carrollton "den of floats".  I tried my best to just isolate the power lines against the sky.  The cissoid line of the hanging cables and against their towers made a nice urban composition.  Not bad for shooting out a car window at 50 mph - LaDawn and I call these kinds of shots "drive by shooting" ;~)

Parade Mania

NO Crowd This is a quick shot from the float.  It is mayhem for 3 solid hours.  Each float tosses about $10,000 worth of beads, stuffed animals, and doubloons into the crowds.  Do the quick math - we had 21 floats in our parade.  Amazing!!!!

Taking The Ride

NO On The Float This image was made by LaDawn from street level.  That's my buddy Ralph on the left, his son Ryan in the middle and you guessed it, that's me on the right.  We had great weather for the parade, great crowds, and as they say say here in New Orleans - A Great Ride!!!

Super Celebration

After our parade it was a quick change of clothing. We then enjoyed a fun Super Bowl Party with friends - old and new. Yes, we were crazy enough to head on down to the quarter after the game.  It was crazy - shoulder to shoulder fans "screaming, yelling, high-fiving, and yes - drinking an adult beverage or two or three or four…. The crowd was packed so tight, it took 30 minutes to go just a block or two.  In spite of the crowd everyone was in great spirits - obviously. Hey, if you were there, you had to hit the "Quarter."

NO Super Celebration Light was not very bright.  I shot everything at ISO 3200.  I was still shooting at very slow shutter speeds - 1/13 second for this shot.  Image stabilization is my friend. Remember, takes lots of shots to capture one or two sharp ones. We're going back tonight and tomorrow and I'm going to goose the ISO to ISO 6400.  I'll keep you posted.

Hey gang, that's it for today's post.  You know, even when I'm not hired for the job, when I've get that camera in my hands, I am ready to go.  Call it the adrenaline, the excitement, the joy of the shoot, a career as an event (wedding/bar & bat mitzvahs) photographer - I love it!!

See ya' tomorrow.  I've got a Technique Tuesday planned to post.  But, who knows what going to happen today in New Orleans, the center of the universe for this weekend   ;~) 

Have a great one,  -David

Friday, February 05, 2010

"The Whisper Of Your Smile"

The Whisper Of Your Smile

"The Whisper Of Your Smile"
©David A. Ziser

This beautiful young lady was the subject of my post on Monday.  Here is another image from that shoot. The image was made by available light only.  The couple were seated under a veranda that opened out onto the family's back yard.  The light was soft and gentle on the both of them. I simply asked them to just get close to each other and whisper their feelings to each other.  It worked.  I rotated around them getting a great series of images for their album.  Sometimes the easiest way to shoot is the best. Camera specs; Nikon D1x fitted with 80-200mm non-VR lens at 155mm, F 3.5 @ 1/500 second, ISO 800. Enjoy!  -David

Food For Thought Friday: Start Running Your Business Before It Runs You

Good Morning Everybody,

New Orleans Airport We arrived safe and sound yesterday afternoon in spite of super heavy fog that seemed to be everywhere.  The flight was the most grey flight we have ever flown. We never made it above the clouds and never saw the sun, just all grey.  Heck, we didn’t even see the ground till we were practically landed.  Anyway, we are in the BIG EASY and the sun is coming up as I write this post– looks like a good day in New Orleans.

We caught up with my buddy, Ralph Romaguera, local native and great photographer, and his lovely wife, Cindy. After a brief visit to his studio we headed to Mandina’s Restaurant, one of the best Creole restaurants in town. About 5 years ago, the water was as high as our eyeballs.

R-C-DAZ-LD This is our first visit to the city since Katrina hit 10 days after our last visit. I have to say, the city is on it’s way back and the excitement is at fever pitch for this Super Bowl weekend.

Couple this Super Bowl weekend with the fact that this is also the first week of Mardi Grass celebrations and we have one busy city happening all around us.  Tonight we begin the Mardi Gras festivities with a grand ball at the Hilton New Orleans Riverside.  Tomorrow we visit the “Den” where all the floats are housed – that should be a kick.

Ralph’s schedule has us starting again Sunday morning at 6:30 a.m. with breakfast, Bloody Marys and Mimosas at the The House of Blues.  After the parade starting at 11 a.m. and wrapping at 3 p.m. we are heading to a Super Bowl Party and then down to the French Quarter after the game, VICTORY as every here is predicting, making it an 18+ hour day!

Let’s see what time I get the post up next week;~)

Hey, let’s get right to today’s post.  It’s an important way to get a good start on this new year for your business.  Here we go.

Start Running Your Business Before It Runs You

Charts - Fotolia_5173872_Subscription_XXL You know, I don't care if you are a BIG fish or a little minnow in the great sea of photography. When you are running your business, big or small, all the same rules apply. You've got a job to do, you've got to process that job, and you have to get it out the door in a timely manner, and at a production cost that makes the entire process a profitable endeavor.

Sounds pretty simple, doesn't it?  The fact of the matter is that those studios with less to do, the smaller fish in the sea, probably have the most expensive production costs in the world.  Here's why - it's human nature mostly. Work expands to fill the amount of time available for the job.

I can remember back in my college days.  I worked as a part time truck driver delivering furniture for a local furniture company.  Whether I had 8 or 18 pieces to deliver, my partner and I always got back to the shop by quitting time.

Were we sloughing off our responsibilities to the company when the job day was lighter? At the time it sure didn't feel that way. OK, maybe sometimes when we had even less to deliver.  If we had a full load, super busy day,we just worked harder and perhaps more efficiently to get it delivered by the end of the day.

Don't a lot of us do that same thing in our own businesses today?  If we've got one job to do today, we can easily make it a leisurely day and stretch it to fill the entire day.  Now think back to your Christmas rush. You got a lot more accomplished in a day, didn't you?

Folks, my point is this.  If we want to be profitable in our businesses, then we've got to act profitable all year long and make the proper "time-management" decisions to make that happen.

Hit the "Read More ..." link below to see my My 7 Step Plan To Production Success.

Here is My 7 Step Plan To Production Success:

1. Set up a production listing of all your active and inactive jobs in house. Be sure that your listing includes internal projects too like seasonal marketing projects, special studio promotions, updating web site, blogging, enhancing social networking skills, any project that COST you people hours (payroll) to accomplish.

2. Prioritize those jobs in order of importance in which they need to be completed. Don't forget to assign a "Finish" date to each active job - very important.  I call this, "Putting a fuse on the project."

Focus on Success Magnifying Glass 3. NOW THE MOST IMPORTANT STEP - Assign each job a production number.  That number is the amount of time and the payroll $ it should take to complete the job in process.  As I said, this is the most important part of this process. If you pay an employee $15/hr, then your production number for a 10 hour album design job would be 10 x$15 or $150.  Seeing the real dollar amount is an immediate "wake up call" to the cost involved in your processes.

This production number you assign is your "production currency" - what you want to PAY to get the job done.  It is literally the amount of money in PAYROLL HOURS, especially if you are paying someone else to do the job, or that you willing to budget to complete the job.

Assign too big a number and the job will fill the space you've allotted to it - making it a very costly production proposition for your company.  Make it too small, and it won't get completed in it's allotted time and you will need to re-evaluate the cost of the production process.

Based on your past experience, you should at least have a feel for how long a project, wedding, portrait, or senior order should take to run through your studio.  The nice thing about implementing these production procedures, is that even if you don't have much history as to costs now, you will continue to build real history as you stick to my plan.

By organizing and prioritizing your jobs is this fashion, you actually take control of your business.  You no longer jump from "fire" to "fire" putting each one out before you move on to the next job.

No longer do small jobs get "lost" in the process.  How many times have you said to yourself, "Oh my gosh," I forgot all about that order?

The beauty of this process is this.  Once you budget the numbers to each project, you now have a clear picture of what needs to be accomplished, an even clearer picture of how long it will take, and what it is going to cost you.  

4. Review weekly with yourself and your staff where each job stands in the process.  Are some jobs taking too much time to complete? Some too little? Why? You need to know those answers so you have better data for the future, for the next time around.

5. When the project is complete, evaluate if you came in under budget or went wildly over budget.  Would it have been less expensive to just send the job to a professional lab in the first place instead of trying to do everything in house.  Now you have object hard numbers to help answer that question.

6. Evaluate your payroll and see how closely payroll hours sync up with production hours.  They should be darn close.  If they don’t then why don’t the numbers align? If they begin to diverge substantially from the production hours assigned, there is "trouble in River City" and you better get a handle on it before the "costs run amok."

7.  Be sure everyone can see the numbers and see WHAT IS EXPECTED. For 2010, we are using Google Docs to post our production schedules and job allocation costs.  With all the travelling I do, I can easily get a quick snap shot of what is happening with my business - no "ifs, ands, or buts." No more wondering endlessly where, when, what or why. I have solid information to forecast for the future and bring credibility to my current expenses.  

Too few businesses, especially small business, have little clue about what their costs really are and how to spend their resources on those jobs.  That may be why there is such a "churn" in the wedding photography field - full time and part time alike. It may look like your making some money but in actuality, when all considerations and expenses are taken into account, you simply aren’t.

Folks, its a changing world out there and its time to "GET A GRIP" on your business.  If you don't, it's a losing proposition.  Aim for the stars instead - the view is so much more exciting!

Want to become part of this conversation? Please add your thoughts to the "Comments" section below.  Let your comments include your horror stories and your success stories for your businesses. I'd love to hear from you.

________________________________________________

Hey gang that's it for me today.  Can't wait to get a start on all the festivities this weekend.  Mardi Gras AND the Saints in the Super Bowl this weekend. It should be quite the party in New Orleans ;~)

Just remember, don't get any pixels in your Jambalaya.

See ya' Monday….. if we survive the weekend ;~)

-David

Thursday, February 04, 2010

"A Sacred Calling"

 Rabbi 2

"A Sacred Calling"
©
David A. Ziser

Here is one of the images I made yesterday at my portrait session.  As I mentioned the location - Plum Street Temple is just a spectacular location for weddings, Bar/Bat Mitzvahs, and now portraits.  Rabbi was gracious enough to let me select any location for his portrait. Although there were some great locations throughout the temple in which to photograph, and we made good use of all of them, it was the balcony that provided the most exciting location for the portrait.  From this higher vantage point the magnificence of this sanctuary, the oldest in Cincinnati, Ohio and one of the oldest in the USA, pours it's beauty forth offering a wonde5rful background for Rabbi's portrait.  It was quite an honor to be asked to make this official portrait.  Camera spec; Canon 5D Mark II fitted with 24-105mm IS lens at 40mm, F5.0 @ 1/15 second (handheld), ISO 800. Illumination coming from camera left - Quantum at 1/8 power shooting through my Zumbrella at 7-8 feet away. Enjoy!  -David