This image was captured several years ago, back in my Nikon days. We had been shooting “digital” for about three years and I had just picked up my first Sigma 8mm Fisheye lens – I was stoked to give it a try.
It was an early afternoon wedding which meant we were heading to the reception just when the lighting was about perfect for outdoor photographs. We also had one of those perfect days with the sky full of beautiful white puffy clouds. Simply an ideal situation.
We checked to be sure no one was hitting onto the 18th green and grabbed this photograph. It’s just a simple wedding portrait but the setting is what makes the image so special. I really like how the color of the groom’s dress blues enhance and compliment the rich blue sky. The fisheye lens’ super wide view really reaches out and grabs the sky taking it all in.
Lighting was from camera right, my Quantum through my shoot thru umbrella (pre-Zumbrella) at full power.
Camera specs: Nikon D1x fitted with Sigma 8mm Fisheye, F 11.0 @ 1/500 second, ISO 400. Enjoy! -David
Turns out today is an easy day, at least studio-wise. Nearly everything is delivered and we are just tying up a few loose ends. Now I’ve got to move on and get my new programs written for the 2011 Photoshop World Handbook being held in Orlando, Florida in March [link]. Yes, I said April but the write ups are due on Monday – looks like that’s how I’ll be spending a good part of the weekend ;~)
I also just completed an article for “The Gallery”, the Professional Photographers of Canada professional publication. I’m speaking at the next PPOC in April [link] and I promised to do an article for their magazine. I hope to see many Northerners there. The article is wrapped and on the way to them. Now back to the PSW articles. When will I ever get my Christmas shopping done ;~)
How about we move on to today’s post. If you are using your iPad for previewing images to your clients, you need to read this article!
iPad OS 4.2 Upgrade – Just Say No!
And I mean, “Say NO!” loud and clear! In Monday’s Quick Hit Monday post, I brought up the issue one of our DPT readers was having after she upgraded to the iPad’s new operating system – it neutered her Delkin flash card reader when trying to use it to import images into the iPad.
I blogged about how cool it was to upload a number of wedding images to the iPad on the wedding day and preview them for the bride, groom and guests [link] – WOW! What a sizzle factor that brought to my wedding coverages!
Mystery Solved
It seems that when Apple issued the OS 4.2 upgrade, they neglected to tell anyone that they reduced power from 100mA to 20mA to the 30 pin connector plug where you attach your USB adapter for your card reader. This move basically rendered ALL card readers USELESS for the iPad. The iPad message says that there is not enough power to use the device.
Not only does the upgrade render the card readers USELESS, but now many folks are complaining that they are even having problems connecting their cameras directly to the iPad.
Wait, it doesn’t end there. The upgrade even renders the iPad keyboard USELESS too!
Hit the “Read More…” link below for the rest of the story.
Why The Change Of Output Power?
Apple contends that is is to make the battery last longer in the iPad. Make it last longer – I recharge my iPad every three days whether it needs it or not and it’s still usually hanging out with about 50% of the battery life left – and I use my iPad everyday with moderate use. How much longer do the batteries need to last anyway?
I’ll give the Apple engineers credit for creating one of the most innovative and useful devices available to we consumers, but some one was asleep at the “upgrade switch” when the decision was made to downgrade the power output to the camera connector to 20ma. With this upgrade they have simply downgraded the iPad, if you ask me.
Apple In Denial, At Least For Now
I checked in with my buddy who works at the Apple Store. Lots of folks have experienced the problem, but Apple is contending that is seems not to be an issue – most camera use SDHC cards anyway. Uh… most of the amateur cameras, that is. So much for the Pros who love the iPad for what it brings to our businesses.
A Solution, But Not An Elegant Solution
What’s the solution? Go buy yourself a “powered” USB hub. There are plenty available on the market. Think you can find a battery powered USB hub? Not anymore Cyber Power used to make two versions – one powered by 4-AA batteries and the latest version was powered by rechargeable batteries. Now both are discontinued.
What’s all this mean to the professional photographer wanting to pull off a quick iPad image preview at a wedding? Well, now you’ll have to find a place to plug in your powered USB port and then import as usual – what a “pain.”
More Discussion On The Topic
You can find a lot more discussion on the neutered iPad below
This site has the best write up about the problem right here. Here is how they end their post:
“It is unknown whether or not this is simply a bug in iOS 4.2 but we do hope that it is and that Apple will fix it in an upcoming software update. To summarize, the iPad Camera Connection Kit no longer works with non-self powered devices.”
Conclusions
I sure hope it is a “bug” too. The functionality of the iPad with the flash card import capability was “golden” to wedding, high school senior, and family portrait photographers. I sure hope Apple considers the negative impact this "power mod” has had on the pro photographer and will reconsider returning the 30 pin power output back up to 100mA.
Who knows, maybe we will see a manufacturer come out with a portable battery powered USB hub again but I’m not crossing my fingers based on Cyber Power’s discontinuance of both of their portable units.
Maybe I’m missing something here but when something goes from “great to good” instead of visa-versa it just gives pause to wonder. C’mon Apple “Power to the People” – at least 100mA worth of power anyway.
Am I planning to upgrade? Nope, not at this time. I sure would like to try out the new iOS features but, as a professional photographer, not at the expense of losing the ability to easily and portably import images from my flash cards at weddings.
p.s. My thanks to all who helped research these answers, including Jason Lykins, who helps out with Terry White’s BestApp site and who posted some of this pertinent info to my Facebook page – THANKS Jason.
Hey gang, that’s it for me today. I’m stepping down from my “soap box” and planning to enjoy the weekend. Hope you get a chance to do the same.
How about I see you on the flip side next Monday. Remember, get your Pixels something special for the holidays too. They sure have been good, haven’t they ;~)
I blogged this image a while ago but without much back story. That’s why I thought we would revisit it again today. I created this image as one of a series of images detailing my newborn subject. I’ll tell you, it was one of my most difficult in home sessions. The subjects were twin newborns about 5 weeks old and born 3 weeks premature.
My assistant, with my strobe and “shoot thru” umbrella (pre Zumbrella days), and I were literally following mom and dad and babies around their living room grabbing what ever we could in between crying spells. After three hours of photographing crying babies, I felt I had nothing from the shoot.
I spent about a week just reviewing the images to see if I could pull anything out of the flat lit, pretty ordinary set of image. Inspiration lead me to take a few images into Photoshop. After working with the “Curves” adjustment layer and “Layer Mask”, I came up with a technique that saved the day. I actually featured that technique a few years ago in a Technique Tuesday post by the same name right here [link].
This image is one of my favorites. I love the tiny hand over the father's thumb. The size differential puts everything in perspective - the fragility of the infant who will all too soon become a man - our future.
Camera specs: Nikon D1x (yes, it was way back in my Nikon days) fitted with Tamron 28-105 F2.8 lens at 105mm, F8.0 @ 1/125 second, ISO 400. Enjoy! -David
Hope you are enjoying the weather in you part of the world – we received about 5 more inches of snow on top of the 4 inches we received on Sunday night. I know that sounds like a dribble compared to our DPT readers in Milwaukee and all points north, but it’s still nice to see. Yep, I am one of those lovers of snow, at least around the Christmas season.
It’s been busy getting the last of the Christmas orders out the door, but I think we are close to having every thing ready to go. It will be nice next week enjoying more of the holiday festivities than rushing around with client orders. I know what you’re thinking, “How does Ziser get everything delivered one full week before Christmas?” Readers of this blog know I covered that in a post right here back in September.
Anyway, we’ve got a little studio Christmas Party happening today, so let’s get right on with today’s post.
So What Are You Doing After The Holidays?
I know for us, we are doing not much of anything. It’s the time when we straighten up, clean up, and re-organize the studio after the holiday rush. The staff is mostly off for the week enjoying the afterglow of the holidays with their families giving LaDawn and I a chance to enjoy a more relaxing week, too.
OK, that said, let’s say you are a portrait studio and aren’t “wedding shy” at the end of the year like us wedding guys. What are you going to do? I’m taking the queue from our friends, Kent and Sarah, at Kent Smith Photography.
As we were leaving Cabo last week, I ask Sarah what her after Christmas plans were. I thought if you’re running a “Million Dollar” studio, that they may be taking a little time off too. Not so, she told me. When you’re running a “Million Dollar” studio, that amounts to nearly $20,000 worth weekly sales you need to generate!
Hit the “Read More…” link below for the rest of the story.
Her remark put a whole new light on that week for me. She further explained that they had special “After Holiday” promotions lined up to keep the studio busy in that week between Christmas and New Year’s.
OK, for me and all of us at David A. Ziser Photography, we are still taking the week off. But for those of you who are shooting portraits…
Here are 5 reasons why you should use that time productively.
1. Family members are usually home for the holidays over that time period. What a great opportunity for them to schedule that family portrait that never seems to happen because so many family members are out of town.
2. The Christmas rush is over and scheduling your clients for their portrait is much easier after the holidays.
3. Your appointment calendar is probably a little lighter on appointments too, so it’s easier and more convenient for them to come in and review their image.
4. This is a great time for them to use the portrait gift certificate or “Portrait In A Box” they bought from your studio before the holidays. I blogged about that last year – give it a read right here.
5. And, most importantly, it adds to your bottom line which will help you through those dry months of Jan, Feb, and March.
OK, those are the reasons you should stay busy for that valuable week between Christmas and New Year’s.
Here are 5 ways you can make that happen.
1. Run a special “After Holiday” special on your Facebook Fan page. The first 10 clients that book appointments receive half price session fees.
2. Do a big push on your “Portrait In A Box” promotion I mentioned above. But, offer special pricing on those whom you will photograph before December 31.
3. When you send Holiday Cards to all your clients – that is assuming you do send cards. What do you mean you don’t send out holiday cards to your past, present, and future clients! That’s a money losing proposition. Anyway, in each of the holiday cards you send out to your clients, include a notice about your “After Christmas” promotion. You just may catch a family or two I referenced in Reason #1 above.
4. It goes without saying that you should do an email “blast to all your clients before the holidays promoting your “Portraits In A Box” and your “After Christmas” sessions.
5. Consider a “Two For One” “Portrait In A Box” promo, but the second one must be used by the end of the current year.
Hey gang, those are just a few of my quick ideas on how to fill up those “slack” days after Christmas. Take a few minutes and do a little “self brainstorming” and I’m sure have even more ideas to add to my list.
Me, I’m still taking the last week of the year off. Like my father used to say, “Don’t do as I do, do as I say.” Hey, all joking aside, if you want to fill those 7 days, I hope I’ve pointed you in a direction or two to do just that.
OK, I borrowed the title from Shakespeare's play, “Hamlet”, but I think it works perfectly because this “Inspiring Volunteer” was honored by our own Cincinnati In The Park panel.
Just as in yesterday’s portrait from the same series, I wanted to photograph the honoree in the surrounds of the Playhouse – the main foyer area seemed to be the perfect place. The banners hanging from the ceiling represent the plays of that season’s line up. I also framed up the Playhouse sign in the background to finish my composition.
Positioning the subject directly in the center of the composition, I thinks works just fine too. He is clearly the center of attention in the portrait with all the other elements playing the secondary role in this image.
The lighting from the spots above served as a nice accent light on the subject’s hair. My flash, which was brighter than the ambient light, came from camera right about 7 feet away at 1/8 power and served as my main light in creating a nice directional and defining lighting on his face.
Camera specs: Canon 5D fitted with 24-105mm IS lens at 47mm, F5.5 @ 1/50 second, ISO 800. Enjoy! -David
That’s right folks, as promised, we are announcing our first Holiday Sale here at DPT and the deals are awesome while our supplies last! Hit any of the images below or the link right here to see all our Holiday Specials! We’ve even got FREE Worldwide Shipping on our Ultimate Bundle listed below!
The sale ends at the end of the year on December 31, 2010, so don’t miss out! Check out the specials and 25% to 70% savings below.
Captured By The Light - How To Take Extraordinary Wedding Photographs for only $29!
An autographed copy of my hugely popular book “Captured By The Light” for only $29!! That’s the best price on planet earth for a book that has been called “…the best book ever written on wedding photography.”
Already own a copy, then this is the perfect gift for a fellow photo buddy.
The Zumbrella – Now Only $29.00
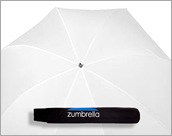
This is by far the best price we have ever offered on my Zumbrella. Last year, my Zumbrella was the best selling shoot through umbrella anywhere. I made Scott Kelby’s Gonzo Gift Guide list. It was the favorite flash accessory for both our Digital WakeUp Call Tour last year and our Captured By The Light Tour this year.
At this price, pick up two. Don’t forget to add on an umbrella bracket too.
“Hot Shots” 3 Set Series: The Photographers Quick Reference Guides, only $59.00
When we made my 3 “Hot Shots” series available the second half of last year, photographers could not get enough of them and we sold out! We reordered for my CBTL2010 tour and still have a few left at this fantastic price.
Live Wedding Shoot: From Start to Finish, only $49
This DVD raises the training bar once again by doing the one thing aspiring wedding photographers everywhere have been asking for. In Live Wedding Shoot: From Start to Finish, you become the “virtual assistant” as I take you through my entire day at an actual wedding.
Rapid-Fire Tips & Tricks Wedding Photography, only $49
This DVD is jam-packed with a wealth of wedding photography tips and tricks discovered over the years. Essentially, this DVD allows you to skip years of trial and error and go directly to the perfected results.
Make Your Lighting Exciting 2-DVD Set, only $39 for both DVDs
Disc 1: 15 Ways to Improve Your Photography Using On-Camera Flash
Classic Lighting and Posing 2-DVD Set, only $39 for both DVDs
Disc 1: Classical Posing & Lighting Techniques
Disc 2: Getting the Perfect Shot at Tricky Locations
The Ultimate Bundle, Everything Above For Only $239 – includes FREE Shipping Anywhere!
This is the deal of the century! It includes everything listed above at a fantastic price!
Look no further for the Perfect Holiday Gift! Get the ULTIMATE BUNDLE - 1 Captured by the Light Book, 1 Zumbrella, 3 Hot Shots Quick Reference Guides, and all 4 Training DVD sets. This is the Ultimate gift for every photographer.
In addition to announcing our holiday specials today which I’ve done in the above post, I also wanted to give you a peek at how I arrive at my final image.
OK, what do I mean? While we were in Cabo, I always have a camera in my hands. Our friend Sarah made the comment to me that she enjoys watching me create my images. I’ll take the first, recompose slightly and take the second, and continue the interactive shooting process to I get the image I want.
I never thought about it that way, but I think she hit the “nail on the head: as they say on how I see and frame up an image. In today’s post, I’m going to illustrate that point for you in a session I did of one of our grooms during a recent Master Class. Let me show you.
Visually Building Up To The Final Image
1st Photograph:
Let’s look at the first image. I knew in my mind that I wanted to create a wide angle portrait on the groom in the beautiful surrounds of the church.
This first image is not a bad first try. But, I am bothered by several elements within the photograph. First, the ceiling, top left, is too bright. Secondly, I don’t like how the arch “hits” him in the head. And finally, the use of the wide angle lens too close to the subject distorted his arm making it unnaturally long.
Hit the “Read More…” link below for the rest of the story.
2nd Photograph:
Now let’s look at the second image. I think it is a slight improvement but “still no cigar.”
In this image the lighting looks good, pose works, arm is not so distorted. I positioned the camera at a higher angle which solved my bright ceiling problem. But I still have the problem of the pillar “ hitting him in the head.”
3rd Photograph:
In this image I’m getting closer still. The pose and lighting are still looking good. The balance of the ambient with the off camera key light works well. So what’s the deal breaker for me?
Take a quick look back at the first image. In that image, I was attempting to frame up my subject within the arch but I just missed. The same has happened for the second and third image. But you can see I’m a lot closer to my compositional goal in this third image. All I need to do is frame him up within the “interior frame” behind him.
4rd Photograph:
I think this image “nails it.” This time the groom’s head is perfectly centered within the “interior frame” (behind his head). That framing offers a nice visual balance to the scene while at the same time drawing viewer’s attention directly to his face.
A tweak or two in Lightroom to adjust the light intensities within certain areas of the scene enhanced the portrait even further and gave me my final result.
The total time that elapsed for me to iterate to this result was 2 minutes and 7 seconds. So from the first image to the last in about 2 minutes illustrates the creative process my mind goes through to obtain a finished photograph with the result I want.
I hope you can understand what I’m saying. The first shot is never the only shot for me. As you can see, the final image is a methodical “process” for me. I like seeing how the image starts coming together as I make the minor changes to the composition. Each “tweak” leads me to the next and then to the next until I now have captured what I want.
Anyway, I get you could say that my first three images are the ones that got away. But, I hung in there till finally the “bells and whistles” sounded and I knew I had the one I wanted.
Hey gang, that’s it for me today. Don’t forget to check out the great holiday special over at our Digital Resource Center. With deals from 15% to 40% off just in time for the holidays! You can’t go wrong!
How about I see everybody tomorrow for another episode of “Business Day Thursday: Your After Holiday Sales Booster.”
Have a great rest of the day and I’ll see you then!
The image was created as a part of a series of portrait studies I did for a special magazine feature entitled "Our Most Inspiring Volunteers" in the Arts in Cincinnati, Ohio. My goal was to photograph each inspiring volunteer in the surrounds of the arts which they loved.
The gentleman pictured above had a love of the Opera so we headed over to the offices of the Cincinnati Opera for his portrait. The lighting was the main challenge. I thought window light would be the way to go since there was a window nearby but I just couldn’t get the effect I wanted.
I resorted to my trusty shoot through Zumbrella for my male portrait light positioned camera left at 1/8 power. The challenge was to keep the light source from reflecting off the poster behind the subject, but we eventually made it work.
I love the color and tone co-ordination in this image and the equal but opposite lighting pattern on the subject's face when compared to the artwork behind him, which is from the opera, Aida.
Camera specs: Canon 5D fitted with Canon 24-105 F4 IS lens at 32mm, F6.3 @ 1/40 second, ISO 800. Enjoy! -David
It was a “way too early” wake up call for me this morning. I had a schedule change late yesterday and now have a very early morning meeting. Still I wanted to get the blog up before I left. And since time is super short this week, I’m going back into the archives and pulling out one of my all time favorite lighting tutorials for you. Hope you enjoy it.
The Light Fantastic – A Fun Lighting Tutorial
An easy shoot, a few head shots, a few candids - we should be in and out in no time. But it never goes down quite that way. We've all gone into a shoot with a certain expectation only to quickly become side tracked with unexpected complications.
Here is the story: I received a call from one of my favorite clients asking if I could shoot all the actors at her son's high school for their Spring Musical. She would also like some candids of the young artists as they rehearse their parts. Sure, I say. I did the same thing last year and it was a lot of fun. Besides, I enjoy watching and working with the kids.
Well, LaDawn and I show up on site and lo and behold - we've caught them at the very early stages of practice and production - no sets, no backgrounds, no costumes etc. Challenge - how could we get good pics of the actors performing their numbers and get some good head shots in these sparse and cluttered stage surrounds? Hey, as I've said many, many times it’s always about the light. It's about how to use it for best effect in both of these situations. Hit the PLAY button below for the rest of the story and a fun shoot.
Hey gang, that’s it for me today. I’m out of time and need to make my appointment. I hope to see everyone tomorrow for a little twist on my series “The One That Got Away”. Also, look for the BIG announcement of our super duper deep discount holiday specials over at our Digital Resource Center. Plan to stop by, you won’t be disappointed.
I know, I know - I've been blogging a lot of sunsets lately. Hey that's what happens when you travel 3,400 miles, mostly western bound. Anyway, in reviewing some of the images from our trip, this one popped out at me.
It was made somewhere around Oklahoma. The sun had been blinding us for about an hour when finally it dropped below the horizon and began it’s wonderful cinematic display of color.
I love the rich, deep color of the cloud formations serving as a beautiful backdrop to the windmill. I also like the way the windmill dominates the scene. I almost wish I had just a little more room at the top, but then again with the windmill overcrowding the scene, is seems to bring more power to the composition.
Camera specs: Canon 7D fitted with 18-200mm IS lens at 70mm, F 7.1 @ 1/200 second, ISO 800. Enjoy! -David
We made it back safe and sound late Saturday and got right into the holiday swing of things. With the snow falling on Sunday, it made it kind of easy. Hey, Cabo was great but Christmas time is still my favorite time of the year and our home and the studio prove the point with 9 Christmas trees already in place.
Anyway, it looks like it's shaping up to be a busy week around here so why don't we get right on with today's post. Here we go...
Holidays All Around, and Good Deals Too Starting Wednesday!
That's right, this coming Wednesday we are beginning our first holiday sale at DPT. LaDawn and Jennifer have been putting the finishing touches on several holiday specials. I have to say, you are going to like what you see. Be sure to check back Wednesday for all the details.
On The Fun Side For The Holidays
Last week I stumbled across a new iPhone/iPad app that I love. It's Bill Atkinson's PhotoCard app. Bill Atkinson is both a MAC guru and fantastic nature photographer. In fact we used Bill's profiles when we started printing everything inkjet on my first Epson 9600 printer.
Anyway, back to the app. The light version is free with the full version costing only $4.99. The lite PhotoCard version works great as I've been using my own images instead of Bill's - sorry Bill. The app is soooo.... easy to use. Pick an image, fine tune it if needed, add the recipient's address - I been sending a few cards to my daughter Elizabeth during our trip - add a stamp and you are ready to go. Just hit send.
It's a great way to share your travels with friends and family. But more than that, I think it has a place in my studio on the business side of things, too. Here's why. With the iPad it's really easy to send an uploaded image to a client, but if you've uploaded the RAW files to your iPad as I do while shooting a wedding, it's that Hi-Res file that they receive - not a good thing.
With the PhotoCard app, the image is downsized and sent as a Jpeg attachment - pretty cool. Now I have even a better and fun way to interact with my clients and vendor buddies. you can check the PhotoCard out right here.
Problems With iPad Upgrade - Maybe
Hey gang, you all know I'm an iPad fanatic. And, I was really looking forward to downloading the latest greatest version of OS 4.2. Luckily I haven't yet. I love the fact that you can use the Delkin Card reader to easily upload my flash cards into the iPad.
I blogged about it right here months ago. Here is the link to the post. Fellow blogging buddy and Adobe guru, Terry White did the same thing right here and posted a video too. OK, that all well and good. I was anticipating no problem with the latest OS version. Well, there seems to be a problem with the latest OS version not working with the Delkin card reader.
I recently received a note from Amanda Spillman, one of our loyal DPT readers. Here is an excerpt from her note, "After I upgraded I can no longer import jpegs or RAW images using my Delkin card reader. I attempted to download the same card I had last imported before upgrading & it says there isn't enough power to support my device. Which I had no issues before with importing images using that card reader previously. Wanted to see if it was just me or if there were others having the same problem. Thanks."
Anybody having any of these same issues? Not being able to get images from flash cards from a wedding shoot would be a huge deficit for me and many others who use our iPads to add a large amount of image sizzle to the wedding day with impromptu iPad slide shows. I'll keep you posted on anything I find out.
Geek Squad Report - Windows 7 Not Letting You Hook Up To A Wireless Network?
After our long drive to Cabo two weeks ago, I mentioned the computer issues Kent and I were having connecting our Windows 7 machines to his network. It was pretty frustrating for about two days especially if you are trying to get a blog post up.
I don't know if anyone else has had the same problem, but if you have, here is the solution that worked for us thanks to a post by Microsoft moderator, Novak Wu.
"This issue can occur by incorrect DNS settings. I suggest you perform the following steps to troubleshoot the issue.
2. Right click on the connection that you use for the local connection, and then click "Properties".
3. Click to select "Internet Protocol Version 4 (TCP/IPv4)", and then click "Properties".
4. In the Internet Protocol window, let's change the "Preferred DNS server" to 208.67.222.222
5. Click 'OK' twice to complete the modification.
If the issue persists, please repeat the steps and change the "Preferred DNS server" to 208.67.220.220."
Thanks a bunch Novak. That did the trick for us!!
Just For Fun - Some Photography Links You Might Enjoy
It's getting close to the end of the year and several sites are posting some of their "Best of" links. Let me share a couple of gems with you today.
First off how about heading over to Tiffinbox.org to see what Master Twitter king, Seshu, has posted. (Seshu tweets like crazy and it's good information too.). Anyway, he’s got a pretty cool blog going called Tiffinbox.org right here. It's an interesting collection of posts by photographers for photographers. Check it out right here.
The second link list is over at LifeHacker, always a good read. His post, "The Most Popular Tips, Tricks, and Hacks of 2010" looks to have some fun things listed. You can find them listed right here. Enjoy!
Now To Get You In The Mood For The Holidays
Have you seen any of the "flash crowd" videos over at YouTube. Many are quite interesting. One of the first I saw was when several hundred people staged a "flash crowd" at Grand Central Station [link]. The large group showed up and milled around the station until the precise predetermined moment - at that moment they just froze in motion with the other commuters continuing on to their connections. It was quite interesting to see the visual result.
Anyway, this "flash crowd" video is pretty darn amazing. All I'll tell you is that it takes place at a mall during Christmas season. Hit the PLAY button below and get into the spirit. It's quite fun.
Hey gang,that's it for me today. The snow is falling, the cider is warming on the stove, and presents are ready for wrapping. Oh.... you mean after two weeks of being away from the studio, I've got real work to do? OK, warm cider and presents tomorrow then ;~)
Have a good one everybody. See ya' tomorrow for another episode of Technique Tuesday.
I made this image yesterday evening as our catamaran began its turn around “Land’s End” – the tip of the Baja peninsula – from the Sea of Cortez into the Pacific Ocean. The timing was perfect as I was able to catch the sun just before it final surrender to the sea. Hundreds of birds were flying around the rocks settling on a nesting location for the night.
The challenge was to get the exposure just right. I wanted to capture the beauty of the sunset while still preserving detail in the shadows. I thought I reached a happy balance in the image.
The sailing ship to the left side of the image was at the right place at the right time for this pretty cool sunset image.
Camera specs: Canon 7D fitted with Sigma 8-16mm wide angle lens at 16mm, F 16 @ 1/250 second, ISO 200. Enjoy! -David
What a great day we had Wednesday and Thursday in Todos Santos. After we arrived, Kent and Sarah surprised us by checking us into the Hotel California, about the most eclectic hotel you have ever laid your eyes on. This is a view of the bedroom to the balcony which is easily 6x larger than the bedroom itself! Who knows, this hotel may be the same hotel that inspired the Eagles to write the song by the same name ;~)
Last night we did the Jazz and Wine Sunset Cruise, simply one of the best deals in Cabo. You get a 2 hour sunset cruise around the cape, unlimited hors d’orves, and a nice variety of adult beverages for like $30! The weather was perfect, the sunset was fantastic, and the evening - unforgettable!
Today is a sad day as we wrap up our trip here in sunny San Jose del Cabo, Mexico and jump on a plane back to the good ol' USA about 1:30p.m. tomorrow afternoon. After a long travel day, finally land at the Cincy airport about 11:30 p.m. and hope to be home by midnight.
I have to smile as I write this because I hear we are heading into a major winter storm that hits right after we get home. It's kind of like Mother nature is saying "Welcome home" in her own comical way. Anyway, I say who cares - weather is weather and we certainly have have had our fair share of great weather these last two weeks.
Hey gang, I've got something different I want to talk with you about today. it's about niche cameras. Why don't give the post a read and let me know what you think. Here goes.
Niche Cameras, Do They Have A Place In Your Pro Gear Bag?
I've been thinking about this for the last several weeks. As you've read at DPT I've just picked up the Canon G12 and the Fuji HS10. Sure, I was thinking they would be fun cameras to take on vacations but could, and I say "could" they have a place in my regular gear bag?
Hit the “Read More…” link below for the rest of the story.
Here is why I ask the question. Let's look at the Fuji HS10 first. What was it's main intrigue for me? The quick answer was the 24-720mm image stabilized lens. I thought, "Wow, what a zoom range!". In shooting with the camera these past few weeks - as I said Monday, it's the camera I love to hate - I find I love the zoom range, but hate the quirkiness of the camera.
At it's widest range, the field of view is the 24mm equivalent to a full frame 35mm DSLR - pretty darn wide. In fact it's wider than my Canon 18-200mm at it's 18mm setting. But it's the 720mm end of the Fuji's zoom range that really intrigues me. So much "zoom" for so little money. The equivalent Canon focal length lens would set you back $1,000's of buckaroos. So, it that a reason to have one in your gear bag?
I'm thinking, "Well, maybe." As a wedding photographer, it might be really cool to have this super long lens for those "reach out and touch somebody" candids I like to shoot. In the field though, I may find the same frustration I've been finding these last two weeks – very slow to focus and very slow response time. I will say that the lens is plenty sharp at full zoom though.
I guess it could be argued that I could shoot the same scene with my 18-200mm lens at 200mm. With the 7D's 1.6x magnification factor, that would give me an equivalent focal length of 320mm, still half of the Fuji's focal length. But if you factor in the fact that the Canon 7D is 18mp compared to Fuji's 10mp sensor, after cropping the Canon image, you are still in the same relative ball park on the pixel count of the image.
The fact that the Fuji shoots 1080p video AND you still have that super zoom 720mm focal length does change the equation somewhat. Also, some of it's unusual features like Multi-Motion Capture, Motion Remover, Pro Low-Light, etc. could make it an interesting addition to your gear bag. For the $350 investment, it's still less expensive that any lens I've ever bought.
So in concluding, I'm still sticking with my earlier answer of "maybe". I'm NOT suggesting that you choose a consumer camera for your digital shooting. What I am suggesting is that with the unusual features of some of these niche cameras, they just MAY have a place in your gear bag because of the one or two features that may be useful to have on your next shoot.
You'll have to decide if those features are worth the $350. So you may buy it - what's the worse that could happen? We've all blown a buck or two on something we thought we needed and then never used. So, sell it on EBay if it doesn't work out. Like they say, "Nothing ventured, nothing gained." I'd be interested to see what DPT readers thought.
Hey gang, that's it for me today. We got one more great day down here in paradise and, although I love ya', I'm hitting the beach ;~) I'll plan to see you back in the frigid north on Monday.
Have a great weekend and I'll see you on the flip side next week.
Here is another of my favorite images I made walking the neighborhood while in Mexico. I love looking for abstract designs in common objects. The is a photograph of a condo development we walked passed yesterday. As I framed up the image, I truncated the black windows to the right side of the image. The white walls of the structure left behind looks like the letter "F".
Yes, I know other titles may come to mind, but please, not here at DPT ;~). Anyway, I still like the simple composition - the stark white against the blue sky and the heavy contrasts between the the whites and blacks - all the elements come together forming a cool abstract image of the urban landscape.
Camera specs: Fuji HS10 camera zoomed to 12.3 - 35mm camera equivalent; 72mm, F 7.1 @ 1/900 second, ISO 100. Enjoy! -David
Our days are drawing to a close here in Cabo. And, I just heard from home that we have a HUGE winter storm that is suppose to hit this coming weekend. Uhmmm.... maybe a few more days down here in the sunny south is in order ;~)
Hey gang, I think I've got a pretty good Business Day Thursday post for you today, so let's get right to it.
Be The Holiday Gift Wizard For Your Clients - 7 Ideas For Using Gift Baskets For Your Studio This Holiday Season
I got this idea from our friend Sarah Smith whom we have been staying with these last couple of weeks. She thought too many stores like Pier 1, Bed, Bath and Beyond, etc. were missing the boat when it came to holiday shopping. She pointed out that several stores had pre-made gift baskets ready to go for their customers, but suggested it would add a much more personal touch if these stores would offer a "gift wizard" to assist the customer in custom designing a gift basket instead.
I loved the idea and got thinking about how this idea could be incorporated into a photo studio operation. Here goes.
First of all the whole gift basket idea could really work well for a studio. Here are my 7 ways to make gift baskets work for your studio.
Hit the "Read More..." below for the rest of the story.
1- Package up three different gift baskets - one for weddings, one for families, and one for children. Each gift basket could include an assortment of items. For instance, an 8x10 frame, portrait collage, mini electronic frame with images, complimentary photo session. You get the idea.
2- Spend some time and some thought into putting these gift baskets together. You want them to be enticing and inviting. Talk over your idea with your clients, fellow photographers, family and friends and see how the concept and product selection sound to them.
3- Plan to promote your studio's gift baskets via your monthly email promos. Suggest that your studio gift basket may be the perfect gift for that "hard to buy" person on your client's Christmas list.
4- Let your clients know that you can be their personal "gift wizard" too. Invite them to come into the studio where you can work with them personally to put together a custom collection of items for that special someone on their holiday list.
5- Think gift baskets from husbands to wives, wives to husbands, girl friends to boy friends, boy friends to girl friends, fiancés to fiancés - the list can go on and on. I think you get the idea.
6- Look to the local charities to help spread the word too. Around the holiday season, most churches are involved in raising funds for the needy. You could donate a gift basket to the cause to help get the word out to the others in the faith community about the gift baskets your studio has available.
7- Don't forget to get your vendor buddies involved. Maybe you could collaborate with them and do some of what I call "cross pollination" and include products and services from several of your vendor buddies in the gift basket.
The secret to your "gift basket" success is to get the word out to your clients - past, current, and future. Your best way to do that is with personal notes to your clients and e-newsletters.
By including your vendor buddies, you'll all get more coverage for everyone through everyone participating newsletters, promo pieces, in-house samples etc. It's a win-win for everyone just by spreading the word to your potential future clients.
I hope you'll give the ideas I've outlined above some thought and see how the gift basket idea could work in your studio. If you've got some thoughts that expand on this idea, why not add them to the "Comments" section below for the benefit of all our DPT readers.
Hey everybody, that's it for today. Two days to go and then back to the frigid north. Have a good one and I’ll see you same time, same station tomorrow.
I don't know if that's the best title in the world but it's the first one that popped into my mind. I love walking around this little community in San Jose. Every time we come down to visit it seems something new has been built.
That "something new" does not always mean more condos and hotels. In this case I'm referring to these really unusual geometric structures that, as you view them, seem to be there only for the visual edification of the passer-by that see them.
Their design is always so unusual and I love photographing them from every angle possible. We stumbled on this structure yesterday during our morning walk - I love it.
I caught the sun directly behind the "Wire Gobbler" which helps focus viewer's attention to the "gobbling" portion of the structure. The entire structure is bright white but by "fiddling" with the Curves panel in Lightroom, I was able to alter the contrast relationships in his image more to my liking. An easy slide of the Vibrancy slider to the right about 60% finished my composition. Hope you enjoy it.
Camera specs: Fuji HS10 camera (Yes, I'm still trying to like his camera) zoomed to 8mm or about 48mm - the 35mm equivalent - F 8.0 @ 1/950 second, ISO100. Enjoy! -David
Hope the weather is good in you part of the world. We are still enjoying those perfect Cabo skies, cool breezes, and beautiful beaches. Although it's been a bit on the chilly side here only making it into the low/mid 80's by mid-day, but I'm not complaining.
We only have three more days in beautiful Cabo and then head back home on Saturday. We plan to make the best of it so let's get right on with today's post.
The One That Got Away: Taking Better Wedding Silhouette Photos
Bridal silhouette photographs can be some of the most striking images you can create for your client. I've seen some good ones and I've seen some not so good ones. Let's take a look at the image below. It's got a lot going for it, but it still misses the mark in some key areas.
First, what do I like about this image:
1- I like how the bride's gown leads from the foreground.
2- I like seeing the bride's reflection on the floor.
3- I kind of like the position of the the bride's bouquet close to her face. It draws the viewer's eye to that part of the image.
4- I think the maker has a good start on creating a beautiful silhouette.
OK, I probably didn't sound too thrilled about this image. Like I said, I think it's a good start. So, what would I have done to finesse this image to the next level?
Hit the “Read More…” link below for the rest of the story.
1- First off, I would have arranged the gown and the train a bit better. The gown is slightly wrinkled where it first meets the ground. The maker needed to give it a good "fluff" and then while still holding on to it, let it touch the ground softly. That would have added lots more volume to how it looks. Fine tune the veil the same way.
2- I would have used a longer lens to compress the scene. I find the furniture on the left a bit distracting. A longer lens would have minimized the situation. No room for a longer lens, then move the furniture.
3- My biggest suggestion is to NEVER have the veil obstruct the profile of your subject. In this image, the veil is pulled forward right under the bride's nose and consequently blocks the bottom third of her profile. This is a HUGE no-no.
4- My second biggest suggestion for this image pertains to the bride's position against the window. She is framed up against the rightmost window pane. But that let's the center wind divider hit her in the top of the head - not a very good compositional play.
She should have been framed up to the left of left panel with the left panel acting as an "interior frame" for the bride.
5- I also think a lower camera position would have helped to add dramatics to this image.
I know I've come down a little heavy on his image but hopefully in a constructive way. There is such a wonderful opportunity here and I think these small changes could have really made the image "sing".
Let's take a look at one of my images I made in the same location - it was a different window though. See how I positioned the bride slightly left of center in the window frame. It looks as if she is moving into that space instead of out of it as we see above.
My choice of longer lens also allowed me to isolate on the bride within the framing of the heavy drapes.
I think the fact that the bride's profile is unobstructed by anything allows the viewer to really enjoy this profile view. That's why we want to ALWAYS keep the profile clean.
Now take a look at my next image. The key point I want to discuss in the image is the positioning of the subject against the window pane. Notice how I have the bride's face framed up within the smaller window pane carefully adjusting her position so that her head is NOT bisected by the vertical element but instead, framed by it.
I also took the photograph from a much higher vantage point in order that the window's horizontal element didn't hit her in the face or de-capitate her at the neck.
Folks, these are all small things to keep in mind when considering your overall composition of the image. It's why they hired you - they want YOU to pay attention to the small things that make their wedding images a wonderful remembrance of the day.
It's like anything else in life - keep you eye on the small details and your final result will always exceed your clients expectations.
Hey gang, that's it for me today. We are making the road trip up to Todos Santos. Todos Santos in a small Mexican town that is home to a thriving art community. The drive to Todos Santos is also quite beautiful.
Have a great rest of the day and I'll see you sometime tomorrow for another episode of Business Day Thursday.
This is one of the portraits I made during Saturday's shoot. The lighting is just a little softer than I normally like but I think it fits this easy portrait of our beautiful young lady.
The location and backdrop offer a nice setting for the portrait as well. Because of the limited space we were working in, I asked her for an easy pose and just standing comfortably with her hands on her hips and a soft smile.
My lighting was coming from camera right bouncing off our silver Grand Caravan which was parked there for just that purpose. A long lens and wide aperture gave me the look I desired for this portrait location. Check out today's tutorial below for the entire story on how this and many other portraits were captured.
Camera spec: Canon 7D fitted with Canon 100mm F2.8 IS Macro lens, F2.8 @ 1/500 second, ISO 200. Enjoy! -David
I couldn't believe it when I checked the weather Channel this morning, 16 degrees with snow on the ground back home in Kentucky. I had to rub-it-in just a bit with my team back home. I asked them about the weather and they gave me the detailed report of snow, wind, and really cold temperatures.
I told them how bad I felt for them for the super cold weather they were having, but I finished our conversation telling them we were going snorkeling this afternoon. I'm glad I was down here where they couldn't throw anything at me ;~)
Hey gang, I've got a super Technique Tuesday for you today. It's a bit long so you may want to watch it in two parts. It's really worth it. Internet connectivity is a bit "iffy" now and then. Trying to get a 50 meg file up to Vimeo can be quite the challenge. Anyway, Check it out below.
Cabo Smiles - Or How To Take Portraits Just About Anywhere
Today's tutorial is about photography, lighting, and family portraits - family portraits made in the most humbling of locations. Because of the locations we were working, I chose to title today's lesson Cabo Smiles - How To Take Portraits Anywhere. When you watch the video, you will see what I mean.
Don't get me wrong, we got some great portraits. This tutorial will walk you through the entire process from solving challenging lighting situations, to finding the best backgrounds in less that optimum locations, to getting the best expressions on all the happy faces we photographed even when you don't speak the language.
Here is the backstory on our family portrait adventure. I've mentioned in previous posts about how the four of us, Kent, Sarah, LaDawn, and I participated in the Help-Project this past Saturday. The project is an outreach project to those in the world who would never have access to family photographs.
Kent and Sarah have been active with a mission church in the Cabo area for a few years now. Last week Sarah, contacted Donna, one of the church's missionaries, to propose Help-Portrait initiative and said that we would be happy to provide family and/or individual portraits while visiting in Cabo - could she make it happen on pretty short notice.
Well, ask Donna anything like that and she swings into action. Within a day she had spread the word around the Barrio and had arranged eight families to be photographed on the simplistic church grounds in the Barrio of Cabo San Lucas. Hit the PLAY button below and see how we pulled off some pretty cool portraits for these families.
I promise, you be surprised by many things when you watch this video. I also hope you will be happy with the lesson because today's lesson is more than just photography and lighting. It's about sharing your time and talent with those in need. Why not check out the Help-Portrait Project right here and maybe next year you can volunteer to be a part of it too. It was a great experience.
Hey gang, that's it for me today. Yes, we are heading out to do some snorkeling and everybody is waiting on me. So, I'm out of here. I'll plan to see you tomorrow for another short episode of the one that got away.
This is image I made while walking the beach on our first day in San Jose del Cabo. It certainly captures the beauty of the area. I like the wide angle lens for this kind of image.
The challenge is to capture the waves right where you want them at the right moment. Using the Fuji HS10 camera made that quite a challenge (see below). Anyway, I was lucky enough to capture this image after several tries.
The Fuji HS10’s field of view is quite wide at it’s widest setting. That certainly adds to the overall impact of this image.
Camera specs: Fuji HS10 camera at 4.2mm (24mm 35mm equivalent), F 5.6 @ 1/320 second, ISO 100. Enjoy! -David


![Portrait In A Box[5]](https://blogger.googleusercontent.com/img/b/R29vZ2xl/AVvXsEjiqRu-Q84q5stdflL3KmD7xqQ6Dtvl_YACJiElhyphenhyphenoHWLHP28hWYw3Nfbw4U6ObRSShTIrmO-iAll9T4qjY7uEWxv_vHZcv139eWK2Sa4v9uOGeUzeFWtMfVY4fo4Aoj3L2j5sN/s1600-h/Portrait%20In%20A%20Box%5B5%5D%5B4%5D.jpg "Portrait In A Box[5]")
![Five - Fotolia_27297280_Subscription_L[1]](https://blogger.googleusercontent.com/img/b/R29vZ2xl/AVvXsEgDA3X0EYaQ9wzS0gqJ4l5QrNQpmtiWRQa5d9206w_vDPBDZxg4O9Lzgwl4qfZe_tnrVZ45mgZDHEreLqh7Lt_zwH6w6fSROZ6CXoAOQbR3-kvTTGyBD5NLOe_krzB1obHWPslT/s1600-h/Five%20-%20Fotolia_27297280_Subscription_L%5B1%5D%5B4%5D.jpg "Five - Fotolia_27297280_Subscription_L[1]")




 A
A


