Friday, January 30, 2009

"Forgotten Moments"

"Forgotten Moments"
©David A. Ziser

This image is from a trip to Chicago a few years ago. We were staying at an historic hotel in one of the suburbs. As we were leaving the hotel one morning, I was taken by the lonely chair at the end of the hall. It seemed to be inviting, even pleading for someone, anyone to please have a seat. The old classic draperies, the dark shadows in the long hallway seems to beckon to many memories of years gone by. Camera specs; Canon 30D fitted wit 17-85mm IS lens at 17mm, F10 @ 1/200 second, ISO 400. Enjoy! -David

Read More...

Gear Bag Friday: Canon 5D Auction and One More Camera In The Bag

Good Morning Everybody,
Things are hopping around here today. We've got to get the ads and website wrapped for the Digital WakeUp Call tour kicking off March 30, 2009 in Jacksonville, FL. And, we are doing a little website housekeeping. It's about time as I have been very delinquent updating my websites. We are yanking the old site that shows the Digital WakeUp Call 2 DVD set, so if your interested in purchasing this set of DVDs then only for the next few days will they remain available. That is at least for a while until the new site is up and functioning. Here is the link.

Auction Time:
Also, I'm terrible at getting rid of equipment I don't use so most of the time it just sits around for example my Canon 5D, the predecessor to the 5DMk II. I've used it once in the last 18 months and it had little use on it then. I thought I would give this a try. If any of our DigitalProTalk readers are interested in my 5D, drop Jennifer an email at jennifer@ziser.com with your bid by next Friday, February 6th. If the high bid is reasonable, I'm happy to part with the camera. Do me one favor though - if you plan to bid, please don't read today's Gear Bag Friday ;~)

One More Camera In The Bag
OK, you knew it was coming. I've been yakking about it for the last few months - yep, it's the Canon 5D Mark II. It's my favorite piece of gear in the bag. I love the images. I love the ergonomics. I love the video capabilities. But that's just a few of the reasons this piece of camera equipment quickly became a favorite.

Here are a eight more.
1 -- ISO, ISO, ISO - yep, speed freaks like me love the new higher ISOs. Nikon had it, we Canon shooters wanted it. And now we have it - hey Nikon guys, no rubbing our noses in our long wait for the camera please. Anyway, I love the high use-able ISO's. I shot an entire reception event at ISO 3200 a few weeks ago and the images look amazing.

ZNote:
I love the noise reduction built into the camera when shooting JPEGs. NIK's DFine 2.0 has to work a little harder when I bring the RAW image into Photoshop from Lightroom. Both Noise Ninja and NIK's DFine 2.0 do a better job of noise reduction than Lightroom - that's why the trip to Photoshop.

2 -- I love the larger crisper viewfinder and it's ability to give me a decent indication of the correct exposure. I didn't mention this last week when I talked about the 40D, but one thing that made me a very "happy camper" with the 40D was the accuracy of the viewfinder in helping me determining correct exposure - just like the 5D Mk II.

Let me explain. The Canon 20D did a pretty good job at that - when you looked at the viewfinder, the image, density, looked reasonably close to what I saw on my computer monitor. The 30D and the original 5D was inaccurate, really awful in that department and there was no way to fiddle with the cameras to fix it.

Still today, when my assistant uses my 30D, I check the viewfinder and the images look good till I download them and check again. Then they are about 3/4 stop underexposed. Granted, the histogram reflects the under-exposure on the camera, but in the heat of the shoot, I'd like a quicker feedback device to tell me I'm in the ball park. The 40D and now the 5D Mk II viewfinders fixed the problem - the images look very close to the same feedback I received when viewing on my monitor.

ZNote:
There was a comment on last week's post about the 40D's viewfinder failing in that department - sorry, I have never had the problem.

3 -- I like it's focusing ability, yep, I said focus. I hated - wait, maybe that was too strong - I was always disappointed in the focusing capabilities of the old 5D at the wedding reception. So much so that I finally decided to NEVER use it for reception coverage. I just kept missing shots waiting for the camera to find it's focus.

The new 5D Mk II fixed that too. It's still a little slower that the 40D, but only a little and I can live with the subtle difference in focus speed.

4 -- Motor speed - the fist 5D was just a tad slow in the motor speed department at 3 FPS. Be sure to shut off "Silent running" or what ever it's called (Silent Shooting) and you kick the speed up to 3.9 FPS. Hey, I know it's not that much, but my shooting routine just feels a bit more comfortable at the slightly higher speed.

5 -- 3, count them, 3 Custom user definable settings just like on the 40D. I love it - 3 cameras in one at the turn of the knob. This is a super handy feature of the 40D, 50D, and 5D Mk II - check it out - it really adds to ease of operation on the wedding day.

6 -- Resolution - 21.1 mega-pixels. Ummm... Canon 1Ds Mark III - $8000 or 5D Mk II $2700 - what a tough choice. OK, no nasty emails for the Canon 1Ds Mark III shooters, please. I'm just trying to save a buck. For me, buy a lens or maybe 3 with the savings.

7 -- sRAW setting. OK, I've wrestled with this one ever since I burned through 56 gigs at a Bar Mitzvah a few weeks ago. Heck, I almost blew a tire coming home with the weight of all those RAW files in the case:~) But, I think I found the solution - sRAW. At that setting the 5D Mk II gives me a file size about 30% smaller than the full RAW with an image size approximating those from the 40D (3888x2592). More on this in a future post.

ZNote:
One little problem - Apple's Aperture and a few other RAW processing programs won't open them yet. Lightroom does just fine.
8 -- Love my 12-24mm Sigma lens on that full frame camera body. It's about as wide as you can go.

9 -- And what don't I like about the 5D Mk II? No pop up flash - what can I say, I still like that little guy every now and then. But with all the other 5D goodies, I guess I can live with it missing.

REMINDER: Please remember to visit the Thirst Relief Auction http://www.thirstrelief.shootq.com/and place your winning bid. You have until Sunday, February 1st at midnight EST. You'll find several truly wonderful items from leading photographers across the country as well as I've donated a space, $895. value, in my week-long Master Class. [link] All of the proceeds from the auction go to help women, children, and families to have clean drinking water. Right now, one in five children die from a drinking related illness or disease. Something this simple can easily be avoided and treated. So far, the Thirst Relief has saved over 100,000 people. Please help us again this year. Go here to learn more: http://www.thirstrelief.org/)

Everybody have a great weekend and I'll see ya' on Monday. See ya' then, -David

Read More...

Thursday, January 29, 2009

"Confidence"

"Confidence"
©David A. Ziser

I've been photographing this young lady since she was 13 years old. I originally photographed her Bat Mitzvah back in my film days. Her parents ask that I take her senior portrait too. This was her favorite from the session. She has long since graduated high school and college and as long as I have known her she has been confident and known what she has wanted. This image is strangely reminiscent of one I posted last week entitled, "Emerging Manhood." That's because last week's image was of her younger brother. The image was made in my studio with only one light, a Paul Buff White Lightning strobe inside a Westcott halo with a 36 inch silver reflector opposite the main light to fill the shadows. This is my studio lighting setup of choice. Camera specs; Nikon D1x fitted with 24-135mm lens at 70mm, F5.6 @ 1/50 second, ISO 200. Enjoy! -David

Read More...

Business Day Thursday: Motivating Employees; Promises Made, Promises Kept

Good Morning Everybody,
Well, we are in a bit of a thaw around here and the city seems to be moving again. That's good news for everybody except the kids that will have to go back to school today. I have to admit though, that I loved "snow days" with my kids. My entire staff, only two employees then, all had kids in the same school system so when a "snow day" was called - hip, hip, hooray - we headed for the hills for some good tubing and sledding. Ahh!!! the good old days ;~)

Hey everybody, I just wanted to give you a heads up about the podcast I did for CameraDoJo right here. We talk about RAW vs. JPEG vs. BOTH; Video and the Canon 5D Mark II and much more for about 90 minutes. By the way, that's not me in the picture.

UPDATE: The auction for Thirst Relief International that I'm participating in opens today at 10:00 p.m. EST. Here is the link for the auction right here. You can read the whole story in yesterday's post [link]. I'm checking it out myself tonight - see you there.

Motivating Employees; Promises Made, Promises Kept
I got a note from one of my Facebook buddies, Stacey Friedlein, about how to motivate employees. I thought it was perfect idea for our Business Day Thursday post. Don't have any employees, then be sure to read No Employees, No Problem article I've thrown in at the end - worth the read.

Hit the "Read More..." link below for the rest of the story.

A good friend of mine and former associate photographer here at the studio worked for the Cincinnati Park District as his regular day job. Bill and I had several conversations about how to handle employee evaluations. He managed a large staff so he had quite a bit of experience in that department. When I read Stacey's article, it echoed back to so much of what Bill advised me in the past so I wanted to share it with you today.

The Employee Covenant
The question for so many small businesses is how do we motivate our employees to perform and not just meet but exceed expectations. One very good way is through the use of a personal covenant. It works like this. During employee reviews (and if your not having these as least every six-months now is the time to start) you provide the employee with a form with "I promise to…" written across the top.

During the review you explain to the employee that they are to write on this form the things they will do in fulfilling their position with your company. It can include everything from showing up on-time, a time-line for completing assigned tasks, reaching sales goals, completing projects accurately, additional studies and just about anything which relates to their job performance.

Ask them to spend time and complete the form during the review. Discuss their list and set quantitative and measurable goals. Then you and the employee sign it. This form becomes an important tool in future employee reviews.

At the future review you now have a measuring stick, which the employee himself has created, to measure job performance. You should find the employee feels much more accountable based on the list they created. Now they are being judged on what they said they would do, not what you said they should.

This process allows for the employee to feel they are an essential part of your company. It helps them to understand the importance of doing their job correctly and in a timely manner. You should see a boost in employee morale and job performance by using this system.

Stacey has a lot of good information. Want more, check out his blog Helping Small Business $ucced [link]- tons of good stuff here, highly recommend.

No Employees, No Problem
If your business is an employee of one - you, the how about making your own covenant with yourself. What do you promise to do for your business? Write down anything that pops into your mind. Here are ten to get you started.


1. I promise to spend 30 minutes each day reading a sales/marketing book.
2. I promise to reach out to a new vendor buddy at least once a week/ once a month to tell them what my business is about.
3. I promise to continue to practice and improve my photographic technique.
4. I promise to develop at least 3 new products or services I can offer my clients.
5. I promise to attend one major convention this year and see what other photogs are doing.
6. I promise to read at least one photography book outside my area of expertise.
7. I promise to attend one seminar that comes near or through my town.
8. I promise to call at least 2 clients a week just to touch base and thank them for their business.
9. I promise to read my camera's manual from cover to cover so I really know what my equipment is capable of producing.
10. I promise to offer my services to at least one charitable organization this year.

OK, you get the idea. Now you have put yourself on notice to make some moves that could substantially impact your business and its growth. Put the list where you can see it everyday. That way it won't become a long forgotten memory in a week. Check your "Promise List" progress monthly - are you ahead of schedule or are you falling behind. Six months later - the day of reckoning - how did you do?

There are three possibilities:
1. You followed through on all your promises and are thrilled with the results of all your efforts. Give yourself a pat on the back, and get started on your next list - you are on your way to achieving the success you want for yourself and your business.

2. Well, you got some of the things done. Feel good about the small accomplishments, but know you need to work harder to keep your job performance in tip top shape and your business on the road to success. Start your second list with your first promise to yourself to try harder.

3. Nothing got accomplished, all promises broken. At this point many people will start making a gazillion excuses why it happened, why the promise list didn't work, why they couldn't keep up with the goals set. Well, what do you do with an underachieving employee? You FIRE them. Maybe it's time to fire yourself and find another line of work or try again even harder to meet your goals.

The bottom line is this:
Excuse makers NEVER succeed. Planning and working always trump wishing and hoping.

--Food for thought.

Hey everybody, I scootin' out of here early today. I'm trying to wrap the book this week and still have a chapter or two to finish. See ya' tomorrow for the second last Gear Bag Friday - One More Camera In The Bag. Don't forget to check out the Thirst Relief Auction when it opens for bidding today. See ya' tomorrow. -David

Read More...

Wednesday, January 28, 2009

"Cherishing The Moment"

"Cherishing The Moment"
©David A. Ziser

Here is an image I captured just 16 seconds after yesterday's image entitled, "The Softness Of Her Touch" This time I focused on the bride's ring which also kept the couple mostly in focus. It has a completely different feel than yesterday's image, but still quite effective as a romantic portrait of the couple. Thoughts anybody? Camera specs; Nikon D1x fitted with 80-200 lens at 82mm, F3.5 @ 1/60 second, ISO 640. Enjoy! -David

Read More...

Wednesday: Important Announcement - Please Read

Good Afternoon Everybody,
Today I feel like Nanook of the North. We received 8 inches of snow yesterday, about an inch of ice over night and 5 more inches of snow on top of the ice between 8am and noon today. Where is my pan sled, I'm ready to go? Hope all is well in your "neck of the woods."

Anyway, on with the post. First things first - I have to tell you about something I'm involved in. I teaming up David Jay and Michael Colon and many others trying to raise awareness and monies for Thirst Relief International.

The Thirst Relief Mentor Benefit is an opportunity for you to bid on a 90 minute session with one of your favorite photographers. When you enter the winning bid you get an opportunity to sit one-on-one for at least 90 minutes and talk about your business, your shooting style, your portfolio, the needs of your studio, or whatever else you'd like to discuss with the photographer you placed the winning, highest, bid on. Many of these photographers are giving much more than just their time, though! Which is very exciting! Some are giving away a space to their workshop, actions, products...all kinds of things! So you'll want to make sure to read each auction that you are interested in carefully.

I'm one of the guys giving away a place at my week long Digital Master Class. [link] An $895.00 value.

All of the proceeds from the auction go to help women, children, and families to have clean drinking water. Right now, one in five children die from a drinking related illness or disease. Something this simple can easily be avoided and treated. So far, the Thirst Relief has saved over 100,000 people. Please help us again this year. (You can also become a donor by giving just $5 a month. Five dollars saves a life. Go here to learn more: http://www.thirstrelief.org/)

The auction will open on Thursday, January 29th at 5pm EST. When the auction goes live you can click here: http://www.thirstrelief.shootq.com/
The auction will close on Sunday, February 1st at midnight EST.

Be sure to check it out!!! Dig deep into your pockets, place your bid for a good cause and obtain a little something for yourself even beyond the great feeling of helping those who really have a basic human need, clean drinking water.

Read More...

Wednesday: Analysis Of A Wedding Shoot - Part 9; Cake Cutting

Cutting the cake by the bride and groom is one of the reception high points and should have thorough photographic coverage. There is usually a lot of paramount opportunities to capture some great action and reaction shots during the cake cutting festivities. Let me walk you through the steps that we take to be sure that we have a total coverage of the cake cutting event at the wedding reception. 1 -- We take several photographs of the cake by itself. This includes close-ups and detail photographs of the entire wedding cake. Many times the cake is illuminated with the spotlight or additional lighting at the wedding reception and we can make most of these images with our camera set on the tungsten mode and not use any additional lighting.


2 -- It's important how we position the bride and groom around the wedding cake for two reasons. First of all - to have a balance of the tonalities in the scene and secondly to get the best lighting on the couple as well as the cake. If I'm looking at the cake and I want my bride and groom on the right-hand side of the cake I would ask the groom to step in the first behind the cake table and then I ask the bride after in after the groom. As in the photo below I have a pleasant trio of balance between the white, in this case cream, wedding cake, the dark tuxedo of the groom and then the beautiful white wedding gown.


3 -- I always coax one image of the bride and groom, asking them to look back into the camera and smiling as I take two or three images. Once I know I've got the image I asked them just to go ahead and cut the cake.

4 -- As they're cutting the cake I am making several more images. I’m photographing close-ups of their hands on the knife as they make their first cut from the bottom layer of the cake. I may also capture some of their expressions that they make with each other as they are cutting the cake as well. What is equally important is to momentarily turn away from the couple and explore the guests watching them cut the cake and capturing some reactions from them as well.

5 -- After they cut a small slice of cake and place it on the plate, I may have to help by becoming a director at this point. I may ask them to step in front of their cake so all their guests can easily witness the feeding of each other or to jest help coax them along as to how to proceed. It's now time for them to feed each other the cake. Yes, I know, things can get a bit messy at this point but I don't see the messy cake feeding much anymore. The bride and groom each take a piece of cake and offer each other a bite. We are taking several photographs at this point. Once again we are surveying the attendees and capturing any other special reactions, giggles, smiles, ahhhh expressions..... that the guests may be offering during this special moment of the reception.

6 -- After they fed each other the cake, they may give each other kiss and toast with champagne. Keep the cameras rolling – it’s digital, every shot is free.
That pretty much wraps this part of the wedding reception. There are times as I said, that things have gotten quite messy. If they do you got another opportunity to get some great candids. But remember, that you are capturing the moment and the moment is a combination of the action of the bride and groom feeding each other the cake and the reaction of the guests should anything really funny happen.

I encourage you to develop a sixth sense about you. Know who is standing around – left, right, and behind you - watching the bride and groom during the cake cutting. Anticipate any reactions from those people as the bride and groom go through the motions. That way you're assured of a great series of images of the bride and groom at this wedding reception high point.

Hey everybody, that's it for me today. I'm going to see if I can flag down a snow plow truck to help dig us out ;~) See everybody tomorrow for another episode of Business Day Thursday. See ya' then. -David

Read More...

Tuesday, January 27, 2009

"The Softness Of Her Touch"

"The Softness Of Her Touch"
©David A. Ziser

This is another image I made a few years ago. It's a bit different that what we normally see in wedding images. Both subjects are very much out of focus with the veil providing the only focus point in the scene. What I like about this image is the fact that it hints at the intimacy of the couple, their anonymity protected by the very soft focus, yet their feelings very much revealed by the bride's soft touch on the groom's cheek. How do you feel about the image? Camera specs; Nikon D1x fitted with 80-200 lens at 82mm, F3.5 @ 1/60 second, ISO 640. Enjoy! -David

Read More...

Technique Tuesday: Lightroom 2 In Reverse, Visiting With Friends, and You Can Be A hero Too

Good Afternoon Everybody,
Help!! We are snowed in today. That's why things are moving a bit slow including the late post. This morning we woke up to 8 inches of new snow on the ground with the weather forecast predicting at least 4 more inches by tomorrow morning. That means that our fair hilly city grinds to a standstill. We should be dug out by tomorrow ....hopefully.

Last night LaDawn and I had dinner with my buddy and outstanding wedding photographer, Joe Buissink. Susan Michal another great friend and outstanding portrait photographer from Jacksonville Florida [link] also joined our group. Mary Mannix, our friend and our Canon rep was also part of the wonderful evening of just visiting and not necessary talking about photography. I kind of like it when a group of photographers can get together and talk, laugh and share events and moments that have touched our lives outside our photography profession.

Having said that let me share with you a story, as related by Joe during our dinner conversation. It's about an amazing young man who just happens to be autistic. Jason amazed his teammates, family and friends when he scored 20 points with 6 3-pointers at the last high school basketball game of the season. It is truly an emotional and uplifting story. Here is YouTube link to the story - definitely worth a peek. So many times, we saddle ourselves with our own less than the best expectations to achieve our own success. This young man, Jason McElwain, did no such thing and became a hero for all of us - pointing the way for us to be heroes too.

Technique Tuesday: Lightroom 2 In Reverse
Time to move on to our Technique Tuesday today. Today's tutorial is part 1 of a Lightroom double-header technique. Today I want to offer a creative way to use Lightroom 2 to enhance your images.

I'm certain most of you have witnessed the Photoshop techniques showing how to highlight a certain color in a B&W image. Let me show you a little trick I picked up at Matt Kloskowski's Lightroom 2 program which I attended last Friday. His little tip about using the Erase brush in Lightroom really opens a up a few doors to creative image processing within the software. Hit the PLAY button below to see the rest of the story...


Hey gang, that's it for me today. Sorry for the late post, but the snow has us slowed to a crawl today. Because of the late post, look for tomorrow's post to be a little later in the day too. We'll get back on schedule after the thaw ;~) See ya' tomorrow for another episode of Analysis of a Wedding Shoot. See ya' then, -David

Read More...

Monday, January 26, 2009

"A Moment In Time"

"A Moment In Time"
©David A. Ziser

I made this image a few years ago and it is still one of my favorite classic wedding images. It shows a beautiful bride in the classic profile view illuminated with a beautiful loop lighting pattern. I think this kind of image is timeless. No, it not like a lot of "run and gun" stuff we see so much of today (not trying to step on toes here,) but it is just a beautiful portrait study of this lovely lady. Many bride's are looking for the more spontaneous look in their images these days which we do capture, but the parents of the bride love these kind of images. Hey, on the wedding day, we need to remember we are shooting for everybody. Camera specs; Canon 5D fitted with 24-105mm IS lens at 50mm, F5.6 @ 1/40 second. ISO 800. Enjoy! -David

Read More...

Quick Hit Monday: Convention Wraps, Great Speakers, A Special Winner Announced

Good Morning Everybody,
Whew! This weekend has been a whirlwind adventure. I'm on the KPPA Board which means we are responsible for a lot of the behind the scenes stuff that's going on at these convention. I've been super busy and I think I'm the lightweight when it comes to the work that needs to get done.


I can't believe the amount of time and effort the entire board, especially our incoming president, Jessica Vogel, puts into making the convention a huge success. And, she is a great photographer - want to get a few Monday morning goosebumps to start your day, then check out Jessica's site right here. Hit any of the galleries - just gorgeous stuff.
On a personal note, I talked LaDawn into entering this year and she won two blue ribbons with her image CAR-isma taking second place in the "Illustrative" category - Congrats to my Sweetie! OH, I forgot to mention, Michele Celentano [link] was another one of our speakers. Michele hails from Phoenix and was a little concerned about getting out of town before the snow hit around here. I had the honor of driving Michele to the airport and we had a great visit along the way. Michele is an extremely popular, energetic, and talented speaker who you can hear over at WPPI in a few weeks.

Michele is also one of the Canon Explorers of Light - that means she's a real big deal when it comes to her photography. Check out the Canon Explorers of Light site right here if you want to be further "blown away" by gorgeous images. Here's the cool thing, Michele has agreed to a podcast with me in a few weeks at WPPI - I'll keep you posted.

We are wrapping the convention today with celebrity wedding photographer Joe Buissink [link]presenting an all day program. Joe is one of those guys that has such an easy manner about him, but he still shoots extraordinary images. His is also a Canon Explorer of Light. I'm missing the first part of the program, but am heading on down there shortly. Hey gang, time is running short this morning so I've got to go. I'll plan to see everybody tomorrow for another episode of Technique Tuesday - Lightroom In Reverse. See you then. --David

Read More...

Friday, January 23, 2009

"Lost In The Moment"

"Lost In The Moment"
©David A. Ziser

I made this photograph a few years ago. The bride was just relaxing near a window. I loved what I saw through the viewfinder - the soft light, subtle tones, and gentle expression. The saturated red of the bouquet contrasted nicely with the subtle colors of the Japanese screen behind her. You can almost feel the quiet repose within the entire composition - one of my favs. Camera specs: Nikon D1x fitted with 50mm F1.4 lens, F 2.2 @ 1/320 second, ISO 800. Enjoy! -David

Read More...

Gear Bag Friday: Matt Is In Town; PhotoProExpo Kicks Off; and How About The Cameras?

Good Morning Everybody,
Today is the day - the day of our PhotoProExpo / MidEast Regional Print Competition/ Kentucky Convention kicking off for the next 5 days. I'm looking forward to catching up with friends, checking out some of the programs, and seeing what new goodies I can find in the trade show.

The convention kicks off with my buddy, Matt Kloskowski, Lightroom and Photoshop guru. A BIG thanks to National Association Of Photoshop Professionals - NAPP - for bringing the Lightroom 2 Tour [link] to the Covington, KY/Metro Cincinnati area and coordinating it with our ProPhotoExpo convention. BIG NEWS - anyone attending the Lightroom 2 program today gets a complimentary trade show pass to the convention! If you're attending one event it's a great opportunity to attend the other!

LaDawn and I had dinner with Matt last night and are stoked to hear his program today! Hey gang, I've got to get scootin', my convention duties are calling. Before I go, let me leave you with another episode of Gear Bag Friday - Enjoy! -David

Gear Bag Friday: How About The Cameras?
In looking back over all the Gear Bag Fridays, it occurred to me that I haven't talked about the cameras in the bag. Sure, it's evident when you look at the images of the day and the accompanying images from the other articles I post, it's probably a Canon camera. Well it is my camera of choice these days – no pokes at Nikons - and most recently the Canon 40D. I do see myself migrating to that Canon 50D soon for two reasons; 1 - the much higher resolution viewfinder, and 2 - the higher usable ISO in the camera. The higher resolution is also a big bonus too.

Up to this point, I would say for the last 18 months, my “hands down” camera of choice has been the 40D. I remember when it hit the market and I was blown away by some of its features. Let me just name the main reasons I was a big fan of the 40D and now most recently the 50D.

Here we go --

1 -- Highlight Tone Priority - this feature alone is what made me switch to the 40D. Sure Nikon has a similar feature called Active D Lighting, but prior to my jump into the Canon camp this was the first time I experienced this feature and it was on a Canon camera. Highlight Tone Priority basically adds a lot of latitude to the image when it comes to over-exposure – actually about one stop. This is particularly useful for a wedding photographer shooting brides in white dresses, often very shiny reflective white dresses, at high noon and late afternoon sun. I loved the added protection this feature allowed me in my shooting routine.

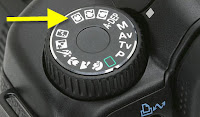
2 -- Also with the introduction of the 40D as with the 50D, was the addition of the 3 custom buttons on the dial. The 30D didn’t have them. The first 5D also had these custom settings which is where I learned to love them. These custom settings, when used correctly, can basically give you three cameras in one. For instance, my 1st custom one button is always set to 1600 ISO 2800K, P for professional, and center spot reading. That means that when I find myself in a tight situation I can simply turn the dial to C1 mode, turn off my on camera flash, and shoot away in the available light of the scene and get some great candid images. The C2 setting on my Canon 40 D is set to 3200 ISO with all the other parameters being the same, 2800 K, P for Professional, and center spot reading, as I mentioned for the C1 setting. The C2 setting isn’t one I use very often but, in a pinch at a wedding reception it may just fit the bill to capture the shot. I reserve the C3 setting for specifics relating to the current job as necessary.

3 -- Another feature I like in the 20D, 30D, 40D and 50D is -- don't laugh now -- the pop-up flash. I can remember when I started shooting my first 20D. The 580EX flash hadn't even been introduced yet. I actually shot a number of jobs for about four weeks with just the pop-up flash as my on camera flash. I know you are still laughing, but remember, I always worked with an assistant with an off-camera flash and also had a room light firing during my wedding reception candids. That little on camera flash still gave me enough light from camera position to fill the shadows if needed and still get the images I desired for my client.

The number one main reason I liked the little pop-up flash is this. At the end of the night after we packed everything up, we've said goodbyes to the bride and groom and their parents, and were walking out the door what invariably happens? Somebody wants one more picture. No problem I don't have to unpack the bag. I don't have to do anything. I know this photograph is going to be a quick grab candid so I simply pop up the flash capture a couple of photographs, wave goodbye, and continue on my way. Mainly I like the little pop-up flash for his convenience at one o'clock in the morning to get that last photograph of whoever, (usually those over indulged with the free alcohol of the evening), feels they need one more picture taken.

4 -- I also like the speed at which the 40D and 50 D shoot. When I tried to use my earlier 5D, I have to say I just didn't like it for reception coverage. It just wasn't fast enough for me. I always switched back to the 30D I was using at the time. The 40D is plenty fast though. It has two speed settings on it – 3fps and 6.3 fps. 3 fps is adequate for most everything that I do. (I have to admit, I like the 5D MkII 3.3 fps just a bit more. 6.3 is just too quick for me in most cases. I've occasionally set it to the faster six frames per second setting but I find that is way too many pictures per second and I really don't need it set to that very often. If you're a fast action event photographer such as a sporting event or race car photographer, then this 6.3 fps setting would be great.

The bottom line is this. I like the 40D the reasons outlined above. I like the new 50D for its higher usable ISOs and much higher resolution viewfinder. I hope that gives you a little insight into why I prefer these cameras and have selected the Canon Family of cameras as my camera choice for shooting my weddings.

I'll fill you in on Monday on some of the convention highlights. So, have a great weekend and I'll see you on the flip-side of the weekend. See you then, -- David

Read More...

Thursday, January 22, 2009

"Our Family"
©David A. Ziser

I don't post many family portraits, but this is one of my favorite family portraits I've captured. I had a conversation with the mom about clothing at our planning session a week or so before the portrait was scheduled. She can up with the wonderful combination of tans and blacks for the family. The image was made in their backyard. Fortunately the trees were so far away from my subjects, so that they went out of focus beautifully with my fairly wide aperture creating a wonderfully beautiful backdrop for the portrait. The direction of light was created with my off-camera flash firing through a translucent umbrella to the left of the group. Camera specs; Nikon D1x fitted with 80-200mm non IS lens at 185mm mounted on a tripod, F4.5 @ 1/500 second (native sync speed on the Nikon D1x was 1/500 second - I loved it), ISO 200.
Enjoy! -David

Read More...

Business Day Thursday: Are You Working At Your Business Or Working For Your Business?

Good Morning Everybody,
Well, as I write this, I have my too little pets (maybe more) keeping me company. My desk is right next to the fireplace in my sales studio. Check out last week's Business Day Thursday [link] and you can see the fireplace slightly left of center in the shot. Look a bit more to the left and you can see the back of my computer monitor - yep, that's DigitalProTalk's world headquarters.

Anyway, it seems that during our super cold week of weather, a raccoon or a possum family found their way down the chimney and have taken up temporary winter residence. All day long, I hear them sneezing, wheezing, and purring. When I'm meeting with clients, I have to explain it's not me or my stomach making those sounds - the remark is quite the ice-breaker. I'm not quite sure how to solve my dilemma - um-mm.. maybe a fire in the fireplace - just kidding. As long as they are reasonably quiet, they can hang around till I come up with a better idea or Mother Nature blesses us with some warmth. Anyway, on with Business Day Thursday...

Are You Working AT Your Business Or Working FOR Your Business?
This thought occurred to me last week, as we were moving through the hustle and bustle of a typical workday. And although we're not always “pedal to the metal” around here, we do get a break every now and then. It was during one of those breaks that brought this thought to mind.

So many of us are caught up in the day-to-day hustle and bustle of our businesses. We think being busy is making us money. The fact of the matter is being busy is probably not helping us be as successful as we could be. Busyness does not equal success. Some of us could be a lot less busy if we would manage our time differently and organize ourselves differently within our studio. Folks, I'm not talking necessarily about a full time Main Street studio. I'm talking about everybody involved in a photographic endeavor whether it be full-time or part-time or beginning on the road to a photographic career.

To read the rest of the story, hit the "Read More..." link below.

So, are you working at your business or for your business? How can we work for our business? What I mean by this is taking time out of the hectic schedule and spending it on thinking about your business, promoting your business, or just exploring how you might improve procedures and practices that you're doing right within your own workspace. I’m talking about trading “busyness” – working AT the business for strategic planning time where you are working FOR your business. If each and every one of us would spend one hour a week organizing, planning, and promoting; this added time would help “grease the wheels” and really get our businesses moving along.

Being tied up – almost hamstrung - in the day-to-day busy activities really undermines the success of so many businesses. No time to think, no time to plan, no time to succeed – that is the reality.

In my early days, I knew that I had to have a weekly Monday morning quarterback meetings with my studio manager. But, as most people in most studios, I was always too busy. I was always too busy with this or that project and was always falling out of the habit of meeting regularly with my studio manager.

Here is an analogy that I think works. It was kind of like having a sore tooth in the beginning. It doesn't hurt much and you figure you don't need to go to the dentist. But after a while the pain builds and sure enough you find yourself with severe tooth, neck, jaw pain before finally going to the dentist. That's what would happen to me in cycles. I can remember where things seemed to be getting a little bit “out of whack,” things were not running as smoothly as they should be. There seemed to be a slight lack of communication between my staff and myself on some issues.

Only when it got bad enough – things were getting even more disorganized - is when I went to the “doctor” – and started to have my necessary weekly meetings again. Every time I got into the habit of regularly scheduling the meetings, there seemed to be a sense of relief knowing that things were back on an even keel. It happened every time we started those weekly meetings - my business would always get back to running smoothly. It’s still a lesson I need to relearn occasionally. As I sit back and reflect on those times, it is so much “human nature” knowing what you need to do and then for whatever reason or excuse, not doing it.

So are you working AT your business or are you working FOR your business? It behooves each and every one of us to spend at least an hour a week working FOR our businesses success, and its continued growth. My recommendation is to choose any one aspect of your business that needs improvement and just concentrate on that one thing for a 30-day period. For instance, how about self-promotion how do you get the word out about who you are and what you do. I think this should be one of the top priorities.

Plan on spending that first hour of Week 1 thinking about how you might start promoting your business. Then, the second week, put a plan together on exactly what you're going to do. Hey, it doesn’t have to be a perfect plan. We are talking about developing “success” habits. And on the third week start “working at the plan” in starting to reach those potential clients. And then fourth week, evaluate what happened the week before, make mid-course corrections, set goals and proceed ahead again.

You may spot some signs of success early on, hopefully you do. It will give you the incentive to continue on that straight path. This post is about developing success habits, habits that may start small but grow BIG. You have to start somewhere. Doing the same thing over and over again and not seeing any positive results is NOT how to be successful. As I said there are so many ways to work AT your business but to work FOR your business’ success, you need to take the time away from the chaotic, hectic, busyness of your business to make it happen.

Food for thought...

Be sure to check back tomorrow for another edition of, guess what, Gear Bag Friday. I start looking back over the series and noticed that I have some gear conspicuously absent. It was the cameras! So tomorrow I'm just going to walk through some of the settings I use with my cameras when shooting a wedding. I hope you find it helpful and informative, and I'll plan to see you again tomorrow. Adios, -- David

Read More...

Wednesday, January 21, 2009

"Emerging Manhood"

"Emerging Manhood"
©David A. Ziser

This image was made as part of a high school senior session for the oldest son of one of my best clients. The young man pictured here wanted nothing to do with a "smiling" portrait. He wanted to show his strength and individuality in his world. I accentuated his expression with the contrasty broad lighting. Converting the image to B&W finished the portrait to just what he wanted to portray in his portrait. Camera specs: Nikon D1x fitted with 80-200mm lens at 105mm, F11 @ 1/100 second, ISO 400. Enjoy! -David

Read More...

Wednesday: Analysis Of A Wedding Shoot Part 8 - Fast Dance Candids and Party Pics

Good Morning Everybody,
Well, regardless of who you voted for in the November election, we all watched history in the making yesterday. For many of us, it made us feel even more proud to be an American. For those watching around the world, it promised a brand new tomorrow in our world's history. I, as well as so many others around our nation and the world wish our new president success and godspeed with all the challenges he faces as he moves from the celebrations of yesterday to the real work on which he embarks today.

Earlier this week, my buddy Craig Weiglien of Mansion Hill Studios, one of the very talented photographic competition around town set up a movie outing to see Bride Wars on Monday night. It was nice opportunity to hook up with our wedding vendor buddies spending some time just relaxing, laughing and having a good time.


We all had to laugh at the movie though. It seems that only wedding consultants are featured in these kind of shows. Seldom do you see a florist and you just never see a photographer anywhere. It was a nice break in the action from our normal busy studio routine and a wonderful chance to catch up with a few friends. Anyway, how about another episode of Analysis of a Wedding Shoot - here we go...

Analysis of a Wedding Shoot – Part 8
Well everybody, welcome to another episode of Analysis of a Wedding Shoot. In our last episode we discussed shooting the room but now we're ready to party. I've actually planned about three or four segments for the wedding reception coverage before we wrap the series.

In this particular segment I want to talk about fast dance candids. Fast dance candids are those candids of people just out there partying on. Fast dance candids are more than just backing up and putting a wide-angle lens on the camera and shooting away. Fast dance candids are more than going up to the balcony with a wide-angle lens and shooting the whole dance floor. Fast dance candids mean capturing the fun, the excitement, the spontaneity, and all those wonderful party moments during the wedding reception.

So in this section let me step you through the main points I try to cover when doing the dance of fast dance candids. Hit the "Read More..." link below for the rest of the story.

1 -- First of all let me say that I think it's important to have great lighting on your fast dance candids. That's why I set up a room light whenever we’re photographing a wedding reception. We covered that in an earlier Gear Bag Friday post entitled, “Making a Case for The Room Light.” Here is the link. I think the added dimension that the additional room light and my off-camera flash bring to the candids is a huge differentiator from so many other wedding photographers.

2 -- The easiest dance candids are really those that are made with a wide-angle lens. Probably my favorite lens when shooting a 40D or 50D cameras would be the 10-22mm lens. I rack the lens out to 10mm, hold the camera over my head, target on the crowd, and shoot away.

3 -- What do I mean by targeting the crowd? What I mean by this is having a sense of what my camera is capturing as I hold the camera over my head. I'm saying that I'm framing up the shot without ever looking through the viewfinder. This is not hard to learn and the talent can be developed in about 30 minutes of practice at a wedding.

I find that in the early stages of practicing, I generally cut off a lot of the heads of the partiers. These type of images are made periodically over the entire four or more-hour run of the reception. Too many other events and happenings, as all of us know, take place during that entire evening and we don't want to miss any of it.

5 -- Close up fast dance candids. These images, many times, are taken with my regular 17-85mm IS lens on the 40D or with my 24-105mm IS lens on my 5D Mk II. These two lens are typically my favorite lenses I use when doing a fast dance candids. I try to get tight on the action sometimes asking for the revelers to look back into the camera. I found over the years that most of the guests can really ham it up nicely and are happy to give me great fun expressions. I call these coaxed candids. They are a nice addition to our photo-journalistic candids.

5 -- I think the worst fast dance candids are those that simply show a lot of backs of heads and backs, loss of expression and emotion of the crowd.

7 -- There are some songs that really lend themselves to great fast dance candids. That could be YMCA. Yes, we still hear it now and then but it's always great for pictures. Another great opportunity for fast dance candids is when the whole crowd decides to do the alligator and get down on the floor. This is a great opportunity to get that camera high above the crowd shooting down on all the wild and crazy people.

8 -- The most important thing to capture in fast dance candids is obviously the expressions on the guests’ faces. Always go for the best expressions. These kind of images capture the party flavor add to the client’s album and are an integral part of the story. Work at it and don’t ever leave it out.

You know, I said it before but I still think the best way to differentiate our wedding candids from those of so many other photographers is really with the lighting. I think that lighting we put on the scene either makes or breaks that candid. I hate seeing candids that are taken with a wide-angle lens with only an on-camera flash. You see a lot of people partying on but they seem to be partying on in the black hole of Calcutta. There is no depth no dimension to the images.

The added dimension that the room light brings to the scene along with the additional light of my off-camera flash and coupled with my on-camera flash just adds so much more to the scene. It's a triangle of light illuminating the subjects adding that much needed detail, depth and dimension to each image.


So gang, that's it for me today. I hope I’ve given you a little something to think about when you go out and photograph your next wedding. Don't forget to check back tomorrow for Business Day Thursday: Are You Working At Your Business Or For Your Business?" See ya' then, -David

Read More...

Tuesday, January 20, 2009

"Dancing In The Park"

"Dancing In The Park"
©David A. Ziser

Here is another image I made during my migration period from film to digital - 2000-2001. Having shot with a Hasselblad for so long, I was having an issue with changing how I composed my images from square to rectangular format, but with the use of wide angle optics, I got over it pretty quickly. This image follows a lot of my rules of composition; bride in 2 quadrant, lots of repeat elements with the arches, with the added bonus of one arch repeating as a shadow helping to frame the bride. Camera specs; Fuji S-1 fitted with 18-35mm lens at 18mm, F 9.0 @ 1/320 second, ISO 320. Enjoy! -David

Read More...

Technique Tuesday: Lightroom Lighting

Good Morning Everybody,
Things are hopping this week at the studio with clients yesterday and today and the PhotoProExpo kicking off later this week. I got huge chunks of my wedding book wrapped this weekend so that's a good thing.

And, we are putting finishing touches on the Digital WakeUp Call - A New Dawn 2009 Tour. I should be able to point you to the web site by the end of the month. I'm also a volunteer for a lot of the PhotoProExpo activities so time is a bit short around here this week. I sure hope several of you will come on by the convention - it's a HUGE photographic talent fest this year. Here is the ProPhotoExpo link again if you missed it on an earlier post. The trade show looks to be very promising as well. It's a GREAT opportunity to hear some fantastic speakers and I encourage each and everyone of you to register and attend if you live with in the Ohio, Kentucky, Indiana, Michigan, West Virginia area.

Well, how about on with this week's edition of Technique Tuesday - I think you re going to enjoy it - here we go...

Technique Tuesday: Lightroom Lighting
So how many times didn't you get the image you wanted in the camera. Or you wish you would have tweaked the exposure/lighting a bit more in the camera? Or maybe there wasn't time during the wedding day to tweak the shot and you had to settle for a Lightroom fix after getting back to the studio?

Well today folks I offer the solution to these problems. Lightroom has some wonderful built in tools that literally let us put light on the scene exactly where we want it. We can easily control the densities and tonalities of the image transforming it dramatically to obtain a beautiful finished result.

In this tutorial, I'll take only a few minutes to take an image at first glance appears not that great. After a few Lightroom tweaks and judicious use of Lightroom 2's new tools, you will see the image transformed into a very cool looking portrait of the groom. Hit the PLAY button below and enjoy the show...


Hey gang, that's it for me today. I've got another episode of Analysis Of A Wedding Shoot planned for tomorrow, so be sure to tune in. See everybody then. -David

Read More...

Monday, January 19, 2009

"Happy Day"

"Happy Day"
©David A. Ziser


Even though this image was in created in 2002, I have always loved this image. Yes, B&W with selective color on the flowers was the rage back then, not so popular today, but I still like it. As a matter of fact, I was with the bride yesterday for her baby naming ceremony of her second son. This image was prominently displayed at her parents home where the festivities were taking place. This image was a very spontaneous moment captured during the pre-wedding portrait series. Let me make a point here. Even though I say portrait series, the images I try to create aren't anything like the very stiff, posed images we used to see in wedding photography of days gone by. I strive for a comfortable, relaxed look from my client. This results in "portraits" that capture much more of the personality of the subject and are a wonderful addition to the wedding album. Camera specs; Fuji S-2 fitted with 50mm lens, F2.0 @ 1/750 second, ISO 400. Enjoy! -David

Read More...

Monday: Quick Hit Monday: John Nack, Crash Taylor, CameraDoJo, WPPI, and EpicEdits

Good Morning Everybody,
And welcome to another edition of Quick Hit Monday. I hope everybody had a great weekend. We are a bit chilly here in good old Cincy getting down to -6 Fahrenheit over the weekend. But, things are warming up. Now when I walk across our deck it doesn't sound like the ice is breaking below my feet. I've got a lot to cover today.... Quick Hit Monday let's get right to it.

Quick hit Monday
I noticed over at fellow blogging buddy, Jason Moore's site, that he has started a new series of interviews entitled PsI Interviews. His first begins with an in-depth interview with Adobe Photoshop senior project manager, Photoshop Hall of Famer, and monster blogger, John Nack. Jason does a great job on his interviews and this one is particularly well done. Be sure to catch Part 2 in the upcoming weeks. I invite you to go check it out. Here is the link. Oh, I forgot to mention. Jason is doing an interview with my buddy, Larry Becker, Executive ditector for NAPP on February 9, 2009. So mark your calendars and check back for this interview.

Also, blogging buddy, Crash Taylor, from England continues his terrific series of interviews with wedding photographers as well. I took a little time over the weekend to get myself caught up on what he's been up to. Your weekly visit to Crash’s site -- here is the link -- is always worth it if you're a wedding photographer. Not only are the interviews in depth and insightful but they give a great peek into a wedding photographer's brain and how we think. Pictures, heck yes pictures – always a full compliment with each interview. Before you let this slip your mind -be sure to check it out -- here is the link again.

And speaking of interviews, Kerry at CameraDoJo.com asked me to do a podcast with him earlier this year. I was finally able to oblige Kerry last week. CameraDoJo.com plans to run the podcast tomorrow - Tuesday. Here is a link to the CameraDoJo.com site. I have to say, it was quite a nice conversation. I think when we both looked up at the clock, we were shocked to discover that 90 minutes had expired.

We talked about a lot of different things that I think you will find of interest. We discussed RAW versus JPEG, the RAW variations in the new digital cameras and some strategies on how we might use the different settings when photographing weddings with these new mega-mega pixel cameras.

We also discuss the video capabilities of the new cameras and what some of the possibilities may be. So, tune in tomorrow to CameraDoJo.com [link] and check it out. While you're there, check out Kerry’s collection of over 50 more podcasts created over the past several months many of which are just a wealth of knowledge.

Last week seemed to be a busy interview week for me. Scott Sheppard also interviewed me for WPPI radio. This was a much shorter interview - only about 10 minutes long – but you may find it interesting. With WPPI Convention and Trade Show only a few weeks away, there are several photographers who will be speaking and Scott has interviewed many of them. The WPPI Convention is one of the highlights of the year when it comes to wedding/portrait photography – they are expecting 12,000 attendees this year with their biggest trade show ever. It is quite the production and I hope to see many of you there in Las Vegas in mid February. By the way, here's the link to my interview with Scott.

Let me wrap Quick Hit Monday by pointing you to another great website – EpicEdits.com. It's run by my blogging buddy Brian Auer. You know, like you I wish I had more time to cruise the net and take advantage of so much good information that's available out there but, like you, there's only so many hours in the day.

In any event I always try to get back and visit my faves. EpicEdits.com has always been one of those favorite sites to visit. What Brian has put together is a great end of the year compilation of his best articles from all of 2008. Folks, there is a ton of well organized information available and I invite to the make the trip over to check it out. Here is the link to EpicEdits.com.

Hey folks that's it for me today. I’ve got a little different kind of Technique Tuesday put together for tomorrow. It's going to be more Lightroom oriented. I stumbled on the technique I’m showing while editing some photographs for my Kelby Training videos. So plan to stop by tomorrow and see what I got up my sleeve. That's it for today, have a good one, and I'll see you again tomorrow. – David

Read More...

Friday, January 16, 2009

"Having An Easy Afternoon"

"Having An Easy Afternoon"
©David A. Ziser

I made this image with the new Canon 1D Mark III at the time. I saw 3 things in the scene that I thought would make the image work. 1- Pillars - pillars are always a good thing when it comes to backgrounds and props. 2 - The sun which would act as a backlight for me if I positioned the bride just right. 3 - A beautiful soft direction of light coming in from the left (bride's right). It was subtle, but gave a nice roundness and dimension to the bride's facial features and figure. All combined, we get a very beautiful, well illuminated bridal portrait. Camera specs; Canon 1D Mark III fitted with 70-200mm IS lens at 160mm, F5.6 @ 1/250 second, ISO 800.
Enjoy! -David

Read More...

Friday: “Questions And Answers Revealed” and Editorial Comment

Good Morning Everybody,
Well, I did it. I really did it. I deleted a comment to a blog the other day; a first, except for the occasional comment spam. You ask, "Did you not agree with the comment?" Nope, that wasn't it. I do not moderate comments in any way and have left every comment stay even if I don't necessarily agree with them. Heck, not my fault that they don't see the DigitalProTalk light. OK, just joking.

In reality, some posters will leave a comment that doesn't necessarily agree with what I post in the blog. That's fine with me because it generally encourages good discussion from our readers and, in many cases, helps to clarify a point.

A good case in point is my post Highlight Tone Priority Image Salvation right here. A lot of people didn't like the fact that I shot JPEG and had to let me know about it. I say, "Who cares?" It about getting the image - JPEG, RAW, handdrawn, painted, whatever - but I let the comments stay. There was quite a bit of discussion, most of which was beneficial to our readers, and that's my point.

The comment I recently deleted was different. It contained inappropriate language and was insulting. My mama always told me, "If you can't say anything nice, then don't say anything at all." I agree. For the very rare, less than friendly, reader, please don't bother knocking on the DPT door because you will be asked to leave. This is a friendly blog with lots of friendly readers - friendly people are always welcome. 'Nuff said.

“Questions And Answers Revealed”
I want to begin by saying how much I appreciate all the readers of DPT and especially the helpful, informative comments we get around here. Some of the posts elicit comments that want a bit more info on the subject I posted. As much as I would like to answer each and everyone of those questions, the day simply does not have enough hours in it for me to do so. Many of the answers to the questions can be found simply by searching the DPT blog. But some cannot, which is why I decided to start this new series, “Questions And Answers Revealed”. In it, I will periodically answer questions raised from the comments to bring clarification to that particular topic.

In today's post, I've gone back through a week's worth of posts, scouring the comments for the most scintillating questions asked and will attempt to bring new meaning to the original post by delving even deeper into details in order to bring clarity, satisfaction, and yes, even closure to those, sometimes, unanswered of life ;~) Anyway, let's give it a go and see what happens. Hit the Read More... link below for the rest of the story.

From the posts---
Technique Tuesday: Recession Lighting: A Poor Man's Guide to Lighting Gear
-You are suggesting you must use a 400 dollar GREAT flash to trigger a 25 dollar toy flash?
Nope, I think the point was missed here. The point is that it's always about the light, not about the expense of the light that makes the image. Heck, there are a gazillion other cheaper strobes on the market that I could have used. The 580 was handy while walking the hotel grounds at 7 p.m. I also take issue with the term toy strobe. This strobe is an integral part of my gear bag and has been featured in the series recently.

-How do you grind down the big threads?
Head to your nearest hardware store, pick up a metal file for about $5 bucks, add a little elbow grease and file away. Or, ask a buddy to do it for you with his grinding wheel as I did.

"Having A Great Time"
-What front light do you used to light them? My guess would be a zoomed on-camera flash directly towards them?
Exactly, check out, "I'm "Jellin" with My Zoom Flash" right here for the details.

-...those saturated red colors like you have in your images. Did you bump this up in Photoshop?
Nope, Just a dark red jell over the flash head. Lightroom 2.0 is my favorite color "Juicing" program anyway these days.

"The Bridal Session"
-On average, how many portraits of the bride do you take on the wedding day?
Lets see, 3500 images over 10 hours - I'd say about 30 minutes worth. That would break down to about 15 in total - 5 close up variations, 5 half-length variations, and 5 full length variations. Unless, of course we have less time, then reduce accordingly.

-How close was the umbrella? I thought by looking at it that it was through a snoot-ed light.
Nope, I do like the "snooted" light for SOME shots but not many. In this shot, the lighting MAY have looked "snooted" because of its distance from the subject - about 12 feet away. That's because the further the light is from the subject, the smaller the light source appears to be with respect to the subject, obviously. But the umbrella is still king for me - I use the shoot through umbrella on all portraits; families, wedding formals, and everything that needs a soft light. I use my "snooted" light technique and my Z-Ray lighting much less frequently than my umbrella lighting.

Gear Bag Friday: The Stuff At The Bottom Of The Bag
-Spectral Highlighter, find it almost anywhere?
No you can't. The company that originally sold them is long out of business. I bought mine over 20 years ago. I've actually considered having mine re-fabricated and making them available - any interest?

Hey gang, that's it for me today. Let me know what you thought of this little foray into “Questions And Answers Revealed”. If there is enough interest, I'll continue to bring it back around regularly.

Anyway, got to go. Everybody have a great one and I'll see you next week, assuming we get a thaw around here ;~) See you then, --David

Read More...

Thursday, January 15, 2009

"Friend Of The Arts"

"Friend Of The Arts"
©David A. Ziser

I made this image very quickly, approximately 15 minutes, a few years ago of this beautiful woman at the Contemporary Arts Center in downtown Cincinnati, Ohio. She had generously volunteered of her time and talents for the organization and was being honored as one of the inspiring arts volunteers in the city of Cincinnati, Ohio. I positioned her within the scene opposite the vanishing point. The diagonal lines converging to the left side of the scene would define the vanishing point. With her on the opposite side of the vanishing point, the viewer’s eyes are easily led to her. Because I was working in a downtown Cincinnati location there were quite a lot of distractions outside the plate glass windows seen behind the subject. I needed to disguise pedestrians, cars, buses, power lines, and anything else that would have distracted from the photograph. I accomplished this in two ways. First by using an F5.6 aperture in conjunction with a fairly close working camera distance to the subject to throw most of the background out of focus. Secondly and more importantly, was to overexpose the background substantially. This placed most of the blurred background tonalities into a medium to high key light level. These brighter tonalities, when blurred, really didn't distract from the portrait of my subject. Lighting her was achieved by using my off-camera flash shooting through a translucent umbrella, which was positioned to her right. This put a flattering, classical loop lighting pattern on her face. The ambient light within the museum supplied the fill illumination to the shadow side of the face. I love the finished result. Camera specs; Canon 5D fitted with 24-105mm IS lens at 73mm, F5.6 at 1/125 second, ISO 400. Enjoy! -- David

Read More...

Business Day Thursday: Don’t Stumble, Fumble, or Fall Before Crossing the Finish Line During Your Sales Presentation

Good Morning Everybody,
We've got a busy day today with clients, tour plans to schedule, and a book deadline quickly approaching so let me get right to it. I think our topic is very important for any studio who wants to learn how to create and present a more polished/professional sales presentation to their clients.

Don’t Stumble, Fumble, or Fall Before Crossing the Finish Line During Your Sales Presentation
You know, the most important thing we need to know for our businesses isn't necessarily the knowledge needed to take the best wedding pictures or portraits in the world. It's that talent that we bring to the table with which we offer our potential clients. So that being said, what becomes the most important aspect of our businesses? It has to be having the ability to professionally present our talents to our potential customers and then being able to close the sale. Sales are the most important aspect of any business –if you want to stay in business.

In this Business Day Thursday post I want to walk you through my 20-year sales process in making presentations to my clients.

The most important aspects of my sales presentations are this. Be eminently prepared, rehearsed, and ready when a client arrives. Let me walk you through my 12-step process of my sales presentation. Hit the Read More… link below for the rest of the story.


Here we go -

1 -- Be sure that your presentation area is in impeccable order, be sure that there is no clutter or miscellaneous piles of papers laying around. No spots in the carpet, furniture is clean and free of tears or worn areas, that all your sample albums are exactly where they need to be, and that all of your additional sales and promotional tools are all in place and within easy reach. Maybe you are comfortable with very soft background music playing or candles burning providing a an aromatic atmosphere.

2 -- The reason we want everything in its proper place and in perfect order is because during our presentation to our client we do not want to stumble, fumble, or fall before we cross the finish line -- the finish line being the final close and booking of the client.

You need to be able to sit and converse with your client knowing that all your sales support, for example; your wedding albums and other products are within arms reach during your presentation. Getting up and searching for something not in its regular location only serves to cause distraction and interrupt the smooth flow of your presentation.

3 -- Take 10 minutes to “Oommm” before the client arrives. What do I mean by that? What I mean is to seat down and relax. Take a few minutes to review all the specifications, if these were indeed obtained from the phone conversation, of the job. It makes you more prepared to converse intelligently and enthusiastically with your client about their upcoming beautiful event.
I find that I make my less than best presentations when I'm hurried and rushed right before the client arrives. I make my best presentations when I take these 5 or 10 extra minutes just to settle myself, relax, clear my mind of other business distractions and review all the aspects of the job right before the client arrives. When the client rings the doorbell, I'm relaxed, calm, and ready to hear about the wonderful event that they have planned.

4 -- We welcome the client into your sales presentation room of your studio, which may as it is for my studio, be your living room, and begin an inviting, warm conversation with them about their big day.

We invite them just to have a look around at our wall portraits before inviting them to have a seat. At this time were taking coats, offering refreshments, doing anything that shows us as a good host to our clients. It's exactly how you would treat friends and guests invited into your own home.

5 -- This next point is most important. After we've had just a brief couple minute visit and conducted our quick visual tour of the studio, I invite my clients to have a seat. Not just any seat, but a seat in a very specific location within the room. I also know that I will take my seat in a very specific location in the room too. In my case it happens to be in the swivel chair to my client's left.

Why am I making such a big deal about this? With your client in one specific location, which is the right-hand side of the sofa in my sales room, I can easily make eye contact with them. I can easily reach all of my sales presentation tools which include albums, folios, DVDs, and anything else that I'm in need for my presentation from my seat.

If the client is seated in another chair by my staff, I ask the client to have a seat back on the sofa (where I can make my best presentation to them.) Think of a long-distance runner who has practiced the same running fundamentals every day of his/her running life. Preparing to run a race and then being distracted by shoes on the wrong feet or something bright and reflective in the pavement is exactly what happens if everything is not in its perfect place including the clients.

With everybody seated, we just move into conversations about the wedding day, who is involved in the wedding, how many plans have been made so far, providing vendor suggestions, if needed, or confirming their vendor selection and just having a nice easy conversation about their plans for their big event. They, of course, are thrilled to share them with you because they are really excited about what's happening in their lives. We listen attentively to each and every word, making notes as they tell us their story.

Let me emphasize that were not there like Joe Friday saying, “Just the facts ma'am, just the facts". For me, I making mental notes that I'll then transfer onto my interview form after they leave. If there is a specific item that I feel that I may not easily remember, I may just jot it down on the interview form as we’re speaking. I think the whole point and what is vitally important is for the client to feel comfortable and relaxed as they tell us their plans and preparations. I never want them to feel that they are being sold anything. At this point I'm listening most of the time, and/or asking leading open-ended questions.

8 -- After getting the facts in the most gentle and inviting way possible, we then segue into my own personal philosophy about how I see a wedding in my own mind’s eye and feel in my heart as I photograph a wedding. This is basically your own personal commercial time – your time to start building that relationship with your client,

9 – Next, we invite our clients to view some of our albums, with me commenting on some of my favorite images as they page through our work. It's important that we listen deeply to everything our client says. That includes their comments on our images. Styles they like, or images they don't like. They may want a variation of the theme and we need to be able to reassure them that we can do that. They may just make general comments that will give us some insight in knowing exactly what they're looking for in their wedding coverage and how we need to modify our photography coverage a bit to accommodate their requests.

They may have some questions about how we cover a particular section of the event or even ask our advice in how they might work through a particular issue say for example divorced parents. These concerns can be answered easily at this time. The main point is to not dictate but to listen to what the client wants from us, their wedding photographer. It's not about us telling them what or how we're going to photograph their event for them. It is a bit like Feng Shui – we need to go with the flow and to earn their trust.

10 -- After moving through our samples, we then review the prices, listen attentively again for any objections, and then ask for the sale. This whole sales process could be several posts in and of itself, so we'll save that for later. The main point is to ask for the sale. We need to find out what the client is thinking. Where they impressed with our work? Were we within their budget with our pricing? Where exactly are they at this point in their decision-making process? Asking for the sale will give you that information immediately.

11 -- After closing the sale, which hopefully we do, we reassure the client that they will have a beautiful set of wedding images and we look forward to working closely with them as their plans develop getting closer to the wedding day. We invite them to follow-up with us whenever they need to inform us with any additional information that would be pertinent for us doing our best job for them. We also promise to follow-up with them with any additional questions we might have.

There are many times when I will even set up a follow up appointment to visit with them. This might include time during their engagement shoot or to make a site survey at their home, at the church, or even at the reception venue. This happens in only rare situations where I may not be familiar with the church or the venue in which the wedding is taking place.

12 -- After the client leaves, be absolutely sure that you come back into your studio, sit down, and reflect how the sales presentation went. Where you enthusiastic about how you presented yourself and your photography to your client? Was everything in its place so that you were able to make your presentation smoothly and effortlessly to your client without any stumbling, fumbling, and falling before crossing the finish line? Was there any point in your sales presentation that needs to be polished up a bit before the next client interview? How are your samples? Do they include a wide range of images? Is there a different order in which you can make your presentation, which would ensure better clarity and information flow to the client about your product and services?

For over 30 years I've been sitting down after a client interview and examining my conscience and reviewing the sales presentation to see how I might improve upon it for the next time. It is only by constantly striving to improve our sales presentations that we will become a better and more successful salesperson.

Folks, hardly anybody out there does anything like this after their sales presentation. But it is vital if you want to serve your current and future clients in your best way. Salesmanship is not a “dirty word” – it is about finding out what your client wants and figuring out a way for them to obtain it from you.

To be a good salesperson you must review each sales presentation, whether you're selling wedding photography, washers and dryers, cars, or anything else. It's what helps you become the best of the best in presenting your work to your client. By being practiced, rehearsed, interested, warm and inviting in your sales presentations, you will continue to refine and polish the entire presentation process at your studio.


This is important whether you work in your home or in a Main Street location. It's important for anybody out there who is excited about what they do and how they offer themselves and their services and products to their potential clients. Reflect on what I've said and see if it doesn't make sense to you too.

Hey gang, that's it for me today. We've got a VERY busy schedule today, including clients coming by to discuss her wedding photographs. So on that note, I’ll plan to see everybody tomorrow with a little different kind of Friday. I'm calling it, “Questions And Answers Revealed.” So until then, have a great one, and I'll see you tomorrow. -- David

Read More...

Wednesday, January 14, 2009

"Peeking In On The Day"

"Peeking In On The Day"
©David A. Ziser

I made this image about a year ago. It was one of my favorite weddings for that year. The couple was great to work with and really emoted their excitement throughout the day. This image I captured was taken just moments before the bride was to make her appearance and walk down the aisle. Guests were arriving and I caught this wonderful candid moment of her peeking out the window to peek at the arriving guests. I loved her soft expression and her beautiful eyes. I had one problem though - we I got back to the studio and inspected the image, I found that it was out of focus. I still loved what I had but what to do - Stylize it! Stylizing an image means doing something to it so it still looks good when presented to the client. I chose to add quite a bit of noise to the image to disguise the image blur. The grain is sharp so the eye is fooled into thinking the image is sharp - well, which it is when focusing on the grain. Anyway, it was a good save - I got to present the image to my client, they loved it , and it was selected for the final album. Camera specs; Canon 30D fitted with 70-200mm IS lens at 120mm, F 5.6 @ 1/30 second, ISO 800. Enjoy! -David

Read More...

Wednesday – Analysis Of A Wedding Shoot Part 7 - Cocktail Candids

Good Morning Everybody,
LaDawn and I took the red-eye back to Louisville last night and then made the drive back to the Kentucky side of Cincinnati to get home. Phew! We are bushed (not George Bushed, by the way.) We spent most of the last two days checking in with our vendor buddies and were busy wrapping up things for my tour starting at the end of March - more on that later.

I wish we had a chance to take in more of the show. Let me point you to IUSA which has great coverage of the show and the many of the presentations. I ran into my buddy and outstanding wedding photographer, David Jay who was working behind the scenes to get many of the shots. Here is the IUSA link, don't miss it - tons of good stuff as you scroll through all the posts including an exclusive interview with Anne Geddes - the keynote speaker. LaDawn attended her presentation and said it was fabulous. The interview will give you a peak into her message.

On another note, I was walking through the show, spotted Kevin King, the genius behind the Radio Popper. The Radio Popper transmitter and receiver combo have the unique ability to turn the IR signal from your dedicated Nikon/Canon flash units into radio waves syncing up your master/slave flash combo for complete control with up to 1500 feet (not the ~30 foot limit of the built-in IR control built into the flashes) with consistent firing of the units.

The new units are tiny and a great solution for this master/slave flash capability. Here is the Radio Popper link which will give you much more in-depth description. Kevin promised to send a set to try out - I'll keep you updated.

Anyway, how about another Analysis of A Wedding Shoot which started out as a short post but grew into what is is. Enjoy the read...

Analysis Of A Wedding Shoot Part 7 -- Cocktail Candids
In this, the seventh in our series, the Analysis Of A Wedding Shoot, I would like to briefly discuss and important part of the event to cover, at least for storytelling purposes. This happens to be the cocktail hour before the reception.

Cocktail hours are arranged many times in my area of the country, about an hour before the regular reception. It's a time when the bride and groom's family and friends come together, many of which may not have seen each other for months and sometimes years. Cocktail hour is also the warm-up for the wedding reception.

I feel that as a wedding photographer, that it is our job to pay some attention to the cocktail hour. I call these images we create during this time “cocktail candids.” Let me walk you through how we shoot this part of the event.

1 -- We try to get to the venue to shoot as many of the setup shots as we can of the hors d'oeuvres, ice sculptures, room set up, and whatever else strikes us as interesting.

2 -- Next, I like to just make a few overall views of the guests coming and being greeted by the mother and father of the bride -- the hosts for the event. These are usually just a few wide shots that help tell the story of this part of the wedding day.

3 -- Next, we just cruise the crowd grabbing photographs of the guests as they mingle and visit with each other. I need to make an important point here. These cocktail candids are not photographs of backs of heads, people eating hors d'oeuvres, or drinking their refreshments. If you want to know the truth, I find no use in these types of photographs at all. Frankly, they are mostly unflattering photographs of the guests which are never placed in the wedding album anyway.

4 -- I went to see the faces of the guests at the party. We simply approach a small group of two or more people and request to take their photograph. They always say yes, we ask for the smiles, and take a shot.

5 -- I want to be sure we have no blinked eyes or bad expressions so we always take at least two photographs of each of these small groupings.

6 -- We move through the crowd trying to focus on the groups that include family members and wedding party members. This means, generally, that we will be photographing guests who are fairly important to the bride and groom and their families.

7 -- We light these images in the most efficient way possible to get the best photographs. If there are two of us covering the cocktail hour, I would be on camera while my assistant would be holding the second light.

8 -- If we're working in a smaller space with only one of us covering this part of the event, then we may use our “side-bounce” technique to illuminate the guests. The “side-bounce” technique involves using just our on-camera flash and turning the flash head about 120° away from the guests and bouncing it off of a nearby wall. This is really easy with the new high ISO cameras and an additional benefit is that it allows us to pick up some nice ambient light with a slow enough shutter speed.

9 -- If by chance, only one of us is photographing the cocktail hour, and the space is quite large, then we were resort to just our on-camera flash bouncing directly up to the ceiling with a fill flap in place to bring a lot of the light directly back on our subjects. Yes, I am admitting we are just using our straight on-camera flash to get the shots. It's not the best lighting but it's adequate to cover this part of the event. As you'll recall from last week's post - my assistant is often covering the cocktail candids as I am photographing the reception location.

10 -- If there is only one of us photographing the cocktail hour, we are generally using the Canon 40 D fitted with a 17-85 mm lens. Now if space is quite tight, we might find ourselves fairly close to our subjects and zooming our lens to its widest 17mm setting. If this is the case, we may run into exposure problems.

Our on-camera flashes have an optimum working range for their best exposure. Being very close to the subject is not within that range and will generally over expose the subject. We have two workarounds for this -- first back away from the subject to about 6 or 7 feet away. This is a sweet spot for the flash and we can be assured of consistent, well exposed photographs if we maintain this working distance to our subjects.

The second solution is to turn down the power of the on-camera flash down by two thirds of a stop. The problem with this technique is that we need to remember to return the flash to its normal power for the rest of the shoot. I tell my assistant to stick with plan A when possible as they are shooting the “cocktail candids” - stay 7 feet away from the subjects.

11 -- We occasionally do some “available light” images during this time trying to capture the fun and spontaneity of the cocktail hour. We don't take many of these shots but, we do include a small sampling in our image presentation to our clients.

12 -- As soon as we know we've got the cocktail hour covered, we all meet up in the main ballroom, place our gear in a secure and safe place, and get ready for the rest of the evenings festivities.

So folks, that's about it. You would think that there is not much expertise needed to photographing “cocktail candids” but, there are always things we need to be aware of and I hope I've given you a few insights into those things in today's post. Good luck on your next shoot and remember, "Keep on smiling."

Hey gang, that's it for me today. I’m whooped. Everybody have a great one, and I'll see you tomorrow for Business Day Thursday. Adios, -- David

Read More...

Tuesday, January 13, 2009

"Florida Beauty"

"Florida Beauty"
©David A. Ziser

Having taken so many photographs of LaDawn last week in Florida, I decided to make her the cover girl again today. This image was made with the technique I discuss in today's Technique Tuesday section. Super easy lighting (a $25 flash), great location, good looking model - presto, a very nice portrait. Camera specs; Canon 5D mark II fitted wit 24-105mm IS lens at 98mm, F 4.0 @ 1/6 second, ISO 400. Enjoy! -David

Read More...

Technique Tuesday: Recession Lighting: A Poor Man's Guide to Lighting Gear

Good Morning Everybody,
Sunday was such a "rush-rush" day at the show, we didn't get a chance to see much of it, as the time passed quickly. Yesterday while at the show we saw some pretty cool stuff. LumaVue Arts had some really cool back light frames - the images were back lit in the frame and seemed to pop off the wall. Photodex was showing their new ProShow Gold 4. This looks like a very viable solution to quickly building products that combine the new video capabilities of our new DSLRs with still images. I'm heading back there today to take another peek.

And in the completely unrelated to photography department, we stopped by the Stop-Pain booth. This is of those vendors that show up at so many shows like this demonstrating special electronic massage devices that will cure all that ails you. We were all wiped out on Sunday so it seemed like the perfect place to relax for a few minutes. LaDawn, my buddy Kent Smith, and I sat there for about 45 minutes getting the full treatment - we ended up buying two units. It was kind of a fun experience - ahh! No more neck pain - yep, they seemed to work just fine. I'll keep you posted on more interesting items tomorrow. But for today, how about on with the show...

Recession Lighting: A Poor Man's Guide to Lighting Gear Well folks, I think I've got one of the best Technique Tuesdays I've ever posted. I shot the footage while in Florida last week with my new Canon 5D Mark II. I've always been challenged with trying to create the most beautiful images with the least amount or at best, the least expensive equipment.

As you know, for me, it's always about the light and the direction of light that we put on the scene and our subjects. It's never about the flashiest, most expensive gear. That's how today's technique Tuesday came about. I'll show you how to use a $25 mini flash unit, the same one I featured in gear bag Friday a few weeks ago, to create some beautiful portraits. Hit the play button below -- I think you'll enjoy the show.


Footnote: I know a few readers have commented about the sound quality of last week's Technique Tuesday. The problem was a result of me using a monaural microphone which, when plugged into the Canon 5D Mark II, only picked up one channel of sound.

I checked with my friends at TechSmith and asked why Camtasia Studio, my edit software, didn’t just combine the channels into one monaural signal when rendering the finished file. They unfortunately had no answer for me. I picked up a mono to stereo adapter plug from Radio Shack and I hope this has solved the problem.

Now in addition to that problem we encountered another during our shoot in Florida. I'm not using the most expensive wireless microphone, (are you understanding the man is cheap-Ladawn) in the world for these videos so there is, one point unfortunately about halfway through the video, in which we picked up a little static.

I watched the video a couple of times and, although it was slightly distracting for a few seconds, I don't think it detracts from the information contained in the tutorial, so I decided to run the post with the small annoyance. Anyway, those are my disclaimers and I’m sticking to them. I still hope you enjoy the tutorials. See everybody tomorrow, -David

Read More...

Monday, January 12, 2009

"Having A Great Time"

"Having A Great Time"
©David A. Ziser

I made this image at a wedding earlier this year and it's still one of my favorites. My assistant was holding my red gelled flash behind the dancers, pointing at the floor and out of range from my camera. The gelled flash really added to the a touch of pizazz to the party candid with its red color closing matching the bridesmaid's dresses and the color theme of the wedding celebration. Camera specs; Canon 40D fitted with 10-22mm lens at 10mm, F 5.6 @ 1/60 second, ISO 800. Enjoy! -David

Read More...

Quick Hit Monday: 800 DSLR Videos, DSLR Video Gear, and a Wedding Seminar In The Bahamas

Good morning everybody,
Well, we arrived safe and sound in Phoenix on Sunday morning, hit the hotel to drop bags, and headed straight to Imaging USA. One of the main reasons were here, besides taking a look at the latest, greatest cameras and gear is to hook up with our tour sponsors and catch up with many friends. That's the cool thing about these national conventions. As you continue to attend year after year, you always continue to meet many new people, make new friends, and are exposed to about a gazillion new ideas. I'll keep you posted as to anything we find particularly interesting out at the Convention -- which I know we will.

DSLR Canon and Nikon Videos – Over 800 of Them!
You know I've been harping on this new video technology built into our still cameras. It is definitely going to be the coming thing. I was over at vimeo.com recently and there are about a gazillion videos created using the Canon 5D Mark II – 434 at last count. Here is the link to the Canon videos. Don't worry Nikon fans. Here's the link to 436 Nikon D90 videos right here. I think there's a lot of junk but combing through the site I'm sure you'll discover a few jewels as well. Maybe this site will stimulate your brains cells into discovering some great new product ideas for us in 2009.

Wait there's more. You need more than these hot new cameras to pull off great video. You've got a check out this video put together by the folks at Zacuto. It shows the latest, greatest gear that you can use for getting the best videos from your new cameras. Here is the link. I'm smiling as I type this post because this is simply unbelievable what this company has created. You get an idea from the accompanying image here;~)

Everything you ever wanted to know about the Canon 5D Mark II
DigitalProTalk reader, Chris Whitcomb of Guided Light Photography, pointed me towards two great Canon 5D Mark II videos – they are two of my favorites. They are by Robert Evans [link] and Stephen and Jennifer Bebb [link]. As a matter of fact, the Bebbs put together an instructional video on just how to create the fusion of stills and video imagery. I ordered the video last week. After I get a chance to view it, I'll give you the low down.

Mitch, another friend of DigitalProTalk, pointed me to Planet5D.com. It's a Wiki dedicated completely to the Canon 5D Mark II. I'll tell you, if you're in the Canon camp this is a great site to browse. There are “tons” of information buried throughout the whole site. Be sure to check out the videos link as well. Again, this a great resource for anybody trying to figure out what to do with the new video capabilities of these new cameras. Here is the link.

Wedding Workshop In The Bahamas
I just got an email from my buddy, Grant Oaks, a talented photographer hailing from the Denver area, announcing his new workshop coming up in the Bahamas in a few months. You can save a few bucks if you sign up early too. Here is the link for all the seminar info. Grant is also the force behind Tafota.com, a company dedicated to giving the photographer the best in designer web sites. Check it out – here is the link – some cool stuff here.

Hey gang, that's it for me today. We have a full day planned at Imaging USA and, hopefully, I'll fill you in on a few of the goodies we see tomorrow. And speaking of tomorrow, this will be one of the best Technique Tuesdays ever -- I promise.
While LaDawn and I were in Florida last week, I put together a brand-new lesson on lighting with my Canon 5D Mark II. It's entitled “Recession Lighting: A Poor Man's Guide to Lighting Gear.” I'll show you how, for only $75, to create some very beautiful images with the minimum amount of equipment. Have a great day everybody and I’ll see you tomorrow, -- David

Read More...

Friday, January 09, 2009

"The Bridal Session"

"The Bridal Session"
©David A. Ziser

I made this image back in my Nikon days which is literally about 6 years ago. I still love it. It is a classic, elegant portrait which was exactly what the client and her mother desired. Actually, I got the call after the wedding to do the bridal session since their wedding photographer captured no formal portraits on the wedding day. The bride was beautiful and the setting was sumptuous. Lighting was simply made with my off-camera flash fired through a translucent umbrella from a direction that gave me my beautiful loop lighting pattern on the bride’s face. All pretty straight forward but creating a great result, Camera specs; Nikon D1x fitted with 18-35mm lens, F 5.6 @ 1/50 second, ISO 400.
Enjoy! -David

Read More...

Gear Bag Friday: The Stuff At The Bottom Of The Bag

Good Morning Everybody,
We've got one more trip planned bright and early Sunday morning. LaDawn and I are heading to Phoenix for the Imaging USA convention. This is a great show and I hope to run into some of our DigitalProTalk readers out there. You can find me running through the trade show most of Sunday, Monday, and Tuesday. So if you spot me, come on up and say HI.

Gear Bag Friday: What’s At the Bottom of the Bag
Well, I am literally scraping the bottom of the bag today, so what else is in here? Yes, folks for a photographer my age probably the most important thing in my camera bag are the Advil and the Celebrex tabs ;~) In all seriousness though, there are a few things left in the bag that are cool little gadgets, many of which have been with me for many, many years. These items are often never rarely used, but still I like having them in the rare occurrence I pull them out and play around with a different playful exposure. Let me go through the quick list.

1 -- A tube of mirrors, otherwise known as a Spectral Highlighter - and you can find it on the Internet most anywhere. This is a piece of gear I've been carrying with me since the mid-80s. We used to use it to create a spray of color around the wedding rings which I used to position the rings in the bridal bouquet. I occasionally use it these days when photographing the bar mitzvah sign-in board -- it's a way for me to spotlight the special sentiments that the guest has written on the board.
2 -- I don't know about you guys or girls but, I still like to use a Cross-Star filter every now and then. Maybe it's too retro for today's wedding photographer and maybe it's just a little too old-school but, I still throw one in every now and then.

3 -- The “Ray-burst” filter is another filter that I used on every event in the early days. I've been pulling it out every now and then just to add one giant splash of color to a party image.

4 -- Close-up lenses - I really don't use these much at all anymore since I picked up my macro lens about a year ago. But, if you went cheap solution to capturing close-up photographs, and inexpensive set of close-up filters these filters fit the bill nicely.

5 -- Did I mention as Z-ray? Yes, it's true my Z-ray flashlight now has a very special place in my gear bag. I also carry my minis Z-ray which is just a smaller version of the larger tungsten flavor flashlight. The mini Z-rays have been previously featured in posts on DigitalProTalk.com just a few weeks ago when we were in Mexico. Their light output is created by a number of LEDs in the units head. These LEDs luminate at a much bluer color temperature. I suggest shooting them on your cloudy day setting or a Kelvin setting increased up to at a least 6000 K.

6 -- 14in Digital Pocket Target [link] designed and patented by my good friend and buddy Ed Pierce. This comes in handy whenever you need to set a quick custom color balance or need to e-mail your exposure quickly.

7 -- And miscellaneous items including spare sync cords, ballpoint pen, spare battery for the camera and charger, business cards, model release forms, a few heavy duty rubber bands and a few other things have just been floating around in there for years.

This covers pretty much the camera side of things. Next week I'll wrap with a few more items to round out the series.

Hey gang, that's it for me today. Laundry to do, bags to pack – again, and another plane to catch. As I said, I hope to see some of you Phoenix -- just come on up and say HI. See you in Phoenix, -- David

Read More...

Thursday, January 08, 2009

”Heading Home”

”Heading Home”
©David A. Ziser

Yes, it's another image made while shooting out the plane window at 30,000 feet. We left early in the morning well before the sun was to rise. As we hit the higher altitudes after take off, the sun just started to peek over the cloud horizon. It's intensity, at this moment, was not so great to wash out the detail of the clouds below. A few minutes later, all brightness shone forth and the earlier moment was gone forever. I especially enjoy how the plane window bent the sun-rays down at a slight diagonal across the image. The contrasts work well here too. Camera specs: Canon 5D fitted with 24-105mm IS lens, F 8.0 @ 1/125 second, ISO 200. Enjoy! -David

Read More...

Business Day Thursday: Don’t Rest On Your Laurels

Good Morning Everybody,
Wow! 11 hours to get back from Orlando - plane delays, more delays, and then even more delays. Seemed we had a "little weather" heading our way back in Cincy and now Thursday morning we have a little of that beautiful, fluffy white stuff all over the place - Florida sunshine anybody?

Anyway, I'm a Midwesterner so I don't mind the snow. In fact, I love the first snow fall of the year - its the 5th, ,6th, and 7th that start to get to me;~) So being snowed in today, I'm putting finishing touches on our Digital WakeUp Call Tour so we can get brochures and websites in production. This is a big project but I think you are going to love the results. As I said, I'll keep you posted as things come together. Hey, I've got a few thoughts for Business day Thursday, so please read on and I hope to hear from you on this one.

Business day Thursday: Creating New Products – Don’t Rest On Your Laurels
Here we are the first week of 2009 all our sales dials are set back to zero and we've got to get the studio chugging along again for 2009. It's that time of the year that each and every one of us have to be reconsidering our product offerings for our clients. Too many photographers move through from one year to the next with the same stale selection of products. These products unfortunately hardly ever get changed or updated. These types of studios are quickly losing ground to the studios accessing today’s client needs and giving the new client what they want.

Things are changing quite rapidly out there for each and every one of us in this digital professional of ours. We need to be on the forefront offering products that speak to the needs and wants of those prospective clients.

Last year as I was delivering a wedding album to a client, I received a request from the mother of the bride asking if I could put together a special slide presentation of select images that she could play on her computer. She wasn't necessarily looking for a parent's album, but in this case, still wanted to have a collection of images that she could share with family and friends and do it electronically - an electronic family album, if you will.

We had offered something like this in years past but it was retired from our product line being replaced with our really cool high-res DVD presentations. But the lesson I learned is that we need to listen to our clients. They may have the idea(s) for our new product offerings.
I was able to accommodate the client and now we have a new product for 2009.

I think it's time that each and every one of us sit down and examine our own conscience and explore what products we need to create or update for 2009. What product designs do we need to freshen up for 2009? What products do we need to retire from our lineup just because people aren't ordering anymore or maybe because they just don't fit with our current product offerings? We need to look at the technologies that are available, see what new products speak to these new technologies, and put together some very interesting offerings for our clients.

I've mentioned earlier that I'm pretty fired up with a brand-new fusion of video and still photography on the new DSLR cameras available on the market. How we can use the functionality of the Nikon and Canon camera offerings in our own studio? Thinking this whole thing through is definitely on the front burner for my studio. I've had several discussions with several other photographers about how we can bring this new technology and incorporate it into our own new product offerings.

We've got a couple of ideas under way. And, I plan to share with you as we refine them just a bit more. The bottom line is that this; the new video offers us several new options for product development but on the other hand, I do not want the product production to gobble up hours of my production time in producing the final product. It must be efficient, current, salable and easy to produce. I think you see what I mean here. But, that still doesn't mean that there aren't opportunities available. And, yes, I think the production issues can be solved.

So what new products are you coming up for your clients in the New Year? Are you offering some of the new pre-press book products available at many of the labs? Are you planning to incorporate video in any of your still works in your new product offering? Are you offering any new kind of portrait sessions or promotions for your clients? Have you incorporated new backgrounds, locations, styles into your portrait session? So what is it that you're going to do for 2009?

If you've got some exciting ideas, please share them in our comments section below. With all of us putting on our thinking caps I think we can come up with a great selection and some great ideas for the New Year. I'm looking forward to see what kind of ideas we receive.

Hey gang, that's it for me today. Plan to stop by again tomorrow for one of our last Gear Bag Friday episodes, “Scraping the Bottom of the Barrel" or “What's Left In the Gear Bag?” So gang, until then I'll see you tomorrow. Adios, – David

Read More...

Wednesday, January 07, 2009

"Tuscan Beauty"

"Tuscan Beauty"
©David A. Ziser

I made this image Monday evening while walking the grounds of the Tuscany Resort in Florida. LaDawn and I found this great spot with arches, wonderful colors, and interesting lighting. I asked her to climb the steps and peek out from the large opening in the wall. The problem was getting a decent direction of light on her. This was easily accomplished with my handy dandy little mini Z-Ray I had in my pocket. I used rubber bands to attach it to a monopod I happen to have with me – we were doing some other shoots around the property on this evening. With my left hand, I lifted the light into place high and to my left. After getting it in the right position for a nice loop lighting pattern on LaDawn’s face, I fired the shutter with my right hand. I think it turned out pretty cool considering I was working without any assistant to hold the light. Camera specs; Canon 5D Mark II fitted with 24-105mm IS lens, F 4.0 @ 1/30 second, ISO 2500.
Enjoy! -David

Read More...

Wednesday – Analysis of A Wedding Shoot Part 6 -- Shooting The Room

Good Morning Everybody,
We had a great time in Florida and will back in Cincy by about 2 p.m. today. While in Florida, I got to play some more with the 5D's video capabilities and even did another Technique Tuesday. There is a learning curve involved and some frustrating moments along the way - like no sound, just dumb stuff that wouldn't have happened if I had been more careful.

I know Tuesday's Technique Tuesday had no sound in one channel - I'm working on that problem and do my best to resolve those issues. Also, I found that the on-camera flash seems to be disabled while in video mode - very strange. I'll try to get more info on that from my Canon rep. Anyway, I think we have the bugs worked out and I'd like to feel that video issues are mostly behind me at this time. But continue to let me know of any future problems and issues. So, that said, how about on with The Analysis Of A Wedding Shoot - Part 6...

Analysis of A Wedding Shoot Part 6 -- Shooting The Room
Once we get to the wedding reception, things are really starting to wrap up for us. We’ve been on the job for about 6 hours and we are now in the home stretch. Many times a cocktail hour reception is going on which we need to cover when we arrive at the reception venue. But, at the same time, the main ballroom is being prepared for all the guests to enter. The final preparations are made, the water is poured, the votive candles are lit, and it's just moments before the doors will open upon this beautiful setting.

My job is to capture some beautiful photographs of the room before the guests enter. The challenge is getting photographs while the hotel staff is still fussing with last-minute details of the room and checking that everything is perfect for the grand presentation. Time is ticking away and the doors need to be opening in just the next few minutes.

I quickly find the banquet captain, find out what the timeline is for the doors to be opening, and also ask how much more time the hotel staff will need to finish with their preparations. We both agree that I'll have about seven or eight minutes to get the room photographs. That's really all I need, I shoot at about 1,000,000 miles an hour while constantly ranging the optics for the room shots from super wide-angle to telephoto, and come up with a tremendous variety of images for our clients.

Let me give you the play-by-play for this series of images.

1 -- Take several wide-angle photographs of the entire room. My lens of choice for these images is my 10 to 22 mm lens on my 40D or the 12-24mm Sigma on my Canon 5D Mark II. The camera is set to anywhere from 800 or 1600 ISO. With the new higher ISO cameras on the market, my job is even easier since I NEVER use a tripod for these shots.
2 -- Be sure to cover the room with a wide-angle lens from the left side, the middle, and the right side of the room so that we have plenty of different points of view on the room. Hey, a lot of these images will find their way to the hotel too so they can use them in their promotions – with my byline, of course.

3 -- I also try to get some very low angle views of the room as well. I do this by featuring one of the centerpieces in the composition placed against maybe the ceiling of the grand ballroom. 4 -- Next, it's time to run up the steps to the balcony area of the ballroom. Once again, with the wide-angle lens in place I shoot the room from many different angles and points of view. 5 -- While up in the balcony, I'll change optics to say 24-105mm IS lens and isolate some tabletops, again, the show different aspects of the room.

6 -- Also while up in the balcony, I'll put my 8mm fisheye on the camera and take a few more photographs with this very unusual perspective. We then run back downstairs and try to get a few more fisheye shots as well.

7 -- It's at this point that I know we're about out of time. But, I've taken all of my wide-angle photographs so with the clients to start trickling into the ballroom, I'm still in good shape. It's at this point that I switch to my 50mm F1 .4 lens. I'm now on the move through the room and just do some close-up detail photographs of the tables and the items on that table like menu cards, an unique fold of the napkin, the chocolates, the centerpiece etc. And of course the wedding cake!!

8 -- In shooting the detail shots I'll sometimes use a wide-angle lens like my 10-22mm lens so I can really add some dramatics to the items on the tabletop. 9 -- That about wraps it; we've got a great series of images that I can share not just with the client but with the hotel venue as well. In total I'll shoot anywhere from 30 to 50 images of the ballroom.

10 --One of my assistants meanwhile has the responsibilty of covering the cocktail hour where we concentrate on capturing groups of family and friends, couples, the musicians.... These mainly consist of candid snaps and grip and grins, individuals smiling looking directly back into the camera.

Hey everybody that's it for today hope you enjoyed it and I'll see you again tomorrow for Business Day Thursday: "Don’t Rest On Your Laurels”. See ya’ then, -David

Read More...

Tuesday, January 06, 2009

"Man Of The Moment"

"Man Of The Moment"
©David A. Ziser


Here is another image from the same session as yesterday’s post. Same challenge, same solution. I had to rack out the lens to almost 200m to focus just on the last fading rays of the sunset. I think this is a strong image of this young man. His handsome look, the dramatic sky, and even more dramatic and contrasty lighting come together for a very impacting portrait. Camera specs; Canon 40D fitted with 70-200mm IS lens at 195mm, F 4.5 @ 1/80 second, ISO 200. Enjoy! -David

Read More...

Tuesday: Meet Me At The PhotoProExpo Convention Later This Month

Good Morning Everybody,
Hey gang, I’m in and out today but first some quick news. Let me tell you about the best photography convention in the world happening later this month in Covington, Kentucky. Its called PhotoProExpo [link]. Programs begin on Thursday, January 22 and continue through Tuesday, January 27, 2009.
The convention has a GREAT line up of talent this year. One of the BIG highlights of this year's convention is the Friday all-day program which kicks off with Lightroom Killer Tips guru, Matt Kloskowski, leading the Lightroom 2 LIVE tour [link] .
The next 4 information jammed packed days include speakers on about everything photographic – weddings, portraits, seniors, business, workflow, marketing and on and on.

One of our other headliners is celebrity wedding photographer, Joe Buissink, one of the best photographers in the country. I could rant forever on what a wonderful opportunity this convention provides, but why don’t you check out all the PhotoProExpo convention info right here. Get yourself registered. I promise, this will be your most exciting photographic experience of the year. I'll be there most everyday and I hope to see you there!!!

Read More...

Technique Tuesday: “I’ve Seen The Light”

Technique Tuesday: “I’ve Seen The Light”
Hey gang, I’m pretty stoked about this tutorial today. It’s the first one I’ve put together completely with my Canon 5D Mark II. Here is why I’m fired up. The entire tutorial gives the viewer and exact “camera eye” view of the shot. You see what I see in the camera as I look for the light and compose the image.

There were just a few hic-cups during the shoot; noisy kids coming out of the elevator where I was doing the demo, my reference to a triangular shadow on the camera side of the face when I meant triangular patch of light, and the hotel guard coming by on his Segue just as I was doing the wrap up – notice my quick glance to the left as I smile my way to the end of the video.

Here is the back-story on this episode -
In this episode of Technique Tuesday I want to walk you through a short lesson in how to find the direction of light in a natural light situation -- say for example, outdoors. I think this is one of the hardest things for photographers to learn. You would think it would be a given but, I can remember years ago when my instructors were trying to teach me how to do it and, I didn't find it that easy. I'm just covering the tip of the iceberg today but I hope it gives you some insights on how to improve your natural light photography. Anyway, hit the PLAY button below and enjoy the show.


This was my first try but I have to say, I love the possibilities – more to come for sure – enjoy!

That’s it for me today – more book writing on my plate and then we head back to Cincy bright and early tomorrow. I’ll see everybody then for another episode of Analysis Of A Wedding – Part 6 – “Shooting the Room.”

See ya’ then. -David

Read More...

Monday, January 05, 2009

"Romance On The Beach"

"Romance On The Beach"
©David A. Ziser

I created this image a few months ago while on another trip to Florida. Here was the challenge. Although the sky looks radiant with the sunset, in reality, there just was not much going on – just little wisps of color near the horizon. I needed to expand those wisps of color to cover more of the background behind the subjects. The easy way to do this is with a longer focal length lens and then backing up quite a bit from the bride and groom. Notice now how that small part of the sky fills in the background nicely with the longer focal length lens. I back-lit the subject with my off-camera flash and got a great shot. Camera specs; Canon 40D fitted with 70-200mm IS lens at 150mm (effectively 240mm with the 1.6x magnification factor), F4.5 @ 1/320 second, ISO 200. Enjoy! David

Read More...

Quick Hit Monday: What’s Happening For 2009

Good Morning Everybody,
This is our 6th day in Florida and I have to say we haven’t seen much sunshine around here. Not because the weather has been cloudy and overcast but just the opposite it's been BEAUTIFUL, it's because we’ve been working on computers most of the weekend trying to get many.... too many projects kicked off for 2009. And what an exciting year 2009 it’s shaping up to be.

My First Wedding Book In The Works!
Let me fill you in on what’s happening around here. Three month’s ago I was asked if I was ready to write a book on wedding photography. I’ve never written a book before but it seems my new-found blogging experience was opening the door on this new opportunity – and I said yes. Now, saying YES to writing a book is a lot like cross country skiing – it sure sounds like fun at first, but once you strap the skies on and get started it’s like the hardest thing I’ve ever done.

I’ve got about 70,000 words completed to date. Now all those words have to be massaged into their final form. And the project has to be completed by the end of this month – do I seem nervous – stressed - maybe just a bit. But maybe I shouldn’t be – I have the best people in the world helping me on the project – that would be the entire Kelby Media team. I’m honored and stoked to get this project out the door!

Tour 2009 - Digital WakeUp Call; A New Dawn - LaDawn is calling it - not a New Dawn, but if I don't stay nice a new LaDawn ;~)
Cities are set, hotels are being booked, web sites are being designed – we are full speed ahead on the year’s best digital photography seminar series ever. It kicks off right after Photoshop World 0n March 30, 2009 – 4 solid hours of fast paced information on digital photography, with over 30 lighting tips and techniques, “magic bullet” software solutions and techniques to kick your image processing into high gear, greased lighting Lightroom tips, and 20 ways to add to your bottom line for 2009 – plus a whole lot more. The web site should be up in a few weeks – I’ll keep you posted.

New Ziser Videos Coming To Kelby Training Real Soon
I talked with Jason , head of the video department at Kelby Training and he tells me that my forth video is very close to going LIVE. I have to tell you, it promises to be one of my favorites. The images for the shoot were outstanding along with a few new photographic twists and turns thrown in for good measure. By the way, we have more video in the can as we speak – I’ll keep you posted as new episodes get closer to a release date.

Ziser Now At DWF – Digital Wedding Forum
That’s right, DWF - Digital Wedding Forum [link]- asked me to be part of their DWF University. DWF University is a great place to pick up some quick tips on just about anything related to wedding photography. It’s a great organization with over 9000 members and some terrific member benefits like DWF-U. I’m planning to do a lesson a month for them. I’m actually working on a few this week down here in sunny Florida. My first episode entitled, “Shooting Brides On Location” just went live so, check it out over at DWF.

Digital ProTalk Newsletter Back On The Stands
That’s right, I’m reviving the newsletter again. All the blogging and the wedding book have just about exhausted any free time for the newsletter, but with the book wrapping, I’ll get the newsletter back on a regular monthly schedule. You can still sign up right here on DPT – just check out the right hand column.

There area few more things on the back burner slowing moving to the front. And you know I’ll keep you posted. Hey gang, that’s it for me today – back to the keyboard – more cross country skiing (book writing) for me.

Wait, there is more – I forgot to tell you, can you believe it, that long promised Technique Tuesday episode, “Seeing The Light” finally goes live tomorrow. Here is the cool thing. I shot the entire episode on my Canon 5D Mark II – the first tutorial in the universe to do so! Anyway, it’s pretty cool, so be sure to tune in tomorrow. See ya’ then, -David

Read More...

Friday, January 02, 2009

"London At The Edge Of The Themes"

"London At The Edge Of The Thames"
©David A. Ziser

I made this image as we were crossing a pedestrian bridge late one afternoon while in London last month. The combination of colors from so many different light sources really lit up the river, buildings, ships, everything with a beautiful wide ranging spectrum of colors. The evening sky also did it's spectacular thing by adding the striking colors and hues of the changing clouds as dusk slowly set over the horizon. Camera specs; Canon 40D fitted with 180200mm IS lens at 35mm, F 4 @ 1/13 a second, ISO 1600. Enjoy! -David

Read More...

Gear Bag Friday: Wait, There's More - The Little Flash That Could

Good Morning Everybody,
LaDawn and I are holed up in Florida working on blogs, books, and 2009 tour plans- Digital WakeUp Call - A New Dawn.

Oops! Did I say tour plans - yep, it's true - 58 cities throughout the USA from March 30 - November 15, 2009 covering lighting, software Magic Bullets, video with the new DSLRs, and 20 products to polish up your bottom line. I know I'm letting the "cat out of the bag" a bit early - just consider it a heads up. I'll fill you in a bit more next week.

Anyway, I thought this post might get lost in the middle of the holidays but I'm posting it anyway. Next week will finally return to some sort of normal schedule around here at DigitalProTalk.com. Let's get to it...

Wait, There's More - The Little Flash That Could
Okay gang, this question only comes up about once a week and has been covered on the blog previously a number of times. But, since it's Gear Bag Friday I'm going to give this little flash a special place in my gear bag and give you the complete lowdown on it's use.

Whenever I'm creating a nice photograph of my bride in church, one way to add a little pizazz to that photograph is to just have a little accent light on the back of the veil. That little accent light is created with my little mini slave as shown here. It's a fairly low power flash unit that is fired optically by my other off camera strobe.

What I love about this little strobe is that it has a little foot on the bottom of the unit with which I can adjust the flash in an upward direction instead of just the unit laying flat on the floor. By adjusting it upwards, just a bit, I can direct it into the back of the bride's veil with the mini-slave positioned on the floor of the church.

Here are a couple things to consider when using this little strobe.
1 -- I prefer a working distance of around 10 or 12 feet from the subject when using my mini slave.

2 -- The thickness of the bride's veil can have an effect on how the backlighting is rendered. If it is a very thin veil, the backlighting may be a bit too strong and actually blow-out the veil. In this case, I simply cover the flash head with a single layer of a clean handkerchief. This reduces the flash output by two stops and accents of veil softly without blowing it out. On a thicker veil using the handkerchief simply isn't enough twinkle lighting effect. It is simply your discretion as to how much effect you prefer on your subject in your own situations. Remember; just don't cover the optical eye with the handkerchief.

3 -- I use an off-camera flash 99.9% of the time. Therefore, with the off-camera strobe coming from the left side or the right side of my subject, therefor it is never any problem with my little mini flash seeing the light coming from my off-camera flash. If you are using just your on camera flash, then the mini slave may not trigger because you're on camera flash will be blocked by the subject. An additional reason why off-camera flash is so important!

Anyway, this little flash is inexpensive, easy to use, reliable, and just adds that final twinkle touch to the beautiful bridal images. Here is a listing of some models that may work for you.

Here are links to 3 models available at B&H. Smith Victor PG250S Wireless Mini Slave – my favorite right here – about $23.50. Smith Victor PG160S Wireless Mini Slave – a little less powerful right here, and only $16.50. SP Systems Mini Slave Strobe – another version the first one right here – only $24.50

Hey gang, that's it for me today. I hope everyone is enjoying the holidays and I'll plan to see you next week. Just remember, pixels count their calories during the holiday season. See everybody on Monday, -- David

Read More...

Thursday, January 01, 2009

"Happy New Year"

"Happy New Year"
©David A. Ziser

Well, the fact of the matter is -this image was not captured last night, New Years Eve, but on a 4th of July weekend. I still thought the fireworks look of this image represented the New Year's celebration too. This image is actually from the same wedding as the outdoor image I posted a few days ago. The couple wanted me to try to capture them among the wonderful Cincinnati firework display. Well, I did, but with the help of iStockPhoto and Photoshop. I had to get them properly exposed with the city lights in the background which was the easy part. I then found these great fireworks shots on-line and dropped them in. The client loved the result. So even though it's a 4th of July image - Happy New Year!!! to everybody. Camera specs; Canon 5D fitted with 24-105mm IS lens at 50mm, F4.5 @ 1/12 second, ISO 1600. Enjoy! -David

Read More...

Happy New Year!!!; The Best of The Best At DigitalProTalk

Good Morning Everybody, or afternoon, depending on your partying proclivities last night;~)

What a year it was last year here at DigitalProTalk.com - over 1,500 posts to date since I started DigitalProTalk.com about 18 months ago. Reader ship has tripled since last year at this time and I offer each of you my sincere, hearth-felt thank you for making that happen. My deepest gratitude too, to my fellow blogging buddies who felt DigitalProTalk's content was worthy to share with their readers. CameraDoJo.com just named DigitalProTalk as one of the top 20 photography sites for 2008 - thanks guys.

A special thank you to Scott Kelby at PhotoshopInsider.com, David Hobby at the Strobist.com, R.C Concepcion at Layers Magazine, mega-blogger 1001 at 1001 Noisy Cameras, Jim Talkington at ProPhotoLife.com, uber news blogger ImagingInsider at The ImagingInsider.com, our friends over at PhotographyBay.com and so many more for their timely mentions throughout this past year - A Great BIG "Thank You" from me to each of you! And one last Extra Big Thank You to my wife, LaDawn, who proofs every entry and makes the final posts day or night. By the way.... all those mistakes you find happen to be her fault, not mine;~)

Here are some of the highlights from this past year:
Podcasts were introduced and get quite a number of listens - 630,000 listens from its current library of interviews. One of my favorite was my interview with the famous Donny Hoyle of "You Suck At Photoshop" fame. Even John Nack over at Adobe picked up on it. Just hit the G-Cast widget in the right column to hear all the episodes posted to date. Look for many more episodes in 2009.

One of the surprise hits for me was my post "Conversations/Discussions/Insights" just a week ago [link]. This post provoked great response and, I think, proves to me that these kinds of posts can generate a wonderful collaborative resource for DPT readers worldwide. Look for more of these types of posts for sure in the new year.

I'm also stoked about the video capabilities of fusion of the new Canon and Nikon DSLR/Video cameras too. I plan to use this new technology to bring much richer content to DPT. These cameras make it that much easier to do just that. So, look forward to some pretty cool Technique Tuesdays.

I still love doing the "Image of the Day" posts too - over 300 for 2008 alone!. Although I feature wedding and portrait images primarily, I also like that it is not wedding photography each day. I've said it before here and I believe it. We need to get our Brain Juices flowing in other directions too. It's only then that we bring that new creative energy to our primary field of endeavor. I pledge to continue to keep those images interesting and diversified and informative to our DPT readers.

And, don't worry - Technique Tuesday and Business Day Thursday will continue though out 2009 along with many other topics as well.

That said, I promise that DigitalProTalk will continue to bring interesting, informative, content, insights, and news from our exciting digital photography world as long as my two typing fingers are up to the chore.

How about a look at the top traffic posts, most popular posts, and top videos from the past year. Here they are, Enjoy! -David

Top 5 Posts
1. It's Revelations Monday: 8 Hours With The Canon 5D Mark II
2. Canon 5D Mark II Video Monday!!!
3. Heads-Up Wednesday: No Photos In Westminster Abbey & The Analysis Of A Wedding Shoot - Part 1
4. Technique Tuesday: My Cheatin' Light - Or How To get Your Flash To Sync At Higher Sync Speeds Than Normal, and Alligators On Location
5. Highlight Tone Priority - Image Salvation!

Top 5 Video Tutorials
1. Technique Tuesday: My Cheatin' Light - Or How To get Your Flash To Sync At Higher Sync Speeds Than Normal, and Alligators On Location
2. Technique Tuesday: Dancing With The Light Fantastic - Getting The Best Light At Wedding Receptions With Multiple Strobes
3. It's Technique Tuesday This Thursday - Rembrandt Lives: Classical Portraiture
4. "Evening Blues" - A Cool Photoshop Tutorial
5. Technique Tuesday - "Our Emerging Future"

Most Commented Posts
1. Quick Hit Wednesday: Too Much Blogging?; New Training Session on Kelby Training; Inexpensive DYI Flash Gels; and Tom Hogarty Over At Photo
2. Technique Tuesday Again: Conversations, Discussions, Questions and Insights
3. Inspiration Friday: Game Changing Camera Technologies - Who Cares About Video On My DSLR
4. [B]Business Day Thursday - 7 Really Easy Things To Sell To Add To Your Bottom Line
5. I Don't Think I'm Dumb, Maybe I'm Just Stupid

Hey gang, That's it for me today. Thanks again for a great year and let's make 2009 even better. Check back tomorrow for another episode of "Gear Bag Friday: The Little Light That Could". See ya' then, -David

Read More...