Showing posts with label outdoor lighting. Show all posts

Friday, August 16, 2013

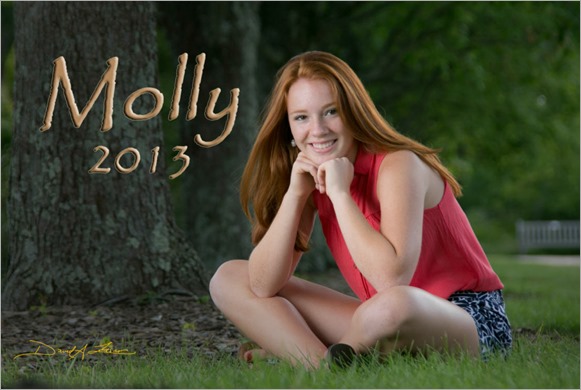
”Sitting Pretty"

Molly - Seating Pretty”Sitting Pretty"
©David A. Ziser

Here is another image from Molly’s session.  I’m putting it up as the “image of the day” because I think it captures perfectly the personality of my subject. I love the easy smile and relaxed pose.  I love too the gorgeous lighting and gentle breeze in the scene.  The soft back lighting from the nearly setting sun did a wonderful job separating Molly from the much darker background.  It was the perfect day for a portrait shoot.

Camera specs; Canon 5D Mark III fitted with Tamron 28-300mm lens at 184mm, F6.3 @ 1/200 second, ISO 200. Enjoy! -David

A Beautiful Portrait Shoot & Thank You For The Birthday Wishes

Good Morning Everybody,

Thank YouFirst of all I want to thank everyone for their kind thoughts wishes on my birthday this past Wednesday.  The birthday wishes came in from around the world and I read each and everyone of them so once again, thank you for your kind thoughts.  It was much appreciated. Thanks again.  -David

A Beautiful High School Senior Portrait Session

I got the opportunity to photograph one of my clients yesterday evening. I actually photographed mom and dad's wedding years ago and have been photographing their family ever since.  Their oldest daughter Molly is about to graduate from high school and her mom asked me to photograph her for her high school senior portraits. I was thrilled - heck, I've been watching Molly grow up since she was a child.

The weather was perfect, the temperature was in the mid-70s, clouds were filling the blue sky, and everything seemed perfect for the portrait shoot at Ault Park. We arrived around 5:30 p.m.  For this time of the year in this part of the Midwest the light is really beautiful and it gives us plenty of time to work into that "sweet light" period shortly before sunset.

Uh OH!  We were hit with a big surprise upon arriving at the park.  There were a gazillion people there.  I had never seen the park that crowded!  What was going on???!!! Turns out it was a special Ault Park dance night and they were expecting hundreds upon hundreds of people to show up over the next hour or two.

Molly1

The crowds just might crimp my style for Molly's shoot but what are you going to do?  You still have to come back with the shots, right - no excuses!!!  In today's post I want to share with you how fabulously well Molly’s session progressed.  I really believe I captured some my prettiest portraits ever!  Having a super cute girl like Molly to photograph sure made the session a breeze.

Above is a glimpse of the park just as we were beginning the portrait session - lots of people everywhere and more on the way!  I decided to walk around the park, do the best I could, keeping in mind, that I had Photoshop and Lightroom in my back pocket and could easily remove any of the distracting park attendees from some of my images.

Anyway, we begin the photography up around the fountain area you see in the image above. The dance party was taking place at the top of the fountain so we were somewhat removed enough from the larger crowd on the upper level of the pavilion. As I said the weather was perfect and the sun was co-operating by ducking behind the scattered clouds every now and then giving me the soft illumination I wanted.

LaDawn was standing by as my assistant with my off camera lighting set up – a Canon 600 EX-RT speedlite -  to supply the directional illumination as needed. Since we were in a fairly sunny part of the park I thought I would begin my photography by having Molly backlit and have LaDawn position herself for the nice loop lighting that I like on my portraits. I also did not shoot through my Zumbrella in this case because I needed the full output from my zoomed (to 80mm) flash.  Here are a couple of images from the beginning of the session.

Molly2

 Molly3

We then continued moving through other areas of the park – there must've been five other photographers working the park that late afternoon.  Nevertheless,  we did find some great locations that offered a wonderful variety of looks and feels. In all but one case, I used my off camera flash – the Canon 600 EX-RT speedlites shooting through my Zumbrella.  That combo just gives me such beautiful light on the subject.

Because we’re still in the middle of summer, the park offers  fabulous locations for portraits. There's always some place in the park that is in full bloom and full of rich colors. I love to take advantage of the beautiful variety this park offers.

When shooting in colorful areas like this, there are two things I really try to accomplish. Number one, place the subject in the shade, then add the off-camera flash, and shoot away. The off-camera flash creates that beautiful dimensional lighting on the subject that just seems to make them pop from the background.

Molly4

The next thing I try to do, particularly in yesterday’s situation, is to backlight the subject as so I can really highlight her hair .  With Molly’s face in the shadows, it’s easy to add the dimensional lighting with the off-camera flash. Check out the two examples below.

Molly5

Molly6

ControllerFor most of the images I was able to use just one speed-light but, when I was working in the more direct sunlight and shooting through the Zumbrella I had to increase my power by using two speed-lights. It was so easy to work with the Canon ST-E3-RT Speedlite Transmitter on camera to easily adjust the remote speedlights to get just the light output I needed.

Another thing that is important to note is that I kept the camera on “manual” for all my exposures and I also shot the strobes on “manual” as well. Over all my years in this profession, every time I try the automatic settings I never do quite achieve the consistency in the results that I want. But with the camera and flashes all on “manual” I can easily control the light output with the camera controller.  This let’s me easily put the light densities exactly where I want them in my scene.

As you'll see in the next couple of photographs, I also like to use repeating elements in my composition. The fence in the next image gives a nice feeling of depth to the scene and easily leads the viewer’s eye directly to the subject.
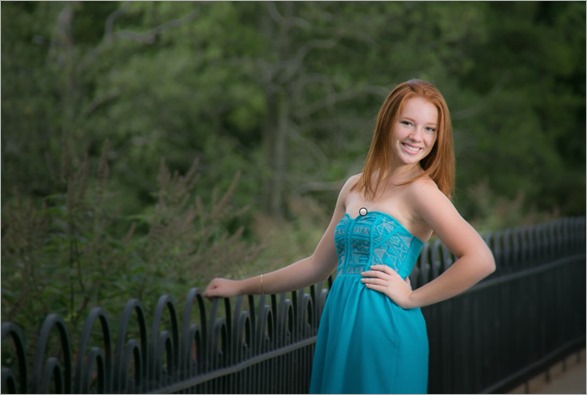
Molly7

I the following image it’s the long row of trees serve this purpose perfectly for my final composition.
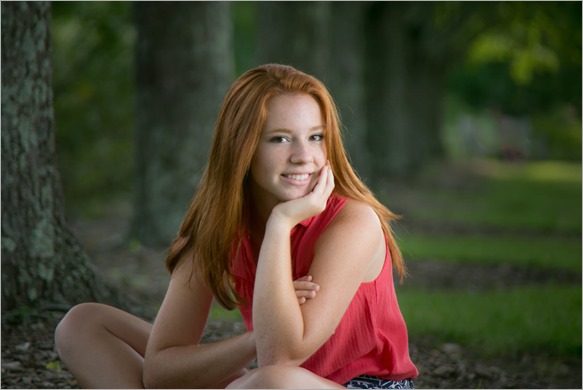
Molly8

We next headed to my favorite location in the park and, as expected it was in full bloom. The problem working in this area is that the subject receives a lot of front light and the background can sometimes go too dark. I was easily able to add light to the subject with my Canon 600 EX-RT speedlites powered through the Zumbrella to get the dimensional lighting I wanted on the subject.

To open up the shadows in the background I used Lightroom 5  to accomplish the finished result. I simply used the the green slide in the color channels pallet and pushed up the “luminosity” up by a few points. Using the green channel only let’s me brighten the greens throughout the whole scene when faced with this lighting situation.
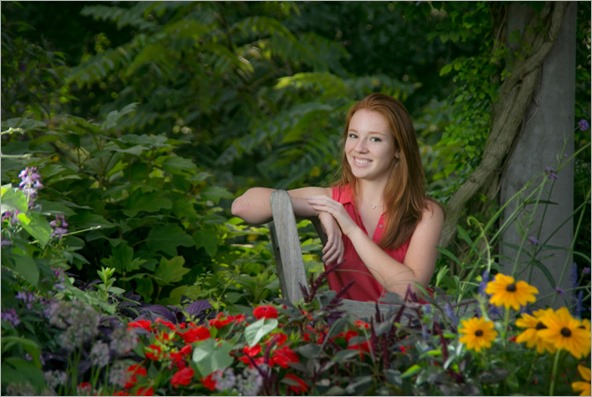
Molly9

In the post processing I also do a couple tweaks on the exposure and always push up the shadow density.  The other correction I made to each of these photographs is the new Radial filter.  Boy, as a portrait photographer, I love how that new feature in Lightroom 5 can really “focus” the viewer’s attention onto the subject.

Anyway, the session went fabulous! Molly was a great subject to photograph with her sparkling personality and a beautiful smile.  LaDawn nailed the lighting perfectly and that makes a difference to capturing great images. A great ending to a beautiful high school senior shoot.  By the way, I’m photographing the entire family on Monday same time, same place ;~)  Stay tuned, I'll share a few of those images with you next week.

_________________________________________________________________

Hey gang, that's it for me today. Enjoy the photographs, enjoy the weekend, and I'll see you again next week.

Adios, David
Tuesday, February 21, 2012

Technique Tuesday: You Light Up My Life; One More Time!

Good Morning Everybody,

Yesterday was the first day of the WPPI trade show and it was humongous! This year's show is covering two large halls and one more room with table top displays from even more vendors.  Even though we spent several hours in the trade show, we still only managed to see about 1/3 of it.

Tradeshow floor

I’ve said it before and I’ll say it again.  These kind of trade shows are a great place to learn. Why? Because of all the booth demos going on at so many booths.  These mini sessions feature photographers that are tops in their field and that are making a difference in the profession.  You could spend an entire day just watching the booth presentations and come away with a wealth of knowledge.

And speaking of booth presentations I did one for my good buddies at Westcott yesterday.  We had a huge crowd blocking the aisles for about 30 minutes and everyone was having an interesting time. Today’s Technique Tuesday speaks to what I showed at the Westcott booth yesterday.  I hope you enjoy it.

You Light Up My Life – One More Time!

In my presentation I demonstrated just how easy it is to control nasty light light on the wedding day.  What kind of light is nasty light? How about the burning, bright, high-in-the-sky sunlight you get on those hot July weddings. How do you work with that kind of light?  For me, it’s all about translucent umbrellas and reflecting panels.

It’s all about playing photon ricochet with the light. For me that means always putting a DIRECTIONAL light of my subject creating a highlight next to a shadow to create the detail, depth, and dimension on the subject.  That is what makes a big difference in wedding and portrait images from everyone else with a camera and that’s what sets you apart from the competition.

Make life easy when shooting outdoors in bright sunlight. Outside I
use a lot of off camera flash, but in a bright light situation,
nothing beats the lighting technique I'll show you in this video.
The results are just beautiful. This video is a bit long but jammed packed with good lighting info so don’t miss a minute of it.  Hit the PLAY button and enjoy the show. –David

_________________________________________________________

Hey gang, that’s it for me today.  We’re catching another program or two and walking the show floors again.  Hopefully we’ll get through another 1/3 of it today;~)

Tonight we catch up with our buddies at Peachpit and later in the evening we’re visiting with our friends at Animoto.  The Animoto party is called to be very casual with soft, relaxing music, and get this – masseuses available to massage the stresses and strains of the day away! Who knows what time I’ll see you tomorrow ;~)

Have a great day yourself.

Your soon to be relaxed and stress free blogger, David

Thursday, October 20, 2011

"Stormy Days Ahead"

Stormy Days Ahead

"Stormy Days Ahead"
© David A. Ziser

OK, this doesn’t look like a very romantic wedding image.  Add to that the title I’ve selected for this image, it doesn’t even sound like the marriage is going to last.

Call it all poetic license – I just like the very dramatic look to the photograph.  It was our second day shooting in Florida and the sky just wasn’t going to yield a rich blue sky with white puffy clouds.

How did I pull it off?  It was pretty easy.  The first secret is to use a very wide angle lens because it gives you such a wide perspective and really draws the clouds into the scene.  The second secret is determining the exposure for the over all scene and then underexposing the scene a bit to add the drama to the sky.

The exposure on the bride was created with my off camera flash coming in from camera right.  The challenge was this.  Since I was using such a small aperture, I needed to get the strobe close enough to the bride to establish the proper exposure on her face.  In reality, part of my assistant was actually in the photograph along with my strobe and monopod on the right hand side of the image.

Whenever your light source is in the photograph, be sure to place it in a “Photoshop-able” part of the scene.  The light and part of my assistant could be seen in the clouds on the right.  But with a quick application of PS CS5 “content aware fill”, they were easily removed in a matter of seconds leaving me with this dramatic wedding image.

Camera specs: Canon 7D fitted with Sigma 8-16mm lens at 8mm, F14 @ 1/320 second, ISO 200.  Enjoy!  -David

Tuesday, May 03, 2011

"Maid Marian"

Made MarianIMG_3730-Edit-Edit-Edit

"Maid Marian"
©David A. Ziser

Here is another image made during my Master Class a few weeks ago. We were shooting at the historic St. Augustine Catholic Church in a very old part of the city.  The challenge was to capture a great image of the bride among the urban surrounds. 

My long lens and large aperture did a lot to disguise homes in the background.  A little more Photoshop did the trick to eliminate the rest of the buildings which were previously visible on the left of the image.

What I loved about the image was how I got the wonderful repeat of the tree line on the right.  The long lens helped to give me a nice background too.  The slight puff of wind did the rest by catching the veil perfectly and adding the soft curved lines to the image.

Lighting was a bit trickier.  I needed to light the bride from the right because of how the wind was blowing. I wanted to use a large aperture so using a flash was not an option.  I chose to use a reflecting panel, my Sun Spotz,  instead. 

I didn’t obtain quite the amount of reflected light back on the bride that I wanted but it was still enough to illuminate the subject adequately. It was the blowing veil that carried the image anyway;~)

Camera specs: Canon 7D fitted with 70-200mm IS lens at 155mm, F2.8 @ 1/4000 second, ISO 400.  Enjoy!  -David

Friday, April 15, 2011

"Hot Times In The City"

Hot Times In The City

"Hot Times In The City"
©David A. Ziser

I captured this image this week during my Master Class.  We were working at St. Augustine Church in an old working-class neighborhood nicknamed Peaselburg a part of Covington, KY. This is quite a historic church and as been standing on these grounds for many, many years. Although the architecture inside was quite beautiful, I really wanted to work against the red brick of the church  exterior.

It was about two o'clock in the afternoon and the sun was quite high in the sky. The thing I loved about the scene was how the blossoms of the tree swept across the top part of the church in the viewfinder.  My first inclination was to grab the wide angle lens so that I could capture the sweeping lines of the tree branches crossing the top steeple of the church. The wide-angle lens also captured the sun as well, and that might be a problem.

Lighting the scene would be difficult. Because I was shooting directly into the sun I knew that I needed to get exposure on the front of the church and also the bride's face. The easiest way to do this was to bounce some light back in the bride's face with my Sunspotz reflector coming in from camera right. One of our class members held reflector, bounced the sun’s rays back onto the bride, and I captured my photograph.

Using my Sigma 8-16mm lens at it’s widest setting added an edgy distortion to the final photograph.  I was also a bit heavy-handed with the Lightroom sliders sliding the “Vibrancy” slider about 80% to the right and then heading down to the Blue channel and saturating the blues even more. Overall I think that oversaturated colors, the low camera angle, the swirl of the veil, and a very wide field of view created an intriguing image.

Camera specs:  Canon 7D fitted with Sigma 8-16mm lens at 8mm, F5.6 @1/4000 second, ISO 400.  Enjoy!  -David

Monday, March 14, 2011

”On Top Of The World”

On Top Of The World

”On Top Of The World”
©David A. Ziser

This is an image I made back in my early digital Nikon days.  It was actually made during one of my Digital Master Classes.  Those of you reading this and who have attended my class know the location well – Drees Pavilion, overlooking Cincinnati, OH and the Ohio River Valley. Which, with the incredible view makes Drees Pavilion one of  the most popular wedding venue locations in Cincinnati, OH.

When you check the camera specs below, you’ll find that my shutter speed was 1/500 second.  That was my favorite feature about the D1x camera, it had the same sync speed as my medium format Hasselblad – 1/500 second.  With the faster shutter speed, I could easily add richness to the sky by underexposing it slightly.  Most cameras that became available on the market after the Nikon D1x was introduced reduced the sync speed to 1/250 second – rats!

The main reason for the switch to slower shutter speeds was the fact that the sensor on the Nikon D1x was a  CCD sensor as opposed to the CMOS sensor all cameras have these days.  The CCD sensor could handle the higher sync speed than the CMOS sensors of today.  You can find more discussion on the topic right here.

This is really just a classical portrait of the bride against the cityscape of downtown Cincinnati, OH in the distance.  The pose is easy and flattering.  The light is coming in from camera left – Quantum strobe at full power pointed directly at the bride – no Zumbrella in this situation.  Balancing the ambient with the strobe gave me the image I was going for.

Camera specs: Nikon D1x fitted with 18-35mm Nikkor lens at 21mm, F9.0 @ 1/500 second, ISO 400.  Enjoy!  -David

Thursday, March 10, 2011

”My Three Girls”

0001-My Three Girls-0246_RyanP05 ”My Three Girls”
©David A. Ziser

Every Fall we get several calls for family portraits.  In the  Midwest that is certainly the best time for outdoor portraits.  The optimum time of the year for us is the second and third week of October. That’s when the fall colors are in “full bloom”.

So what’s one to do when you get a call and the client wants to have their portrait made well after that date – in this case, the day after Thanksgiving – a month later?  The quick answer is – you still do your best. 

This image was made on the day after Thanksgiving.  Most of the leaves had already fallen to the ground and their limbs were pretty bare.  The good news was that I still had plenty of leaves on the  ground offering the Fall color for my image,

I arranged the mom and her two daughters in what we call a pyramid composition, carefully selected a high enough camera position so that the leaves on the ground would give me a good backdrop, opened up the aperture , and fired away.

Light was coming in from camera right – you guessed, strobe at 1/2 power through Zumbrella just out of camera range.

The long focal length and wide aperture worked their magic disguising the mostly leafless trees and blurred the background beautifully creating this very nice Fall portrait.  This image is what I call a “huggy” shot – it’s the last image of every group photograph I make – wedding or portrait.  I love how the “huggy” always brings out the best expressions of my clients.

Camera specs: Canon 5D fitted with 70-200mm IS lens at 200mm, F4.5 @ 1/200 second, ISO 100.  Enjoy!  -David

Monday, March 07, 2011

”I’m Just A Country Girl”

I'm Just A Country Girl2

”I’m Just A Country Girl”
©David A. Ziser

This image was made as part of a high school senior shoot a few years ago and is pretty much how it looked right out of the camera.  We had a beautiful Fall day full of color, great locations, and a very pretty subject to work with.

In addition to our lovely subject, it was the Fall colors that really made the session fun. Everywhere you pointed the camera, the viewfinder was full of Mother Nature’s glory.

The goal though is to keep the viewers’ attention on your subject. The best way to do that is with great light, a large aperture, shallow focus, and tack sharp focus on your subject.

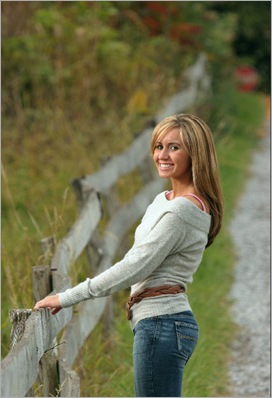
I positioned Casey in the foreground knowing the wooden fence would go slowly out of focus but still lead the viewers’ eye right back to our subject. Here grey sweater matched the colors of the surrounds perfectly.

My off-camera flash was brought in from camera left – my Quantum shooting through a 42 inch umbrella.  Yes, this was in pre-Zumbrella days.  Nevertheless, we still got a great direction of light which balanced perfectly with the ambient light falling on Casey.  The result was a terrific high school senior image.

DAZNOTE: I would have preferred using a larger aperture but the ambient light was a bit too bright.  Remember, I was limited to 1/250 second – the native sync speed on my Canon 20D.

Yes, I could have used a lower ISO but that would have necessitated me bringing the flash closer to my subject which was not an option – it was just out of camera view on the left already.

And yes, a more powerful flash may have helped but I was already at full power on my Quantum.  Working outdoors with flash is always a challenge to get the best light on the subject, but the final result is always worth it.  

Camera specs:  Canon 20D fitted with 70-200 IS lens at 185mm, F 5.0 @ 1/250 second, ISO 400.  Enjoy!  -David

Tuesday, January 18, 2011

Technique Tuesday: Top 10 Posts – Part 1

Good Morning Everybody,

Bruce shootingI can’t believe this is day 4 of the Imaging USA Convention. My program is later this afternoon at three o'clock so I hope to see you there. Animoto threw a wonderful party at a dude ranch last night and it was great fun. You had an opportunity to target practice with an authentic western six shooter.  That’s my buddy, Bruce Hudson, shooting a few bad guys ;~)

DAZ on bullHeck, you could even ride the “bull”.  Yep, that’s me in the saddle.  Like I said, everybody had a great time. We got in a little late last night and I’ve got to get moving - so let's get right to the today’s post.

Technique Tuesday: Top Ten Posts Of 2010 – Part 1

Top 10aWe've been so busy for the last couple weeks, I haven't had the opportunity to put together my top 10 postings for 2010.  I’ve been working on it for the last couple of days so look forward to those top 10 lists to be posted over the next few days.

Today I'm posting the first five posts from Technique Tuesdays 2010. These posts were the most popular according to the number of viewings each received when I reviewed the 50+ videos I posted from last year.

Here you have 5 of the Top 10 Technique Tuesday posts:

6. My 5+ Favorite Bridal Poses [link]:  This 21 minute video tutorial discusses my favorite “must do” bridal photographs you must take on a wedding.

7. You Look Marvelous [link]: A 12 Minute video tutorial on how to use Lightroom 3 for quick retouching – very cool.

8.  Time To Light Up Your Life [link]: A 28 minute video tutorial on lighting with reflectors outdoors.

9. Wedding Day Daydreams [link]: A 20 minute video tutorial on creating beautiful outdoor bridal portraits.

10. I Can See For Miles [link]: A 22 minute video tutorial on how to get great bridal portraits with long lenses.

When you can find a few minutes in your day, take some time and enjoy them for a second time.
____________________________________________________
A gang that's it for me today, we've got a be hitting the road real soon. The tradeshow opens in just a few minutes and I still have a lot of work to do, vendors to visit, new products to explore before the trade show wraps up at 1:30. Thanks to all who came up and said HI over the last few days. It has been a blessing to meet so many old and new friends while visiting San Antonio.

Anyway, have a great one and I'll see you soon.

Adios, David

Monday, December 20, 2010

"Aimee In The Wild"

Aimee2

"Aimee In The Wild"
©David A. Ziser

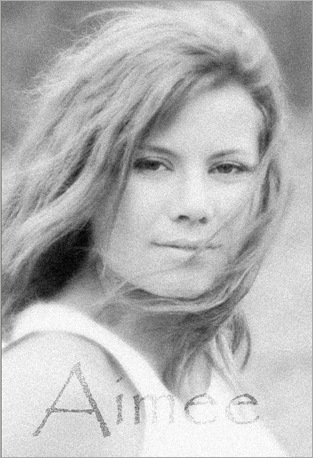
This is an image I made during a high school senior session a few years ago.  I had actually been doing work for the family for a number of years so I was happy to oblige Aimee when she called.

I always have to smile when I shoot high school seniors – hardly ever do they select a photograph of themselves smiling.  The image shown here was one of Aimee’s favorites. She liked the “wild child” look in the image and the impression this would make to her friends and family.  Aimee is an amazing young lady, by the way.

The image was taken on an over cast day so the lighting was quite flat.  The light was also coming from almost directly overhead so it pocketed her eye sockets too.  Things were not looking great.

I used a simple 50mm F1.4 lens at F2.5 so that the background would go out of focus and bring the viewer’s attention back to Aimee.  What I had in the original image was not that great.  I decided to crop the original image MUCH CLOSER and go just for Aimee’s expression as you see it above.

The close crop necessitated me throwing out too many pixels leaving me with a slightly soft image – now what to do?  I’ll tell you, the easiest solution is to “artzify” the image by converting it to B&W and adding a little “grain”. That’s exactly the solution I used and it worked just fine.

Camera specs: Canon 20D fitted with 50mm F1.4 lens, F 2.5 @ 1/640 second, ISO 800.  Enjoy!  -David

P.S.  You can see the original image by hitting the “Read More…” link below.

What do you think!

Aimee1

Friday, December 17, 2010

"Romancing The 18th"

Romancing The 18th

"Romancing The 18th"
©David A. Ziser

This image was captured several years ago, back in my Nikon days.  We had been shooting “digital” for about three years and I had just picked up my first Sigma 8mm Fisheye lens – I was stoked to give it a try.

It was an early afternoon wedding which meant we were heading to the reception just when the lighting was about perfect for outdoor photographs. We also had one of those perfect days with the sky full of beautiful white puffy clouds. Simply an ideal situation.

We checked to be sure no one was hitting onto the 18th green and grabbed this photograph.  It’s just a simple wedding portrait but the setting is what makes the image so special. I really like how the color of the groom’s dress blues enhance and compliment the rich blue sky.  The fisheye lens’ super wide view really reaches out and grabs the sky taking it all in.

Lighting was from camera right, my Quantum through my shoot thru umbrella (pre-Zumbrella) at full power.

Camera specs: Nikon D1x fitted with Sigma 8mm Fisheye, F 11.0 @ 1/500 second, ISO 400.  Enjoy!  -David

Tuesday, November 16, 2010

Technique Tuesday: “LIVE” Print Review; & Wedding Day Daydreams

Good Morning Everybody,

First off, sorry for the late post today.  We’ve got a lot of things going on at the studio that took precedence over the DPT blog today. But I finally found some time to get today’s post up and running.

Before we get to today’s lesson, I want to mention something coming up this weekend that I think you will find quite interesting. Why not give it a read below and then on to today’s video. Enjoy!

You’re Invited To A “LIVE” Print Review This Sunday

KPPA Print Logo That’s right,  this Sunday from 1:00 – 3:00 p.m. EST, our Kentucky Professional Photographers Association is conducting their Fall print review.  Photographers from all around the state will be submitting their images to be reviewed by three qualified judges.

KPPA Print review Since I’m the VP of our association, we got together and thought it would be a cool idea to “broadcast” the print review “LIVE” via a webcast. It’s FREE and you can register RIGHT HERE!

This webcast is for anyone wanting to learn how to make their images more exciting, more dramatic and technically more sound. You cannot afford to miss the opportunity. Its really cool to see what goes through the judges mind as they review the images submitted. Once again, you can register right here.

Technique Tuesday:  Wedding Day Daydreams

Melanie 1200px- IMG_1639Yesterday’s “Image Of The Day” post entitled, “Wedding Day Daydreams” [link] yielded some very nice comments, emails, and Facebook comments so I thought I would make it the center of attention in today’s lesson.

The image is the lucky result of decent weather, a cool fall sky, and random geese flying by that allowed me to capture this great image of the bride on her wedding day.  That was only half the story though.  Judicious use of Adobe’s ACR sliders and a Photoshop trick or two gave me the finished result.

This tutorial will walk you through all the steps I took to first capture the image and then properly compose and light it.  Then I’ll walk you thru how I reviewed the images on the computer until I eventually chose the images to use in creating this bridal portrait. 

Also, I don’t use ACR very often, but I’ll show you the steps I took to get the image mostly where I wanted it before heading into Photoshop for a few final adjustments and additions.

There’s lots of good information in this tutorial so I hope you enjoy it. Hit the PLAY button below and enjoy the show!

________________________________________________________

Hey gang, that’s it for me today.  Boy, the day sure has gotten away from me, I’ve got to back to my real job.  I’ll plan to see everyone right here again tomorrow with another episode of “The One That Got Away.” And, this time, it’s one of my images ;~)

See ya’ then,  David

Monday, November 15, 2010

"Wedding Day Daydreams"

 Melanie 1200px- IMG_1639

"Wedding Day Daydreams"
©David A. Ziser

This is an image I captured at Saturday’s wedding.  The forecast was for rain later in the day with temperatures hovering in the low sixties.  Fortunately the bride and groom had scheduled photographs to be taken before the wedding.  We began the portrait session earlier in the day just as the clouds began rolling in.  I thought if I could just get a few outdoor images with the sky looking this good, I would have a great start on the wedding coverage.

The wedding and reception were taking place at the country club so it was an easy walk to the first tee to capture this image. I love how the image came together. I had my assistant positioned about 120 degrees from my position, camera right.  With the bride in a profile view the light came in perfectly on the bride.

Golfers had just started to tee off on #18, the green to my right and caused the geese resting around the pond to take flight. All elements came together for a very nice bridal portrait on Saturday afternoon.

Camera specs: Canon 7D fitted with Sigma 8-16mm lens at 16mm, F11 @ 1/125 second, ISO 200.  Enjoy!  -David

Tuesday, November 02, 2010

"Fall Beauty All Around"

Fall Beauty All Around

"Fall Beauty All Around"
©David A. Ziser

Here is another image captured during my Master Class a few weeks ago.  The lesson was to show how we could use a long lens and wide aperture to make the trees in the background still look good even though they had dropped many of their leaves. The larger aperture worked well to give me the result I was looking for.

The other challenge when shooting outdoors is being able to use a shutter speed that let’s you use the wider aperture.  Even at ISI 200, I was pushing it, just a bit, to get close to the camera’s native sync speed of 1/250 second.  By cheating the sync and shooting at 1/320 second, I was still able to obtain the directional light on my subject that I wanted.  Underexposing the ambient light gave me the beautiful, structured lighting on her face that I most often strive for in my images.

The rest was easy. I had the bride strike an easy “hand on the hip” pose and shot away.  Lighting was from my strobe camera right -  going direct - NOT through the Zumbrella. I used this technique because of the higher amount of ambient light  and I needed the additional amount of light from my strobe.

Camera specs: Canon 7D fitted with 70-200mm IS lens at 200mm, F4.0 @ 1/320 second, ISO 200.  Enjoy!  -David

Thursday, October 28, 2010

"The Colors Of Autumn"

The Colors Of Autumn

"The Colors Of Autumn"
©David A. Ziser

Fall is about the prettiest time of the year for a lot of people. In the Midwest we get to enjoy those Fall colors for approximately a 3 week stretch throughout October. It's a great time to schedule family and high school senior portraits and pictorial bridal pictorials.

This is an image I made at a recent bridal pictorial session. This year our Fall season was a bit short lived because of our very dry summer. Still, as a professional ,that is no excuse for not being able to pull off a nice portrait of our bride.

The challenge is to find that one spot of color that will make a great background for your image. Many of the leaves had already blown off the trees but I found this small patch in the distance I thought would work. I needed a long lens to really stretch out the background behind the subject.

I also wanted to use a large aperture to throw the background well out of focus so that viewers' attention would go right to my subject. Solving the problems were easy. Place the 70-200mm lens on my camera, rack it out to 200mm and walk away till I had the bride framed up in my view finder. Next set the aperture to f4.0.

How to light the bride - how about I use my super reflective SunSpotz reflector [link] to bounce the sun’s rays back into the subject. When used a reasonable distance from the subject, it is less apt to "blind" them. I find that about 15 feet away works pretty well.  Remember, I’m not using the SunSpotz as a fill light – it’s my main light.

I had the bride strike a pleasing pose, brought the light in on her face creating a flattering loop lighting pattern and shot away. With the shallow depth of field the background colors just blossomed and looked great softly diffused behind the bride.

The light reflected from my SunSpotz - which again was my main light created a pleasing directional light on my subject and brought out the finer details of her gown. I think I pulled off a pretty nice Fall bridal portrait for my bride.

Camera spec: Canon 7D fitted with 70-200 mm IS lens at 200mm, F4.0 @ 1/400 second, ISO 200. Enjoy! -David

Tuesday, October 26, 2010

"Fountain Dance"

Fountain DanceIMG_0129

"Fountain Dance"
©David A. Ziser

Here is another image I made during my Master Class last week.  The reason I’m posting this image is because I want you to see it as a lighting lesson.  Let me explain.  Everyone knows I’m a big fan of directional lighting – using the light’s direction to create a highlight next to a shadow to create detail, depth, and dimension on the subject.

When you go outside into the bright sunlight, that objective just might change.  Last week during my class I saw that a lot of the students were just “shooting away” at the bride.  I’m thinking, “Why is no one looking for the direction of light?” Heck, it’s the sun, but the sun could be set up to illuminate the bride giving me the flattering loop lighting pattern on her face.

That’s what I set out to do in this image.  I simply orientated the bride to the fixed light source, the sun, till I had created the same light direction on her face as I would have with an off camera flash.

Look too at the added detail in the gown.  We see that added detail because the light is “crossing” the gown, not “blasting” into it.  I think the result is worth it.  Sure, it’s fun “running and gunning” when you’re shooting, but a little more lighting sophistication on the image can add a nice polish to the finished image.

I tweaked the color, clarity, and contrasts in Lightroom 3 to enhance the image for this presentation.  I think it came out kind of cool.

Camera specs: Canon 7D fitted with 70-200mm IS lens at 180mm, F 5.0 @ 1/3400 second, ISO 200.  Enjoy!  -David

Monday, October 25, 2010

"An Easy Day At The Park"

An Easy Day At The Park

"An Easy Day At The Park"
©David A. Ziser

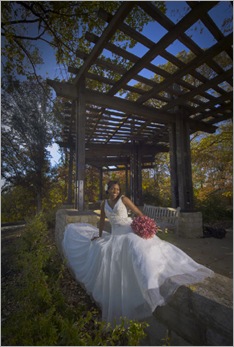
Here is an image I captured during my Master Class last week. I love those wide angle lenses, and for me the wider the better. This is the widest angle lens you can put on and APS size sensor.

The super wide nature of this wide angle lens really accentuated the convergence of the lines in this image which I like a lot.  I would have preferred to see a bit more of the right side of the image, but was hampered by some distracting elements which I decided to crop out – not a big deal though.

Compositionally, I like the sweep of the arbor in the top part of the image repeating the sweep of the stone wall on which she is sitting, and the sweep of her gown.

A tweak or two in Lightroom enhanced the sky a bit adding a little more dramatic color to the scene.  I also even like how the cool shadows in the shadows of her gown compliment the sky color.

The lighting is coming in from camera left – Quantum Trio on full power – illuminated the bride nicely and really helped to pick up the detail in the bride’s gown.

Camera specs: Canon 7D fitted with Sigma 8-16mm wide angle lens, F 8.0 @ 1/200 second, ISO 200.  Enjoy!  -David

Wednesday, September 29, 2010

Wednesday: "The One That Got Away - Episode #6"

Good Afternoon Everybody,

I hope everybody liked yesterday's lighting tutorial [link]. I know it ran a little long, almost 30 minutes, but I wanted to give you the complete picture (no pun intended) of how versatile reflected light can be on your shoots. It really is a powerful lighting technique.

Canadian Imaging Hey gang, you won't believe it. I got a call yesterday from the Professional Photographers of Canada [link] about their CanadianImaging conference held in Banff next year [link]. For the last few years I've been receiving tons of requests from our Canadian photog friends to bring my programs northward.

Well, good news - we are wrapping the final details to make that happen. The dates are April 16-20.  Here is their website right here for all the details. My program info should be up on their site by next week. I'll keep you posted. I'm really excited to be visiting the Canadian friends of DPT.

"The One That Got Away - Episode #6"

I continue to get emails thanking me for running this series. Thank you as I enjoy writing it too. That said, I’ll keep it coming your way for the next several weeks. Today's post has to do with how the lighting could have been enhanced to really add some sizzle to the image.

Let's first take a look at the first image.

One Away 1

Here is what I like about this image:

1- It is nearly perfect in pose and composition. I like that the maker has the shoulders turned in one direction while her head is turned in the other.

2- The subject placement is right where it needs to be. The bride is positioned with her head in "nodal point #2.

3- Notice too how the lines of the steps in the distance lead  ones eye directly to the bride.

4- Exposure is nicely balanced between the background and the subject.

All well done. So what would I have done differently?  Hit the “Read More…” link below for the rest of the story.

Here is where I would make a few adjustments to the image.

1- Lighting is completely flat on the bride's face. I would say it was coming from an on camera flash. See how the on camera flash flattens the details so much. With so much going for this image, that would be the first place I would begin.

2- OK, what would I have done to improve the lighting? Off camera flash or a reflector could have done the trick. Be sure to review the last image in this post where I show exciting lighting on the bride.

3- This is a very fine point, but I think the bride's left hand could have been posed a bit more gracefully. My suggestion is to have the bride hold the veil with her thumb and middle finger which is what the photog did in this example. Only her hand looks like a “claw” and is unattractive. The final finesse is to have the bride flatten the hand a bit and extend the index finger slightly.

4- One final point, with the bouquet as far forward on the bride's dress, a nasty shadow would have been cast on the dress had off camera light been used. My suggestion is to be aware of where the shadows are going to fall, and reposition the bouquet accordingly pulling it back slightly.

OK, now let's look at our second image.

One Away 2

I know what you're thinking, "It sure looks like the first image to me." And you would be right in thinking that. These images were made during my Master Class this past spring. I was demonstrating how we use reflectors to create a key light or main light on the bride.

I had basically set up the photograph after which the students stepped in and tried to duplicate my image. The second shot is somewhat an improvement on the first in so far as we see a directional light on our bride. A little work in Lightroom could have enhanced it a bit more.

Now look at the third image. This is the one I made.

One Away 3 1- Notice how I refined the hand position of the bride's right hand.

2- Notice how the direction of light, the sun bounced off of a super silver reflector back into the bride's face, really enhanced the image from what we experienced in the first image.

3- Notice too, how the contrast in the third image is better controlled as compared to the second image. What did I do differently? I simply used my on camera flash as a fill light. I dialed the power output down about 2 stops, and set it to "high speed sync" to accommodate the faster shutter speed I was using.

4- A tweak or two in Lightroom to fine tune density and color finished the job.

As you can see from today's discussion, it's really the small things that make a big difference in your final result. And it's understanding how to make these small improvements to your photographs that differentiates you from the composition.

It's your choice to be part of the crowd, or be a leader of the pack.

__________________________________________________________

Hey gang, that's it for me today. We are super busy again today and I've to get back to my real job. Oh, just a quick note - I'm announcing a brand new FREE webcast tomorrow so be sure to stop back for all the details.

I'll see everybody tomorrow for another addition of Business Day Thursday.

Adios Everybody, David
Tuesday, September 28, 2010

"Simply Beautiful"

0001-Simple Beauty3-0156_Ellis P10

"Simply Beautiful"

©David A. Ziser

I made this image during a family portrait session a few weeks ago. During our sessions, I photograph the entire family and then break the family into smaller groups. Those groups could be dad and the boys, mom and the girls, mom and dad, and each of the children individually. Of course, we would accommodate any additional requests from the parents as well.

That's pretty much what I did at this session too. I blogged the image of the four sisters last week link. After photographing the four sisters, I then photographed each young lady individually trying to capture something special and unique about each one of them.
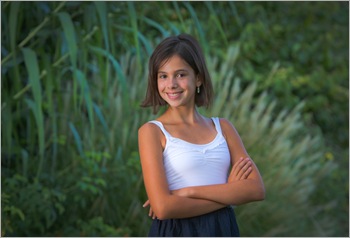
The young girl in this image is the oldest of the four sisters and at that stage in her life where she reflects her own self confidence and independence. I think it shows in this image.

This is the simplest of all portraits to take. She is positioned in the middle of the frame looking right back into the camera. No rule of thirds in this composition, no special placement - just in the center of the frame with her looking right back at me.

That is really only the beginning of the portrait. The long lens and wide aperture soften the background bringing the viewers attention directly onto our subject. The soft light on her face coming from camera left – my assistant holding the Quantum through Zumbrella -further completes the easy look I wanted in this image.

Think of this portrait as "softness all around" - soft lighting, soft background, and soft expression. All these elements came together in a wonderfully simple and beautiful portrait of this young lady.

Camera specs: Canon 7D fitted with 70-200mm IS lens at 150mm, F 4.0 @ 1/200 second, ISO 100. Enjoy! - David