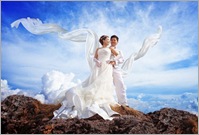
Tuesday, May 17, 2011

Saying Goodbye To Winter"

Saying Goodbye To WinterIMG_5020-Edit-Edit

"Saying Goodbye To Winter"
©David A. Ziser

Normally I don’t post a non-wedding/portrait image on a Tuesday but since this week’s Technique Tuesday post is on the Content Aware Fill tool in Photoshop, I’m making an exception. Why? Because I used CAF in this image too.  You can look closely but you won’t be able to spot it.  Want to see the original – you can find it right here in a previous Quick Hit Monday post.

This is one of my favorite images from our visit to Banff about a month ago.  The scenery was nothing short of breathtaking EVERYWHERE you looked.  This image was made as a “drive by shooting” as we were driving along the highway back to Banff and this amazing scenery was breath taking to view!

Compositionally and color-wise this image really works for me.  The tallest mountain peek is positioned at nodal point #3 and the trees at #4.  The eye is lead gracefully in from the left hand side of the image with the gentle rise of mountain peeks and tree line.

The rich blue sky and the clouds blowing over the mountain speaks to the brisk crispness of the Spring air this time of year in the Canadian Rockies.  It was a picture postcard scene if there ever was one.

Camera specs: Canon 7D fitted with 18-200mm IS lens at 35mm, F11 @ 1/400 second, ISO 200.  Enjoy!  -David

Technique Tuesday: You Won’t Believe Your Eyes!

Good Morning Everybody,

Just a couple of quick notes before we get on with today’s Technique Tuesday.  First I’m planning a FREE Webcast for the not to distant future on Social Media Marketing focusing on how to use Twitter to enhance your business presence.  If you have any suggestions for upcoming topics, please let me know in the comments section after this post.

SnappAlso don’t miss SNAPP tomorrow evening – it’s LIVE Photoshop User TV.  It looks like fun.  Here is the link to REGISTER!  I missed the last episode but I definitely plan to sit in on this one – hope to see you there.

On with today’s post…

You Won’t Believe Your Eyes!

Content Aware FillI remember seeing a demo or two about Content Aware Fill in CS5 months ago.  The demos simply blew your mind and I couldn’t wait to try out that razzle-dazzle feature myself. When I first tried CAF, I got mixed results – how come when I tried it, it didn’t work quite as effectively as the demo I had watched?

You know, it’s like anything, CAF takes a little practice and a little getting used to.  It’s not made to work it’s magic on EVERYTHING, but it does work magic in many situations.  That’s what this tutorial is about – using Content Aware Fill for the Wedding/Portrait photographer and showing when it works and when it doesn’t.

I’ve done three posts at DPT over the past few weeks [link1] &[link2] & [link3] where CAF figured prominently in my finished results.  In this tutorial, I’ll revisit the images in those two posts.  I’ll show you a tip and trick or two that helps you get the best out of Content Aware Fill.

Why not hit the PLAY button below and enjoy the show.

_________________________________________________________

Hey gang, that’s it for me today.  I’m trying to put the finishing touches on my newsletter which is scheduled to go out tomorrow.  You can sign up for it over in the right side bar if you have changed your email address or have yet to receive the newsletter.

Also, I’ll be back tomorrow for another episode of the one that got away. 

Hope to see you then,  David

Monday, May 16, 2011

"Dancing On The Circle"

Dancing On The CircleIMG_6215-Edit-Edit

"Dancing On The Circle"
©David A. Ziser

Last Friday I posted one of my favorite images [link] from my Thursday evening Shoot-Out at Texas School a few weeks ago. That same location bore photographic fruit with several other images as well.  This is another one of my favorites. Dodging the cars and fighting the light, I was able to pull it off.

Yes, dodging the cars first.  I was trying to get this shot in a very busy part of Addison Circle.  Every time I had the shot lined up, a car would come whizzing by and I’d have to move.

The lighting was the most challenging.  The lights you see in the ground illuminating the sculpture above are very bright quartz halogen lights indeed.  Instead of using strobes on this image, I chose instead to use the lights around the perimeter of the traffic island.

I needed to get the bride’s face oriented to the one light that you see in the bottom right corner of the scene. The orientation had to be just right to get some semblance of a “loop lighting” pattern on her face.  After working the pose a bit, I managed to pull it off.

I didn’t want her directly in front of the light because, if I did, my exposure on her would have meant that I would have severely under exposed the rest of the scene.  I managed to position her just out of the direct light beam.  That allowed an exposure that gave me a better tonal balance overall.  I still needed to add a bit of “Fill Light” with Lightroom 3 to finish up the image.

There are several things I want to point out in the composition of this image.  First look at how the lights on the ground come around and lead the viewer’s eye right to our subject.  Also notice where I positioned her head – right where the curving elements of the structure behind her intersect.  Any other placement I tried just didn’t work.

Even though she is “dead center” in the frame, it doesn’t appear so with the enormous sculpture looming over her.  Anyway, kind of a cool image to me.

Camera specs: Canon 7D fitted with Sigma 8-16mm lens at 8mm, F5.6 @ 1/80 second, ISO 1600.  Enjoy!  -David

Quick Hit Monday: Tantalizing Photography; Photoshop Galore; and iPad Nirvana

Good Morning Everybody,

After the Blogger outage last Thursday and Friday which sure made getting the post up last week a bit more difficult – LaDawn and I settled into a fairly easy weekend.

OVOProbably the highlight of the weekend, besides meeting Vivian the new baby daughter of my Ace #1 Assistant Nicolas Viltrakis and wife Terri, was seeing Cirque du Soleil’s show OVO on Sunday evening.  LaDawn and I are both huge Cirque fans having seen just about every show playing in Las Vegas.  It’s nice to have one come to town right in your own back yard.  “O” playing at the Bellagio is still our all time favorite but OVO was very entertaining with fun exciting costumes.

I’m spending this week catching up on a few projects and loose ends and finalizing plans for my Kelby Training DVD shoots next week.  My next training videos will focus (no pun intended) on Engagement Portraits and Composition. I’ve completed both the outlines for the shooting schedule. I’m just wondering how we’re going to get everything edited down to just two 2 hour training sessions ;~)

Hey  gang, I’ve got some pretty tantalizing reads for you on today’s Quick Hit Monday so why don’t we jump right in.  Here we go…

In The Photography Department

1. I know I’ve mentioned this before, but while in Banff last month we attended a wonderful program by two fresh new wedding photographers – David and Quin Cheung.  They were entertaining, funny, and very informative.  Just for the fun of it, head over to their site and check out their exciting wedding photography – you’ll love it!  Here is the link right here.

Fuji X1002. Last week while visiting After Dark in Cincinnati, I ran into Neil Van Neikerk, author of the best selling “On Camera Flash”.  We had previously met at WPPI so it was a nice surprise to get a chance to visit again.  During our quick visit he showed me his latest camera he was shooting with – a Fuji X100.  I’ll tell ya’, it was one interesting camera – a rangefinder camera that look’s like an old Leica rangefinder camera of years ago.

Apparently it was quite a hit at Photokina last year and is in very short supply right now – even B&H has been out of stock.  Anyway, Neil allowed me take a few shots and I was really impressed.  I even took a few at 3200.  The images looked great.  Is this my next wedding camera?  We’ll have to see on that one, but the camera sure looks like it could be a possible addition.  Want to read more on it – here is a link to a recent review right here.

3. Creative Wedding Photography Option for Those on a Budget [link].  This is a very interesting article reflecting the trends in today’s wedding client but I really liked the images accompanying the article.  Give it a peek right here.

Terry-EJJ_DSC10502JJ_thumb14. My buddy and long time friend, Terry Deglau, recently started a blog entitled “A Creative Mind Is A Moving Target” and is brain dumping his vast amounts of knowledge into weekly posts.  One of my recent favorites is “Sometimes Slow is Better” where he has a very thorough discussion on slow shutter exposure photography. You’ll get a kick out of reading Terry’s posts – check it out right here.

5. National Geographic just released a new iPad app that  is receiving “rave” reviews.  It’s called “50 Places Of A Lifetime”.  You can check out some of the amazing images and download the app right here.  Even with all the traveling we do, most of these locations have been off our radar.  Yes, I’m planning to down load the app;~)

6. And a few more inspiring images from nature can be found right here in this post entitled “41 Most Refreshing Pictures: Sweetness Of Nature”.  Hey, we all need a little Monday morning inspiration don’t we – check it out.

Tripwire7. Danger!  Danger!  Will Robinson! I almost linked you to the article below but upon verifying the link, my Norton Antivirus software immediately notified me of a virus attack. DON’T check out this article “35 Useful Digital Photography Tips And Tutorials” at Tripwire Magazine – sorry, no link provided.

Virus2

I really work on keeping the links I post here at DPT safe for all our readers and haven’t seen anything like this for quite a while.  This kind of stuff really irks me though – a promise of good content only to have the well meaning visitor be hit with a virus. Please be forewarned of other sites like TripWire out there playing the same game.

But now on to more fun stuff.

Photoshop, Photoshop, and More Photoshop – 7 Hot and Helpful Links For You

Poster TutsThis part of Quick Hit Monday is turning into a weekly feature, most because of all the cool content available.  Each week I’ll try to nab the best links for the Portrait/Wedding Photographer.  I’ll also toss in something that goes beyond portraits and wedding just because the links contain such interesting content.  I hope you enjoy them. 

1. 15 Photoshop Cheat Sheets That Will Make Your Task Easier [link]

2. How To Repair Scratched and Damaged Photographs or Scans [link]

3. How to Soften Skin in Photoshop For Portraits [link]

4. Best Photoshop Tutorials [link]

5. 40 Tutorials Poster Design to Improve Your Skill and Creativity [link]

6. 25+ Nature Inspired Unique & Exceptional Photoshop Tutorials [link]

7. Out Of Bounds Attention Grabbing Photo Manipulations [link]

Don’t Stop, There’s More! On The iPad That Is

iPad coolnessI almost ran these series of links last week but just ran out of space.  Heck, I’m out of space this week too but I’m running them anyway for all my iPad geek buds out there.  Enjoy the reads.

1. How Much Would the iPad 2 Cost If It Were Made in the U.S.? About $1,140 [link] 

2. The Coolest Thing Anyone’s Done With iPhone Camera+ [link] 

The quality is getting better all the time.  I hear rumors of an 8 MP in the iPhone 5

3.  What Happens When Sixth Sense meets an iPad? [link] 

Way cool video – DAZ

4. Next iPad to Offer 3D Display? [link] 

5. iPad 2 Vs. Asus EEE Pad Transformer (video) [link] 

6. Pro HDR for iPhone and iPod Touch [link] 

7. The Always Up-to-Date Guide to Jailbreaking Your iPhone, iPod touch, and iPad [iOS 4.3.3] [link] 

____________________________________________________

Hey gang, that’s it for me today.  I’ve got to get back to my real job. How about I see you tomorrow for another episode of Technique Tuesday: You Won’t Believe Your Eyes!  It will be a good one – I promise.

See ya’ then.  -David

Friday, May 13, 2011

"Lovers In Fantasyland"

Lovers In Fantasyland - IMG_6223

"Lovers In Fantasyland"
©David A. Ziser

This has been called the “outstanding image of the week” at Texas School.  I made this image a week ago on the last day of shooting.  I was scheduled to be one of the instructors at Thursday' Night’s Shootout.  Although we were to meet in a nearby park to begin the photographs, as the evening progressed I knew I wanted to capture a few shots around the “Blueprints” sculpture at Addison Circle just a block away from the park.

I had been “eyeballing” this unusual sculpture as a photographic background throughout the week as some of the Texas School festivities were held nearby.  Thursday night proved to be the night.  We wrapped shooting in the small park and then began to walk back to the hotel toward the location of the sculpture.  It was well past sunset, but the sky still held that twilight glow that I love.  I always say, “We keep shooting till we can no longer see the camera bag.”  That was exactly the time I was capturing this image.

I positioned the bride and groom at the base of the imposing sculpture after selecting the best composition for my photograph. I didn’t want to see the many building around the site so I took up a camera position that gave me as many trees as possible in the background behind the sculpture. I also liked how the sky’s brightness and “blueness” transitioned from dark to light across the top of the image.

The rest was simple – just get a flash behind the couple and fire away.  That flash was my remotely fired Canon 580 EX II flash in “manual” mode at 1/4 power.  The spray of light highlighted the green grass nicely but, most importantly, gave me that dramatic rim lighting around the couple.

The contrasting colors, gentle tones in the sky, dramatic lighting, and very unusual location made for a n impacting wedding image.

Camera specs:  Canon 7D fitted with Sigma 8-16mm lens at 8mm, F5.6 @ 1/80 second, ISO 1600.  Enjoy!  -David

_______________________________________________________

Hey gang, that’s it for me today. We’ve got the weekend off around here and LaDawn and I are gonna just hang out and relax for our first weekend off in a long time.

Keep your pixels smilin’ and have a wonderful weekend. I’ll see you bright and early next week for another episode of Quick Hit Monday. 

-David

Thursday, May 12, 2011

"Meet The New Organist"

Meet The New OrganistIMG_5696

"Meet The New Organist"
©David A. Ziser

OK, the title implies that this is a portrait of someone new at this church.  But in looking at the photograph, it could be a portrait of the new minister, the architect, or a groom.  In reality it was a portrait of a young man playing the part of a groom during my photo session at Texas School last week. 

The point is this, lighting and composition rules are the same regardless of subject matter.  Sure, I point my camera mostly at brides and grooms, but the techniques I discuss at DPT apply across the board.

I love the visual balance and composition of this image. The long, strong diagonal lines criss-crossing the scene add further interest to the image. When we originally walked into this church I believe the class was thinking, “What in the world is Ziser going to do in this location?”  At first glance, the location did not look promising.  But add the widest angle lens in the gear bag and it came alive with possibilities!

Lighting was from camera right, my Quantum on 1/4 power through my Zumbrella.  I under exposed the ambient about a stop and hit the shutter button. I think I was able to capture a pretty nice portrait out of this location.

Camera specs: Canon 7D fitted with Sigma 8-16mm lens at 8mm, F5.6 @ 1/100 second, ISO 800.  Enjoy!  -David

Business Day Thursday: Over Promising and Under-Delivering; Sedona Update–2 Seats Left; & Dinner With Joel Grimes

Good Afternoon Everybody,

This being Thursday, the After Dark crowd is heading home till the next one in Charlotte, NC September 26-28, 2011.  I stopped by to say my good-byes and thank Dave Junion, the “brains” of the operation, for his hospitality in letting me hang out for a few days.

GrillingA few of the mentors were wrapped for the day so I invited Ralph and Cindy Romaguera, Phillips Mitchell, and Joel Grimes over to our home for a grilled dinner on our deck.  I hadn’t met Joel before this week but have always loved his work. 

Joel Grimes, is really a down to earth, nice guy with tons of experience and some great stories to tell about his travels worldwide.  You know, everyone just “chilled”, enjoyed a nice dinner, and good conversation. 

The Sedona Experience: A Private Workshop Update: Only Two Seats Left

DesertDancer2IMG_5254_thumb3That’s right, only 2 seats left for my Sedona Experience coming up on June 7-9, 2011!  I’ve mentioned that we’re keeping the class size to a very intimate 6 photographers only who will be eating, sleeping, and breathing photography for  2 1/2 solid days – about 32 hours in total. Those signed up already are super stoked about the experience.  Here is all the info right here.

I just checked time of the sunsets in Sedona and it looks like we are adding a few more hours to each day’s shooting sessions.  Like they say, you can sleep when you get home ;~)

If you would like to be one of lucky two to nab one of the last two spots, give Jennifer a call at 800.292.2994 to get the full details. You can also place your $495 deposit right here to secure your seat.  Jennifer will then call you with more details.

Business Day Thursday: Over Promising and Under-Delivering

It’s Pizza Time:

After returning home from Texas School last Saturday neither LaDawn or I wanted to make dinner and that usually means a call to Papa John’s Pizza.  Pretty good pizza and we can stay loyal to our state because Papa John is headquartered in the great state of Kentucky.

Pizza 11inWell, the pizza arrived in about 45 minutes and we were both anxious to dive in.  I opened the box and once again we both exclaimed that the pizza sure looked smaller that usual.  In fact, it was not the normal Papa John pizza we come to expect over the years.  The ingredients were a good two inches from the edge and they weren't all the ingredients I had ordered.  Now normally I wouldn’t complain, but this has been a recurring problem with the past several deliveries from Papa John’s.

I’m wondering if they changed crust size or something. I decided this time to call the store and talk to a manager. Chris, the manager, got on the phone and brushed me off saying that they would get another pizza out right away.  I mentioned the smaller pizza size and then he went into “hi-gear” telling me that’s exactly what I ordered – a 12 inch medium pizza.

I overlooked his remarks and  his anti-sales attitude, hung up the phone, and waited for the next pizza.  The more I thought about it, the more I thought, “This just is not right. We’ve been getting these smaller pizzas for months now.”  I decided to measure the pizza and sure enough it was about 11 inches, not 12 inches as advertised.  It measured just over 11 inches – a good bit shy of the 12 inches advertised.  Mathematically that meant Papa John’s was making a pizza 72 square inches smaller – almost 20% smaller than advertised!  I wonder if Papa knows what going on in his Florence, KY store?

A while later our other two pizzas arrived and were just fine. Dinner was a little late that night but it got me thinking.  Is that any way to do business? I’m not even talking about the “snotty” attitude of Chris, the store manager.  I’m talking about over promising and under-delivering.

Are You Doing The Same? I Hope Not!

You know, around my studio we always try to do just the opposite, well almost.  We “honestly” promise and then over-deliver.  I was just with a client yesterday who was reviewing photographs for their “Birthday” album – yes, birthday album. Can you believe it - we had two birthday shoots on the same weekend.  It was a fun visit and they put together a great selection of images.

Our coverage included 35 images in an 8x8 leather album.  The client selected 34 additional images for a total of 69 images – 69 to represent the year she graduated high school.  I had myself and Nicholas covering the 4 hour event so in a few images I was in the background of some of Nicholas’s photographs.

When the first one popped up, I was quickly noticed by the client who may have deleted the image from her collection. I was quick to point out that any image I’m in that goes into the album is on me – it’s complimentary.  She smiled as did her husband and said, “Well, in that case, we’ll take it.”  It’s a small gesture but it’s still delivering more that what was promised in the coverage.

Let me give you another example.  When reviewing the images for an album, I always suggest that the client add a few photographs of the flowers or other detail shots that we could use as backgrounds in our album design.  When it comes to billing those 12-15 images, they are always at no charge.  And, you know what?  I know the client appreciates the gesture.

A Way to Guarantee Business Failure and Save The Day

Under PromiseWhich brings me back to the pizza story.  Why would ANY business ever over-promise and under-deliver?  But it happens all the time.  How often has that hamburger looked as juicy and tempting as it did pictured in the menu?  How often have you had a service performed like a poorly applied asphalt coating, only to have most of it washed away by an over night rain storm.  The list can go on and on – you probably have many similar experiences.

But, if you are a business person/studio owner, you just can’t afford to conduct your business in that suicidal fashion.  Like they say, have a good experience with a company and the customer will tell a few friends. Have a bad experience with a company and they’ll tell the world.

There may be times when maybe it’s your staff under-delivering on the part of your business like the Papa John story above.  As the business owner, you’ve got to know if that’s happening and put a stop to it.  Thankfully, all I hear is praise for my staff from my clients and even many of you as customers that have called to sign up for our Master Classes and/or pick up a Zumbrella or two.

Sure, sometimes something may go awry, but that’s when you throw even more effort at the situation to make it right for the customer.  Boy, can I tell you a story or two here – like when I backed into the cake table while photographing a table of guests and knocked off the top layer of the wedding cake.  You should have seen the expressions of the guests at that table!  Turns out that wedding was the largest wedding sale for the studio during that particular year.  How did I turn it around? Massive over delivering!  But, I’ll will save that story for another day ;~)

________________________________________________________

Hey gang, that’s it for me today.  It’s late in the day and time for a little R&R.  How about I see everyone sometime tomorrow for about the coolest wedding photograph ever – you’re going to love it!

See ya’ then,  David

Wednesday, May 11, 2011

"Skies Of Blue"

Skies Of BlueIMG_5843-Edit

"Skies Of Blue"
©David A. Ziser

You would not believe the conditions under which this image was captured.  Bright afternoon sun, no acceptable location to place the bride for a decent background – nothing was going right.  It looked like we weren’t going to get anything till I decided to “play” with the light.

The background of this scene was the church parking lot – with several cars parked in it!  Beyond the parking lot was another building – ugly and pretty darn challenging.

I figured that if I got as close to the ground as possible that I could eliminate most of the clutter in the background.  That worked for the most part but I wanted all the clutter gone.  That meant a slight 3/4 crop on the bride. That mostly did the trick.  I still needed to remove a few of the parking lot lights but that was easy in Photoshop.

The next problem was the bright sky behind the bride – how could I get any color at all into that sky"?  The answer, of course, is to under expose the sky.  That was going to be a bit more difficult because I still needed to get light on my bride’s face.  Anyway, I decided to give it a shot.

I brought my 150 W.S. Quantum flash in close from camera left.  How close – about 4 feet away from the bride’s face.  If you look closely, you may still see some remnants of the flash hiding within the tree on the left.  Reminder, if you are going to include your gear in a shot, be sure to put it in a “Photoshopable” area of the image.

Why did I need the flash so close?  Easy answer – I needed a very small aperture to darken the sky.  Remember, I could only push the shutter speed so fast and still see the flash sync in this image.  Once I reached the flash sync speed limit, all I had left was aperture and that usually means a very small aperture under extremely bright lighting conditions like we experienced at this location on this day.

Anyway, we were able to pull it off and capture a great image to boot. I especially like the sun peeking through the trees ;~)

Camera specs: Canon 7D fitted with Sigma 8-16mm lens at 10mm, F16 @ 1/400 second (cheating the sync), ISO 200.  Enjoy!  -David

The One That Got Away: Mostly Because Of Subject Placement; Jason Groupp Sets New Flash Record!

Good Morning Everybody,

Snails paceWhat a day yesterday turn out to be – whew! Our IPS’s connectivity dropped to a snail’s pace -60B/sec, yes 60B/sec – 60 bits of info per second!!!!  I was pulling my hair out trying to get the blog posted.

On top of that, Vimeo also had a hiccup or two as well. I asked Jennifer to try to get it posted before she left for the day.  I switched to my Verizon My-Fi card to get to the internet and Vimeo finally got back on track about 5:30 p.m.

But the day ended on quite an up note.  We caught up with our friends, Cindy and Ralph Romaguera – Ralph’s a mentor at the After Dark happenings in Cincy this week – and got a chance to visit a bit before Ralph had to go back to work.

And speaking of After Dark, Jason Groupp, also one of the mentors set the the world record for most flashes used to take a photograph!  [link] 

World Flash recordJason wired, radioed, cajoled 300 small flashes to fire together to set the all time record. The bystanders blinded by the super nova burst of flash was only temporary and luckily their sight had returned within the hour – just kidding ;~)

DAZ LD BeehiveThen it was off to the play to see Beehive, a very popular musical featuring the songs of the 60’s.  Hey, I’m a child of the 60’s and I was lovin’ it.  The best part – the 4 song Janis Joplin compilation at the end of the play – Piece Of My Heart, Try (Just A Little Bit Harder), Ball and Chain, and Bobby Magee – that’s when music was music ;~)

The One That Got Away: Mostly Because Of Subject Placement

I was reviewing images for today’s post and couldn’t find just one that stood out for me to discuss.  In fact I found many that could fill the bill.

In looking at many of the class’s images it dawned on me that many times the image could have been improved just by being a bit more careful with subject placement.  Many times I was seeing distracting elements in the background. These could have easily been avoided by moving the subject a little to the left or the right or even changing the camera position just slightly up or down.  Let select a few images and show you what I’m talking about.

Photo #1:

OTGA - Photo 1_MG_5777

Image placement is not too bad in this example but it could still be improved upon.  On the positive side I think the maker has a nice sense of space created around the couple.  The focal length of the lens and the camera distance to the subject yielded a nice balance of the size of the arch with the relative size of the subjects in the foreground.

In addition, they are centered in the arch which works in this composition as well.  The flash and ambient are balanced giving the couple the attention they deserve.

My minor complaint about this image is in the subject placement.  Look at the cross sticking out of the bride’s head.  Once you notice it, it really is a major distraction to the image.  All the maker needed to do to fix it was to lower his/her camera just a few more inches.  That would have hid the distracting element behind the bride’s head.

Let me point out that you’ve got to be VERY careful in lowering the camera position – lower it too much and you place the subject’s heads up into the very bright arches above.  That would have been even a worse situation.

So you can see, it’s only a matter of inches that can make or break a shot.  Keep your eye on the background and be sure you have an “all clear” behind the subject’s heads before you press the shutter button.

Photo #2 Series:

OK, now let’s have some fun.  Let’s look at this next image.  I think we have the same problem with image placement.

TOTGA2

At first glance it may have seemed like a good idea to place the bride in front of the stain glass window behind her head.  You could argue that the window was leading the viewer’s eye to the subject.  I get a different feeling.  I feel that the window is growing out of her head.

What happens if we move the bride around a bit on this background.  Let’s try the second position below.

TOTGA 3

OK, in this position we, at least don’t have the window growing out of her head.  Actually I think this position is an improvement on the initial placement.  But what happens if we move her head even more to the left and bring her closer to the camera.

Moving her to the left let’s us place her head within the larger space of the wall behind her.  I’m thinking this is the best placement for our subject.  Take a look at the image below – what do you think?

TOTGA 4

Now I think the image is beginning to come together.  Let’s give it a tweak or two in Lightroom 3 and see what we get.  Check out the last image below.

TOTGA 5

What do you think?  I think a lot better – the bride is framed nicely against the back wall.  I toned down the brighter areas in the background to remove them as distractions.  A little better crop also allowed me to reposition the bride into nodal point # 1.  All the lines seen in the foundation of the building lead to our bride as does the corner of the building.  The tree also gives us a nice canopy over the bride and adds a touch of Springtime to our image.

I hope this progression of images has been helpful today.  I’ve tried to show you the iteration my mind goes through when composing an image.  It’s always a tweak here and a tweak there before you get to press the shutter button.

________________________________________________________

Hey gang, that’s it for me today.  I’m going to run down to After Dark one more time today and say my good-byes to my buddies.  We have a few instructors coming over for dinner this evening. On top of that, I’ve got clients coming by this afternoon to review their images.  Yep, another busy day here at David Ziser Photography.

How about I see you tomorrow for a business building Business Day Thursday post. Tomorrow’s topic – “Do You Over Promise and Under Deliver”?

See ya’ then,  David

Tuesday, May 10, 2011

"Chairman Of The Board"

Chairman of the BoardIMG_5554

"Chairman Of The Board"
©David A. Ziser

This executive portrait was made last week during one of my shooting sessions with the class.  We were just wandering around the hotel and found this pretty cool hallway on the second floor.  The diagonal windows and leading lines gave me the perfect backdrop for this portrait of Peter, one the the wranglers for the week.

I pulled a chair in to use as a prop for him to rest his elbow.  With the other hand in his pocket, the nice loop lighting on his face, and the strong background, he looked as if he just walked out of the boardroom.

Lighting was simple – I just brought my Z-Ray in from camera right, adjusted it’s working distance to balance with the ambient light.  Adding a slightly darker gradient with LR3 to the bottom right side of the image brings viewer attention easily to our subject.

Camera specs: Canon 7D camera fitted with 18-200mm IS lens at 50mm, F5.6  @ 1/80 second, ISO 800.  Enjoy! –David

Technique Tuesday: Magical Black & White Conversions – Saving the Under/Over Exposed Image

Good Morning Everybody,

In reading over all the comments that have been posted the last few days, I want to begin today’s post by offering a great big “THANK YOU” to all of you who attended my Texas School class held in Dallas last week.  Thank you for all your kind comments and remarks you’ve been posting here at DPT.

DAZ Texas ClassIt was a great time with a great group of people, and that includes class members, wranglers, and staff.  I hope our paths cross again in the not too distant future.

After Dark Update:

Yesterday I headed down to the big After Dark event being held at the Netherland Hilton Hotel, in downtown Cincinnati. There were about 300 folks from all over the US enjoying the myriad of educational festivities.

I got a chance to meet Joel Grimes, an amazing photographer and Photoshop artist. If you haven’t seen any of Joel’s work, be prepared to be “blown away” with his outstanding images right here.  He’s been featured over at the Strobist site and is presenting at Photoshop World in September.  We got a chance to visit briefly – he was showing a small group his latest, greatest “pole cam.” Again, be sure to check out his work right here.

DAZ and Dave Junion2I wondered around for a few hours yesterday and also got a chance to meet Dave Junion, the genius behind After Dark.  Dave is an extremely talented photographer hailing from Wisconsin.  I’ll tell ya’, we had a good time just joking around for a bit.  In fact I MAY even be doing a “bridal shoot” Wednesday evening with a boa constrictor – that’s if I can wrestle it away from New York fashion photographer, Lindsay Adler, who’s planning a fashion shoot with the same snake.  Like I said, it’s a little “crazy” at the Netherland Hilton Hotel this week.

Magical Black & White Conversions Part 2: Saving the Under/Over Exposed Image

Hey gang, I’m pretty excited about this week’s Technique Tuesday. Last week I began to get carried away with the length of the tutorial and decided to break it into two parts.  I covered the steps I take to get the B&W images I like for my wedding photography. One of the things I covered was how to stylize your images for maximum viewing impact. You can catch that post right here.

This week we’re gong to spend some time on saving the image. Yep, every now and then we all take an image or two that just misses it in the exposure department – me included.

The thing is that some of these images would still be great additions to the wedding coverage if we could somehow correct the errors of our ways.  That’s the topic for this week’s tutorial – basically, how to save an under exposed or over exposed image and still get a saleable result.  Why not hit the PLAY button and see how I do it.  And, enjoy the show.

_____________________________________________________

Hey gang, that’s it for me today.  I’m heading back down to After Dark this afternoon to see what’s happening and check out a few more of the programs.

Have a great rest of the day and I’ll see you tomorrow for another episode of “The One That Got Away”.

See ya’ then,  David

p.s. Sorry about the late posting today.  Not only did we have connectivity problems at our end today, Vimeo managed a few hiccups in the process too. Don’t you love technology ;~)

Monday, May 09, 2011

"Fashion Forward"

Fashion ForwardIMG_5644-Edit

"Fashion Forward"
©David A. Ziser

Here is another image I captured during one of my teaching sessions at Texas School last week.  I was trying to demonstrate to the class how, that while the super wide angle lens could be your friend, it could also come back to “bite” you, compositionally speaking, that is.

I positioned our bride in about the worst part of the frame, the bottom right corner.  I was getting some distortion, but on the other hand, I was loving my composition.  I was able to manage/minimize quite a bit of the subject’s distortion in Lightroom 3.

Look how the bride is framed up in the right-bottom part of the frame by all the lines in the ceiling. I really liked how the wide angle lens was stretching all the lines in favor of the composition. I guess I could have cropped more of the left side of the image, but I don’t mind that large part of the ceiling offering a counterweight to the visual balance of the frame.

This is definitely an image that may not suit everyone’s aesthetic tastes but I still like the fashion feel of the image.

Camera specs: Canon 7D fitted with Sigma 8-16mm lens at 8mm, F5.6 @ 1/40 second, ISO 1600.  Enjoy!  -David

Quick Hit Monday: Future Of Blogging; Photographic Inspiration; Photo Tips; Photoshop/Lightroom Tutorials; and A Few Freebies

Good Afternoon Everybody,

Kentucky Derby I hope everyone had a great weekend.  We landed just in time to watch the running of the 137th Kentucky Derby.  LaDawn and I quickly picked our 3 favorites – six in all – none of them made it to Win, Place, or Show.  That sort of explains why we don’t go to the races ;~)

It’s kind of interesting – over all the years I’ve been shooting weddings in the Northern Kentucky/Greater Cincinnati area, I’ve almost always had a wedding on race weekend.  But down in Lexington, KY where the Derby is run, time stands still  – that means nothing else happens EXCEPT the Kentucky Derby.

Sunday was a very relaxing Mother’s Day for the both of us, the weather was perfect and we both enjoyed brunch with LaDawn’s son and new wife in the morning and a peaceful/restful afternoon with an adult beverage later in the day.

After Dark Lands In Cincinnati, Ohio

After Dark Cincy Things are back into high gear today.  After Dark landed in town yesterday and I plan to head on down and check it out later today.  After Dark is a very unusual educational event bringing 35 instructors together for a 3 day learning and sharing opportunity on just about everything photographic.  I hear the sessions go into the wee hours of the morning – hence the name After Dark.

I noticed lots of my buds will be in town – Ralph Romaguera, Mary Mannix from Canon,  Dave Cross, just to name a few - so I plan to head on down and say HI. 

For today’s Quick Hit Monday I’ve got lots of information laden tutorial and tip heavy links for you today along with some pretty darn inspirational photography plus lots of freebies.  Enjoy!

Meeting The Man Behind LensFlare35

DAZ and Dave Warner After classes wrapped Friday at noon at Texas School, we packed everything up, headed back to our room and caught up with Dave Warner, the force behind Lensflare35.  Dave and I have stayed in contact over the last few years – I’ve even appeared on his podcasts in the past [link1] & [link2].

We had a great lunch at Flying Fish, a wonderful little restaurant just a few blocks from the hotel, highly recommended BTW, and talked blogging and how to build exciting web content for the future.  Sadly, we both feel podcasts and many of the typical blogging scenarios have run there course these days. 

Things will be changing over the next 18-24 months.  Bloggers that move forward by generating exciting alternative ways of creating content will be the new winners in the blogsphere.  DaveWarner picWe’re both looking at how to bring those new technologies to our readers.   It was a great visit, even though I was running on “fumes” and I think it showed a bit – so SORRY Dave – but we both plan to work together and push forward with some exciting possibilities.  We’ll keep you posted.

Oh, BTW, check out some of Dave’s outstanding photography at DaveWarnerStudio.com right here.  His stylized images of Austin on Metal are just beautiful.

Monday Morning Photographic Inspiration

Cool Wedding Pic I always like to wake up to beautiful photography on Monday morning.  Let me point you to 3 cool websites that will light your creative fires for this week.

  1. 25 Beautiful Wedding Photographs [link]
  2. 10 Best Example Of Architectural Photography [link]
  3. 31 Effective Examples of Rim-Lit Portraiture [link]
    Amazing Digital Painting Landscapes – 50 Examples [link]

Monday Morning Photographic Tips, Ideas, and Behind the Scenes Looks

5 Photo Tips Here’s four worthwhile tips, ideas, and a peek behind the scene at the recent royal wedding of William and Kate to help you make your photography more exciting as well as consistent.  Be sure to check out tip #1 from my buddy Denis Reggie – good advice.

  1. 7 Tips for Great Wedding Pictures by Denis Reggie [link]
  2. Royal Wedding Photographer Reveals Behind-the-Scenes Details [link]
  3. Photography Ideas on Composition and Color [link]
  4. Five Photography Tips: Chris Garrison [link]

Monday Morning Photoshop/Lightroom Tips, Tuts, and Tricks

Too Much PS Hey, you’ve got to stay sharp to stay ahead of the pack.  Time to go to school this Monday morning.  Here are 7 links to sharpen your Photoshop/Lightroom skills.  Enjoy!

  1. HDR Photography Tutorial Part 1 [link]
  2. Sharpening in Photoshop [link]
  3. How To Fake a Tilt-Shift Photo in Photoshop [link]
  4. Photoshop: How Much is Too Much? [link]
  5. Lightroom Tip – Facebook and Flickr Commenting [link]
  6. Easy Grunge Border in Photoshop [link]

Monday Morning Freebies

Free BrushesAnd just so you don’t leave today’s post empty handed, let me point you towards three freebies you can stick in your back pocket - check out the links below.

  1. 30 Free Stock Photos Websites To Download Images [link].
  2. 75+ Photoshop Brushes For Designers & Artists [link]
  3. 50 Useful and Free Vector Photoshop Brush Sets [link]
  4. High Resolution Colorful Free Textures [link]

_________________________________________________

Hey gang, that’s it for me today.  I’ve got a client stopping by in just about an hour so I’ve got to run.  If you see me down at After Dark this afternoon, come on up and say HI.

And, don’t forget to stop back tomorrow for Technique Tuesday: Magical Black and White Conversions – Saving The Over/Under Exposed Image.

See ya’ then,  David

Friday, May 06, 2011

"Sunrise – Texas Style"

Texas Sunrise IMG_6093-Edit

"Sunrise – Texas Style"
©David A. Ziser

We were up bright and early yesterday morning so we could be at the instructor breakfast by 7:00 a.m.  That meant a pretty early wake up call.  As we were getting ready, LaDawn called out to me that it was looking like it might be a really beautiful sunrise. 

I wiped the sleep from my eyes, grabbed the camera and recorded the sun as it made it’s early morning appearance.  The vantage point from the 15th floor of the hotel sure helped the composition.

The challenge was to keep the sun itself from “blowing out” completely but still maintain detail in the clouds.  As luck would have it, as the sun rose, it did so, not to an open sky, but rose instead into low hanging cloud cover.  The cloud cover blocked just the right amount of the sun’s bright rays for the exposure to capture it’s brilliance and still fill the sky with radiant color – Texas style.

Camera specs: Canon 7D fitted with 18-200mm Lens at 190mm, F8.0 @ 1/1000 second (camera on manual), ISO 400.  Enjoy!  -David

_____________________________________________

Hey gang, that’s going to it for today.  It’s been a long week and LaDawn and I are looking to take the rest of the day off after our class wraps around noon today. We had a great time at Texas School and sure have some wonderful memories. I’ll post a more complete week wrap up on Monday for you.

We make the trip home tomorrow and are looking forward to a few weeks at the same address ;~)  How about I plan to see everybody bright and early on Monday hailing from the great state of Kentucky.

Have a great weekend everybody.  Keep your pixels smilin’ and I’ll see you then.

-David

Thursday, May 05, 2011

"Texas Rose"

Texas RoseIMG_5459

"Texas Rose"
©David A. Ziser

When we headed out to shoot on Tuesday, the hotel lobby seemed like the logical choice for photographs.  The setting, the attractive chandelier all looked to make a good background for this photograph.

The challenge was, once again, the lighting.  In a wider view I noticed my Quantum flash thru my Zumbrella from camera right was lighting up the ceiling.  It was quite distracting.  We grabbed a USA Today, removed the reflector from the strobe, wrapped the newspaper around the flashtube of my Quantum flash, set the power to 1/4 power, focused the light carefully on our bride, and shot away.

Once the light was what I wanted, I ran a series of images at differing focal lengths.  This close perspective was one of my favorites.  The USA lighting technique created a cone of light that gave me a Hollywood spotlight effect on the bride – I thought it looked great.

The pose was easy, natural and relaxed, the background complimented the image nicely and Jennifer’s warm smile engages the viewer.  All in all, a nice, very elegant bridal portrait for the bride.

Camera specs: Canon 7D fitted with 18-200mm IS lens at 100mm, f5.6 @ 1/25 second, ISO 800.  Enjoy!  -David

Business Day Thursday: The Gift of Impossibility

Good Morning Everybody,

OMG – I can’t believe the start time today – 7:00 a.m.  and I’ve got to get the blog posted!  Situation:  Too much fun at Texas School, too little time to blog ;~)  All joking aside, we really do have a very early wake up call this morning.  We wrapped our shooting yesterday and then it was off to the wild and wooly trade show being held from 4:30-10:00 p.m. at the Intercontinental Hotel. Yes, free wine and beer was available until 10:00 p.m.  This is like the 3rd largest photographic trade show in the country!  We were back to the room by 10:30 p.m. and I worked on class images till 11:30 p.m. Whew – a pretty long day. Did I mention that I have the most amazing class of students? Enthusiastic, open to seeing and learning and they have been a real joy to LaDawn and I this week.

Thankfully, my Ace #1 Assistant, Nicholas Viltrakis, has come to my rescue today. Nicholas is not only my Ace #1 wedding assistant but also my second shooter.

He had just wrapped a post over at his blog and offered it for me to post as well.  Since it speaks to what I’ve been talking about this week in my class, I decided to take him up on his offer.  I love the title of his post – “The Gift Of Impossibility.”  How about I turn it over to Nickolas and let him tell you the story.  Here we go…

The “Gift of Impossibility” or Failure is not an Option

I decided to get a portrait of my ladies before they scampered off to Grandma and Grandpa B's this morning no matter what! Rain, sleet, stormy weather would not deter this photographer.

OK, there was no actual rain in this image - it's all Photoshop, stop sending me hate mail! But anyway the situation still got me thinking!  What happens if it was really raining and I really wanted to get a great image. What would I do?

Failure is not an option, whatever you call it, it's a mindset really that can make ordinary people perform extraordinary actions. In psychology it is described as follows: "Volition or will is the cognitive process by which an individual decides on and commits to a particular course of action." And over the course of my career in various situations I have felt like failure wasn't an option, but only in a few situations would the consequences have been bad enough for me to commit to prevailing at all costs.

One of the greatest lessons I have learned in volition happened to me early in my career working for David Ziser. A man of impenetrable will himself, I was photographing a wedding reception with Mr. Z, shooting the under appreciated "table shots."

There were well over 300 people at the wedding, all seated and eating dinner, some on the balcony of the great Hall of Mirrors in downtown Cincinnati. There were 40 tables or so 8 or 10 to a table. Since there were so many people I photographed the hard to reach places and as much else as I could so Mr. Ziser could focus on the key tables. Just as I had finished about half of the room David asked to see the camera. The result?

And I'll quote, "These are all too close, go shoot them again.”

Now keep in mind I've just interrupted about 180 or so people from a tasty open bar dinner among friends. Now I have to go do it again. That s@#ks! (Plus now I have to do it before they get up and go mingle. And not just the tables again, everybody has to be there!)

This, my friends, is where the concept of volition pops back into my mind. Well ok, Here we go camera. No choice. *sigh* I couldn't fail again, I'd look like a real jerk then, so I made up my mind to do whatever it took and be as persistent as possible to get the job finished.

Jokes, charm, telling them a magazine wanted a copy after they saw the first one, apologizing profusely, whatever I had to do. It's an interesting feeling that changes (in my head, at least) when there is no impossibility. If it can't "not be," then there must be a way of doing it. If I don't have the option of saying no, all I have to think about is how I can get YES to happen. :) It can be very liberating.

(get ready for my upcoming rain tutorial)

The idea goes... if this is just a mindset then why can't you just treat more situations with a "can't fail" attitude? The Volition wiki page further goes on to say: "Volitional processes can be applied consciously, and they can be automatized as habits over time."

Wouldn't that be nice?! Habituate yourself to a Can do / failure is not an option mentality! Here's the loving portrait we ended up with today just before my lovely ladies went to visit family.

Stop thinking of excuses and think of options. Harder said than done I'm afraid, but it can be done! I'm also not saying that you should apply this strategy to all situations, clearly "Grizzly Man" didn't have it right.

Just something to think about.

(No babies were harmed in the "filming" of this. I just needed an image for effect. :)

p.s.  Reposted with permission from Nicholas’s blog right here.

You can also check out Nicholas’s regular website right here.

________________________________________________________

Hey gang, that’s it for me.  We’ve been up since 6:00 a.m. and we shoot till 9:00 p.m. this evening – it’s going to be a long day.  I hope to back tomorrow with at least an Image of the Day post.  Have a great one and I’ll see you then.

Adios, David

Wednesday, May 04, 2011

"Pretty Baby"

Pretty BabyIMG_5584

"Pretty Baby"
©David A. Ziser

Here is an image I made during yesterday's on-location shoot.  We began by shooting around the beautiful Intercontinental Hotel. The lobby area, hallways, and windows offered us several great possibilities for shooting.
The location with what appeared to offer the least of those possibilities yielded one of my favorite images from yesterday’s post.

I positioned the bride in the nondescript hallway.  The back ground looked interesting, at least after I viewed the image at the best focal length for my composition.  The challenge was to get some decent light on the subject.

The location was too tight to use Zumbrellas or any other type of lighting equipment so I decided to use my on-camera flash. But I still wanted my famous loop lighting pattern on my bride.

I found the part of the wall, that if illuminated would give me the same direction of light I needed to capture what I wanted.  I carefully pointed my on-camera Canon 580 EX II flash at that part of the wall, shielded the direct flash from the subject, and shot away.

WOW! It worked!  We got one very beautiful photograph of our very gorgeous bride.

Camera specs: Canon 7D fitted with 18-200mm IS lens at 20mm, F5.6 @ 1/100 second, ISO 800.  Enjoy!  -David